SecurAccess SIP PMR – User Guide EN
23
WEB port:
for security reasons, you can modify the TCP 80 port with an other one.
Admin password/Confirm password:
enter a new one (by default ‘1234’), up to 40
characters.
Video on home page:
by default this feature is activated.
By unselecting, the video on home
page is deactivated and you directly access the ‘Status’ page.
Video protection by password
: protection to secure access by password to
http://ipaddress/video.jpeg (camera image).
Click on ‘
Save and restart
’ button to save modifications. The doorphone reboots.
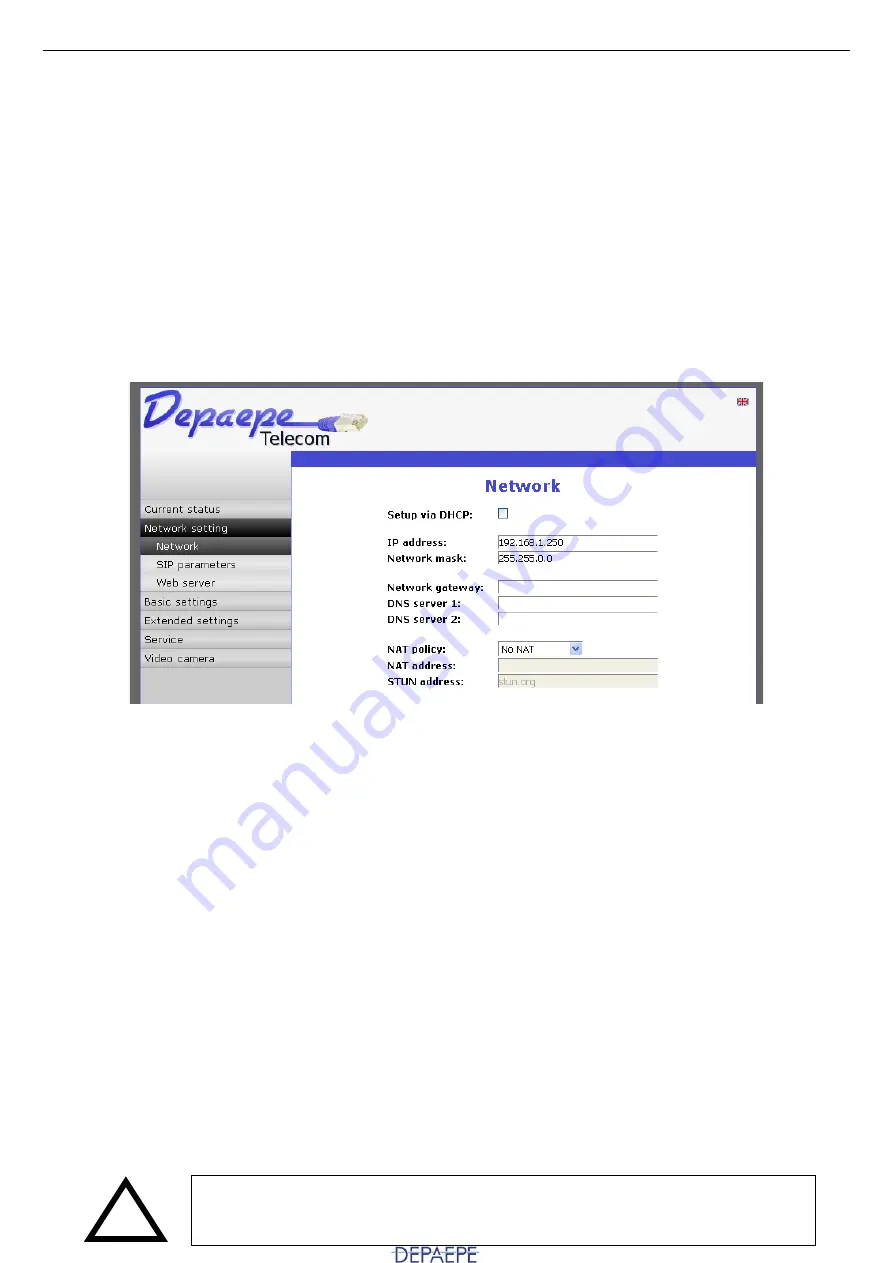
4.3.3. Network settings
Via the ‘Network setting’ page, select ‘Network’.
The SecurAccess SIP PMR doorphone comes out of factory in Static IP Address mode , DHCP is
deactivated.
DHCP mode:
mark to activate,
the doorphone will try to contact a DHCP server in your
network, to obtain valid network settings (IP address, Network mask, Networks gateway, DNS,
etc).
IP address:
if the doorphone cannot be connected to a DHCP server, you must manually enter
the network settings in this section.
Network mask:
enter the IP address of the subnet mask.
Network gateway:
enter its IP address.
DNS:
enter the server IP address -
the doorphone will try to contact a DNS server in your
network,
to translate a name into an IP address.
NAT policy:
activate or deactivate the network address translation service (in order to match IP
addresses to other IP addresses).
NAT address:
enter the server IP address.
STUN address:
Click on ‘
Save
’ button to save modifications.
Note :
in DHCP mode, the doorphone IP address can change after reboot. We therefore
recommend that the Static IP Address mode is selected for the SecurAccess SIP PMR.
Please pay attention, wrong network settings may prevent the access to
your doorphone, and the inefficiency of your network. Contact your
network administrator if you have any doubt.
!


