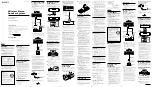
III
Installation Checklist
The following table provides installation details so as to enable quick and convenient assembly by to a
professional electrical engineer. These steps can prevent human errors that cause unnecessary harm.
NOTE
Only qualified electrical engineers should adjust the equipment. Carefully read and follow the manual's Before You Start safety
instructions. Ignoring the safety instructions can cause injury or death.
Installation of Equipment
□
Is the equipment being installed in a well ventilated, indoor area with a relative humidity of less
than 90% without condensation?
□
Is the operating environment temperature maintained at -10~45°C (SVG300AXXA-XX model);
-10~40°C (SVG500AXXA-XX model)?
□
Installation Complies with Degrees of Pollution: Degree 2 (for a factory environment) and
contamination-free substances without e-waste contaminated dust particles.
□
The location of the equipment must be approved for fire safety, must be clean, must not be within
the vicinity of corrosive gases, and must not vibrate.
□
Is there any weight or items stacked on top of the Static VAR Generator?
□
Is it placed on level ground?
Electrical Installation
□
The equipment is grounded
□
The equipment's input voltage value is consistent with the supply voltage
□
Is the wiring for the input terminals correct?
□
Has the power cable been properly chosen? Refer to the User Manual.
□
The input terminal must be connected to the fuse and isolation switch. Refer to the User Manual.
□
Does the voltage value of the equipment's transformer match the voltage supply?
□
Is the orientation of the CT installation correct? "Current transformer grid terminal: K (S1); Load
terminal: L (S2)"
□
Is the installation of the CT diameter and length correct? Please refer to the User Manual.
□
Confirm that there are no other conductors and assembly parts inside the Static VAR Generator
(SVG).
□
Confirm that the cover is back in place after adjusting the voltage of the transformer.
Before Starting the Device
□
Before starting the Static VAR Generator (SVG), determine whether the I/O of the power supply
relay is in an uncharged state.
□
When the power cable wiring is complete, check that the cabinet door is closed.
□
When the power cable wiring is complete, to ensure safety, do not touch the cable.
□
If the cable is exposed, please provide clear warning signs such as "Do Not Touch the Cable".
Summary of Contents for SVG300A43A-11
Page 1: ...6...
Page 3: ...II NOTE 90 10 45 SVG300AXXA XX 10 40 SVG500AXXA XX CT K S1 L S2 CT CT CT SVG SVG...
Page 6: ...1 2 1 2 90 1 3 SVG SVG SVG300A43A 11 1 10...
Page 7: ...1 3 2 EPE 4 1 5 1 6 2 1 5 1 6 3 1 7 a M5 12 1 7 b M5 8 4 1 8 a b 1 3 3 1 8 a L...
Page 8: ...1 4 1 8 b 5 2 3 1 7 a 1 7 b 1 8 a 1 8 b...
Page 11: ...2 2 2 1 2 SVG300AXXA XX SVG500AXXA XX a b c d a 1 3 3 b 04 c 2 2 1 d...
Page 17: ...2 8 2 5 SVG300 mm inch...
Page 20: ...2 11 2 7...
Page 21: ...2 12 55mm 2 16in 63 6mm 2 50in 63 6mm 2 50in 100mm 3 94in 2 8...
Page 31: ...3 2...
Page 41: ...4 1 04 15 15 800 600 TFT LCD 100 SD 10 10 4 3 1 4 1 4 1 1 4 1 2 1 2 3 1 2 3 2...
Page 42: ...4 2 APFXXXA43X XX A Hz 1 4 3 or ON OFF 2 3 4 2 4 2 1 4 2 2 4 2 2 1 4 3...
Page 44: ...4 4 4 2 2 7 HELP HELP CT 6...
Page 45: ...4 5 CT 4 2 3 4 1 2...
Page 46: ...4 6 4 3 4 3 1 CT 20120123 1 2 3 CT CT CT CT P1 P2 P2 P1 CT CT CT...
Page 47: ...4 7 4 5 4 3 2 1 2 1 5 30 60 3 USB or SD Card...
Page 48: ...4 8 4 3 3 1 2 1 5 0 1 4 4 3 4 20120123 1 20120123 10 2...
Page 50: ...4 10 4 20120123 5 Save Quit X 10 10 120...
Page 51: ...4 11 6 03 4 3 5 20120123...
Page 52: ...4 12 1 20120123 2 20120123 3 20120123...
Page 53: ...4 13 4 5 4 3 6...
Page 54: ...4 14 1 200 2 20120123 3 20120123...
Page 55: ...4 15 4 20120123 5...
Page 56: ...5 1 5 5 1 SVG 4 3 5 200 1 2 10 R S T CT...
Page 57: ...5 2 IGBT CT RESET...
Page 58: ...5 3 RESET CT CT CT HMI IGBT...
Page 78: ...2 10 Figure 2 5 The two side boards and removal method SVG300 Unit mm inch...
Page 81: ...Product Installation 2 13 Figure 2 7...