110
Installing System Components
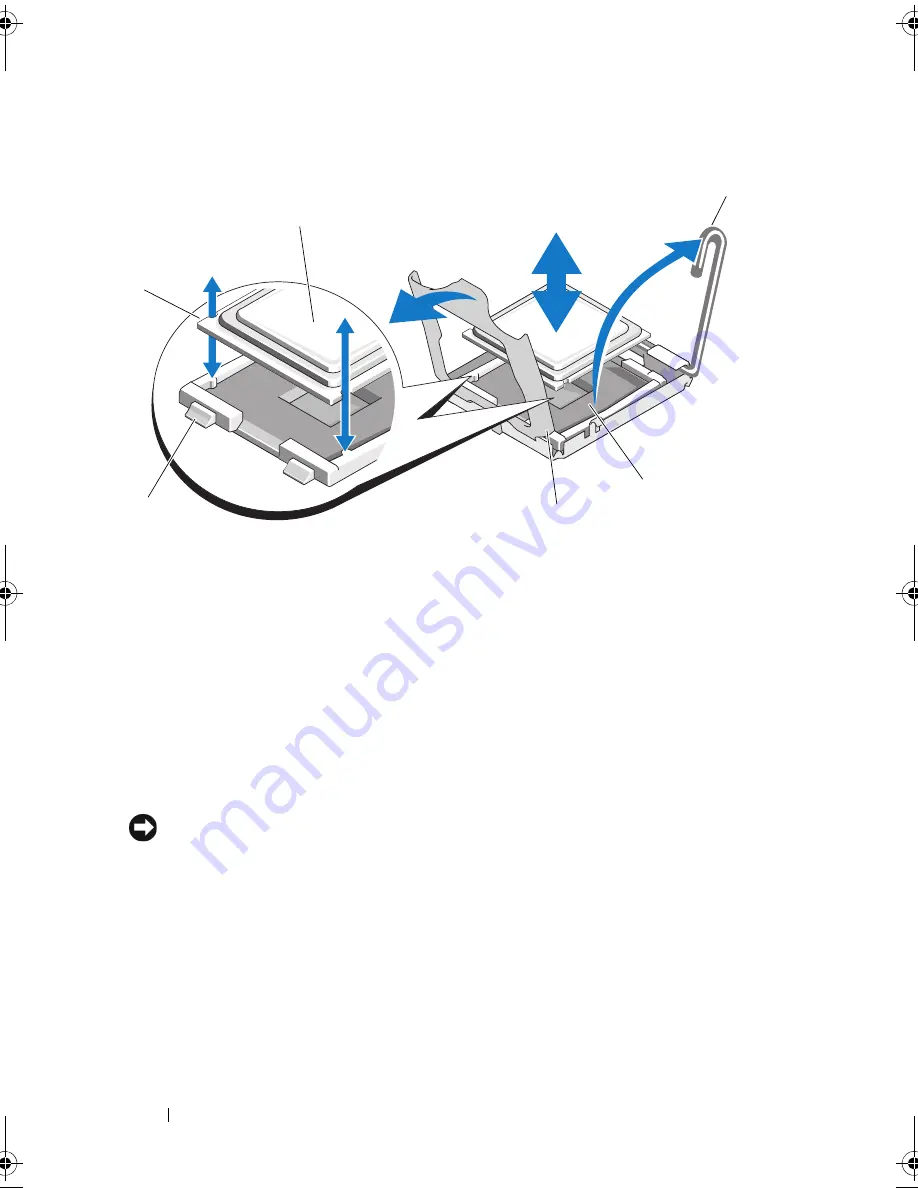
Figure 3-20.
Installing and Removing the Processor
Installing a Processor
1
Unpack the new processor.
2
Align the
p
rocessor with the
socket keys on t
he ZIF socket. See
Figure 3-20.
3
I
nstall the processor in the socket.
NOTICE:
Positioning the processor incorrectly can permanently damage the
system board or the processor when you turn it on. When placing the processor in
the socket, be careful not to bend the pins in the socket. Avoid touching the socket
pins or the pads on the processor when handling the processor or the system
board.
a
If the release lever on the processor socket is not positioned all the way
up, move it to that position.
b
With the
p
rocessor and
the
socket
keys
aligned, set the processor
lightly in the socket.
1
notch in processor (2)
2
processor
3
socket-release lever
4
ZIF socket
5
processor shield
6
socket key (2)
3
2
6
5
1
4
book.book Page 110 Sunday, June 21, 2009 5:16 PM
Summary of Contents for PowerEdge R300
Page 10: ...10 Contents ...
Page 46: ...46 About Your System ...
Page 64: ...64 Using the System Setup Program ...
Page 166: ...166 Jumpers and Connectors ...
Page 168: ...168 Getting Help ...
Page 186: ...186 Index W warning messages 44 warranty 11 wet system troubleshooting 132 ...


