92
Adding and Replacing Parts
www
.dell.com | support.dell.com
NOTICE:
The keycaps on the keyboard are fragile, easily dislodged, and time-consuming to replace. Be
careful when removing and handling the keyboard.
5
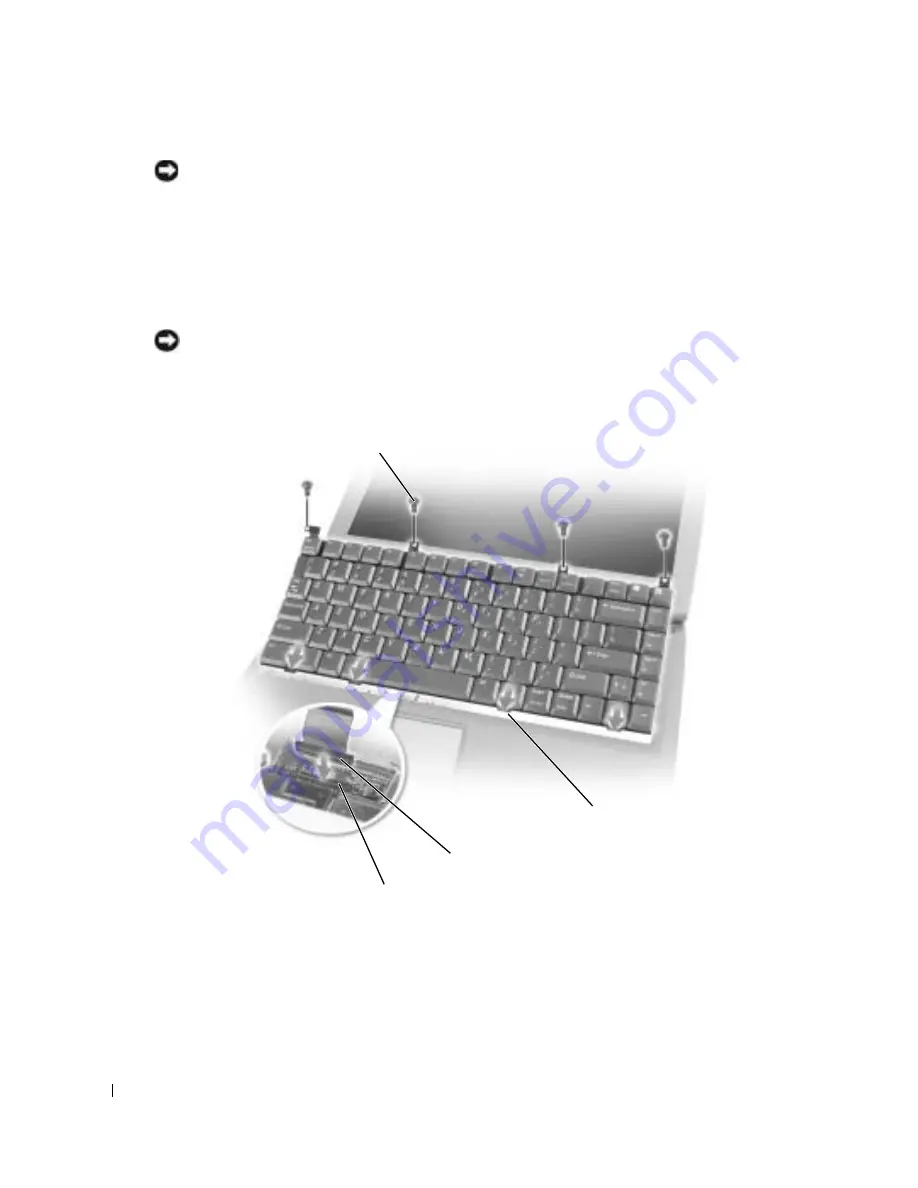
Lift the keyboard out of the bottom case, and rest it on the display hinges so that the
keyboard connector is exposed.
6
Pull up on the keyboard connector to disconnect it from the interface connector on the
system board.
7
Remove the keyboard from the bottom case.
NOTICE:
To avoid damage to the connector pins, press the keyboard connector evenly into the interface
connector on the system board, and do not reverse the keyboard connector.
8
Connect the keyboard connector of the replacement keyboard to the interface connector on
the system board.
9
Insert the four securing tabs on the keyboard into their respective slots in the palm rest, and
lower the keyboard into the bottom case.
Ensure that all four securing tabs are engaged before trying to completely seat the keyboard.
10
Replace the four keyboard screws.
11
Replace the hinge cover.
interface connector
keyboard connector
screws (4)
securing tabs (4)
Summary of Contents for PowerEdge 5160
Page 1: ...w w w d e l l c o m s u p p o r t d e l l c o m Dell Inspiron 5160 Owner s Manual Model PP08L ...
Page 8: ...8 Contents ...
Page 12: ...12 Finding Information w w w d e l l c o m s u p p o r t d e l l c o m ...
Page 22: ...22 A Tour of Your Computer w w w d e l l c o m s u p p o r t d e l l c o m ...
Page 30: ...30 Using a Battery w w w d e l l c o m s u p p o r t d e l l c o m ...
Page 44: ...44 Using PC Cards w w w d e l l c o m s u p p o r t d e l l c o m ...
Page 54: ...54 Setting Up a Home and Office Network w w w d e l l c o m s u p p o r t d e l l c o m ...
Page 124: ...124 Appendix w w w d e l l c o m s u p p o r t d e l l c o m ...


