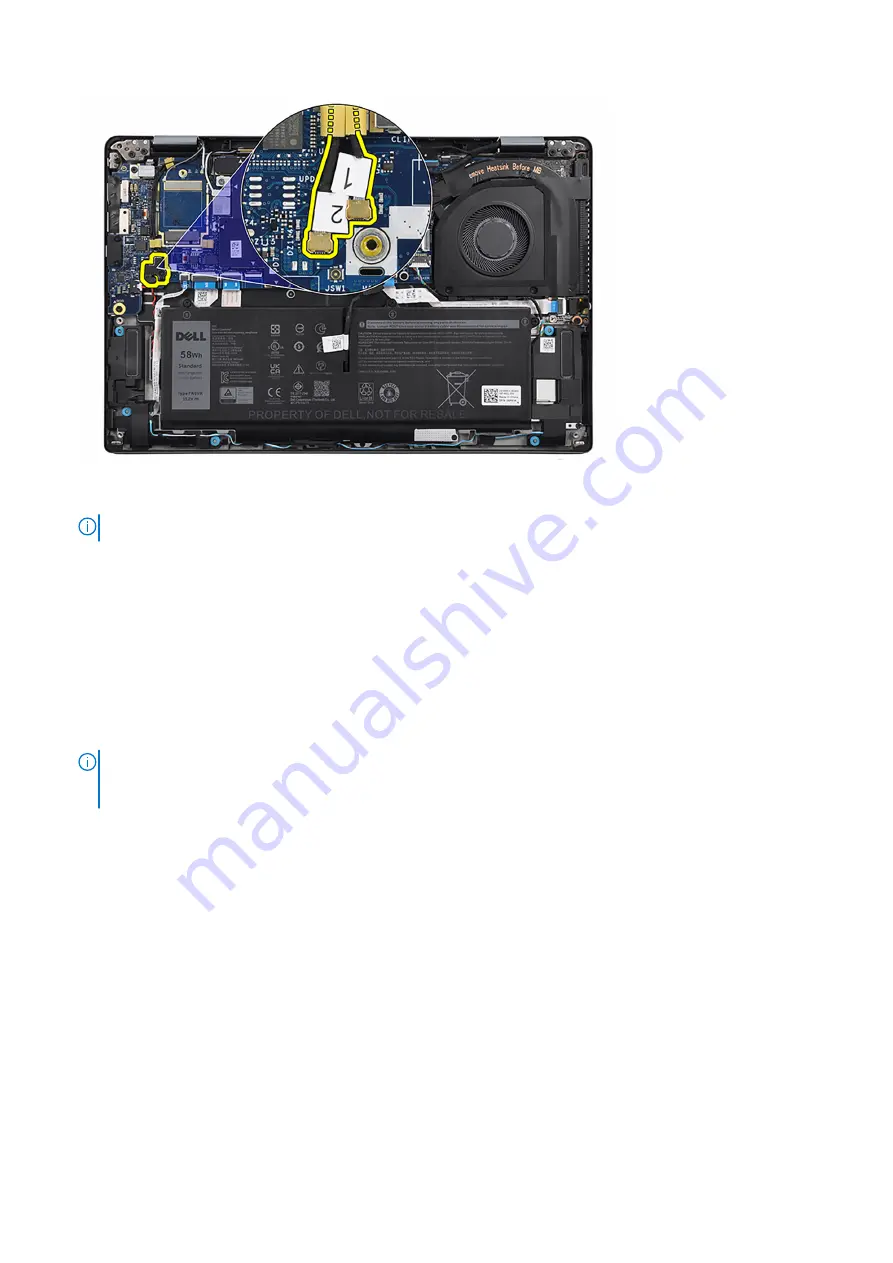
8. Unroute the #1 Darwin antenna cable, #2 Darwin antenna cable, #6 black/gray WWAN Aux1 antenna cable and #5 white/
gray WWAN Main antenna cable from the respective routing guides on the palm-rest and keyboard assembly.
NOTE:
The steps from 5 to 8 apply only to computers shipped with a WWAN card installed.
9. Remove the two screws (M2x2) that secure the display-cable bracket to the system board.
10. Remove the display-cable bracket from the system board.
11. Peel back the tape that secures the display cable to the system board.
12. Disconnect the touch-screen cable (for computers shipped with a touch screen), display cable, IR-camera cable (for
computers shipped with an IR camera), and sensor daughter-board cable (for computers shipped with a sensor board) from
the system board.
13. Open the display assembly at an angle of 90 degrees and place the computer on the edge of a flat surface such that the
palm-rest and keyboard assembly lay flat on the surface and the display assembly is over the edge.
14. Remove the six screws (M2.5x5) that secure the display hinges to the palm-rest and keyboard assembly.
15. Remove the display assembly from the computer.
NOTE:
The display assembly is a Hinge-Up Design (HUD) assembly and cannot be further disassembled once it is
removed from the bottom chassis. If any components in the display assembly are malfunctioning and is required to be
replaced, replace the entire display assembly.
44
Removing and installing components
Summary of Contents for P110F
Page 18: ...18 Removing and installing components ...
Page 36: ...36 Removing and installing components ...
Page 46: ...46 Removing and installing components ...
Page 61: ...Removing and installing components 61 ...
Page 70: ...70 Removing and installing components ...


