


50
Hard Drive
5
Remove the palm-rest assembly (see "Removing the Palm-Rest Assembly"
on page 31).
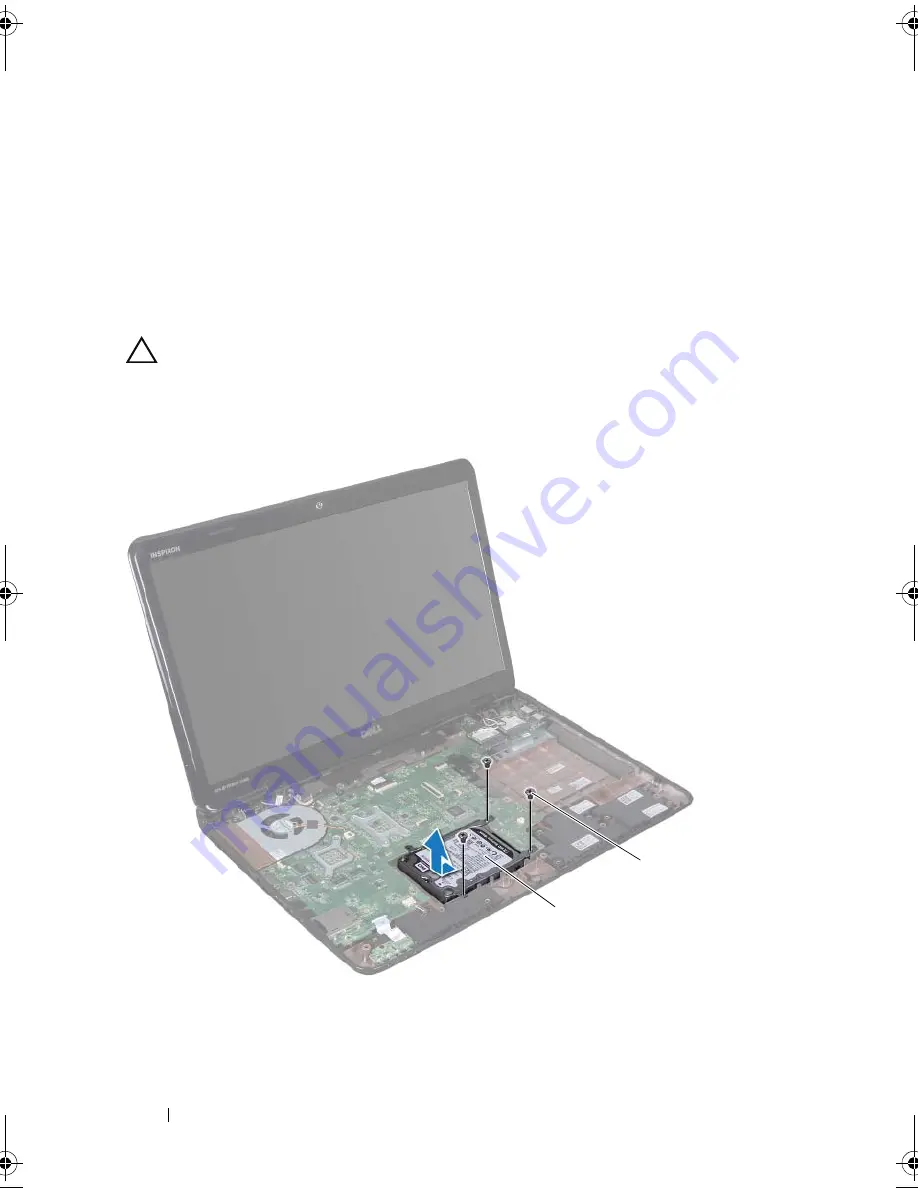
6
Remove the three screws that secure the hard-drive assembly to the
computer base.
7
Slide the hard-drive assembly to disconnect it from the connector on the
system board.
8
Lift the hard-drive assembly out of the computer base.
CAUTION:
When the hard drive is not in the computer, store it in protective
antistatic packaging (see "Protecting Against Electrostatic Discharge" in the
safety instructions that shipped with your computer).
2
1
book.book Page 50 Friday, April 13, 2012 2:02 PM
Summary of Contents for Inspiron 17R N7110
Page 1: ...Dell Inspiron N7110 Service Manual Regulatory model P14E Regulatory type P14E001 ...
Page 8: ...8 Contents 25 Flashing the BIOS 115 ...
Page 12: ...12 Before You Begin ...
Page 26: ...26 Memory ...
Page 30: ...30 Keyboard 6 Replace the battery see Replacing the Battery on page 16 ...
Page 36: ...36 Palm Rest Assembly ...
Page 40: ...40 Hot Key Board ...
Page 44: ...44 Power Button Board ...
Page 56: ...56 Speaker Assembly ...
Page 60: ...60 Status Light Board ...
Page 64: ...64 Speakers ...
Page 68: ...68 Thermal Fan ...
Page 74: ...74 System Board ...
Page 77: ...Coin Cell Battery 77 ...
Page 78: ...78 Coin Cell Battery ...
Page 83: ...Thermal Cooling Assembly 83 ...
Page 84: ...84 Thermal Cooling Assembly ...
Page 88: ...88 Processor Module ...
Page 100: ...100 Display ...
Page 104: ...104 Camera Module ...
Page 106: ...106 Hinge Cover 8 Push the two tabs that secure the hinge cover to the computer base ...
Page 107: ...Hinge Cover 107 9 Lift the hinge cover off the computer base 1 tabs 2 1 ...
Page 110: ...110 Hinge Cover ...
Page 114: ...114 AC Adapter Connector ...