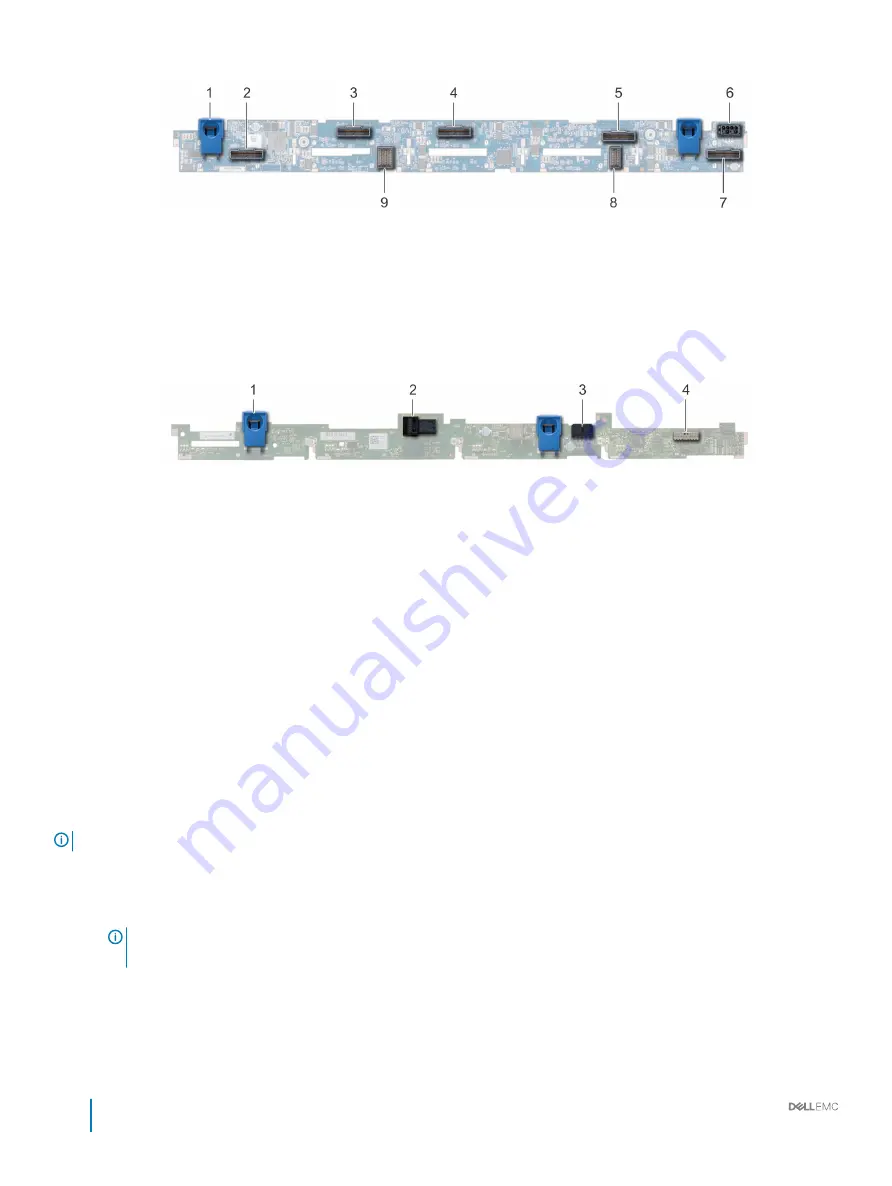
Figure 79. 10 X 2.5 hard drive backplane
1
release tab (2)
2
NVMe cable connector
3
NVMe cable connector
4
NVMe cable connector
5
NVMe cable connector
6
power cable connector
7
NVMe cable connector
8
backplane to expander board cable connector
9
backplane to expander board cable connector
Figure 80. 4 X 3.5 hard drive backplane
1
release tab (2)
2
SAS cable connector
3
power cable connector
4
backplane signal cable connector
Next steps
Install the hard drive backplane.
Related links
Removing the air shroud
Removing the backplane cover
Removing a hard drive
Installing the hard drive backplane
Installing the hard drive backplane
Prerequisites
Follow the safety guidelines listed in
NOTE:
The procedure to install the backplane is similar for all backplane configurations.
Steps
1
Use the hooks on the system as guides to align the slots on the backplane with the guides on the system.
2
Lower the hard drive backplane until the release tabs snap into place.
NOTE:
If you are installing a backplane with an expander board, then tighten the captive screws after installing the
backplane.
126
Dell EMC PowerEdge R640 Installation and Service Manual
Installing and removing system components


