Load Supplies
8
RP90 Plus E and RL90 User Guide
Load Supplies
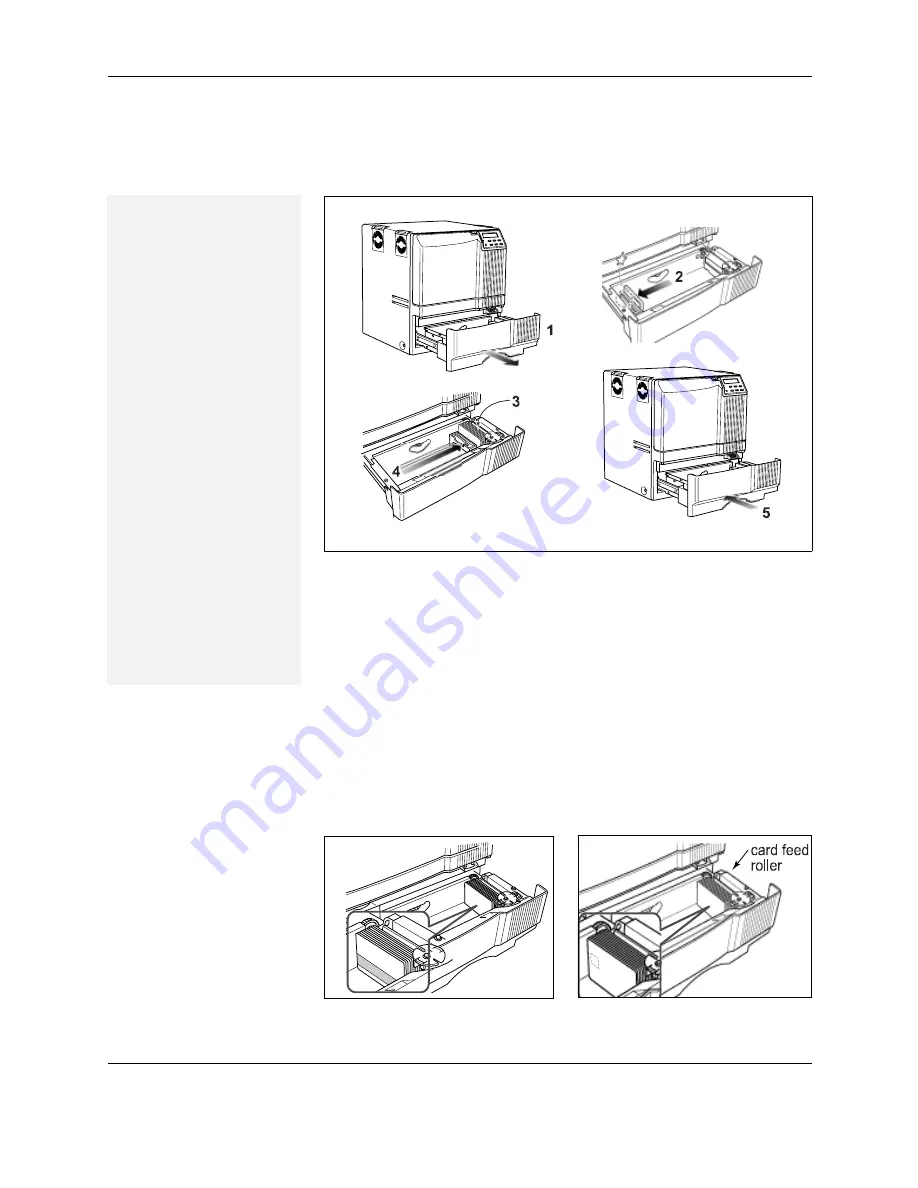
Load cards
The card hopper can hold approximately 250, .030” (.75mm) cards. The cards
are loaded and held in position with a card bracket. Make sure that magnetic
stripe or smart cards are loaded in the proper orientation for processing.
1
Open the card hopper.
2
Slide the card bracket to the left until it latches.
3
Insert cards. See the diagrams below for the correct card orientation.
— Load magnetic stripe cards with the magnetic stripe down and
facing the card bracket.
— Load smart cards with the smart card chip toward the back of the
card hopper, facing the card feed roller.
4
Slide the card bracket back into position carefully so cards are not
disturbed and your fingers do not get pinched.
5
Close the card hopper.
Tips: Handling cards
•
Do not open the card
hopper when “Loading”
is displayed on the LCD
panel.
•
Do not touch the
surface of cards before
printing them. (Oils on
hands will reduce
printing quality.)
•
Handle cards by the
edges or wear cotton
gloves.
•
Cards can stick
together. Slide or fan
cards to separate the
edges.
•
Orient all cards the
same way.
•
Do not use cards that
are bent or otherwise
damaged.
•
See
“Supplies” on
page 67
for specific
card information.
Smart card chip orientation
Magnetic stripe card orientation
Summary of Contents for RP90
Page 12: ...About the laminator 6 RP90 Plus E and RL90 User Guide...
Page 26: ...Printing cards 20 RP90 Plus E and RL90 User Guide...
Page 76: ...70 RP90 Plus E and RL90 User Guide...
Page 82: ...76 RP90 Plus E and RL90 User Guide...
Page 86: ...Character Code Table 80 RP90 Plus E and RL90 User Guide...


