background image

SiUS371901E

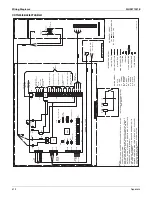
Wiring Diagrams

Appendix

408

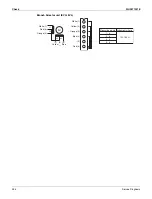
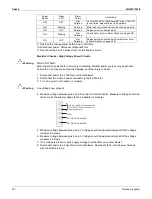
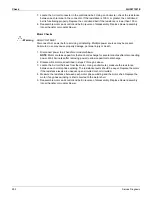
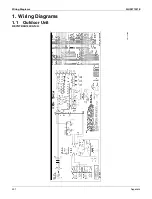
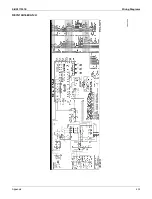
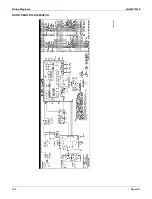
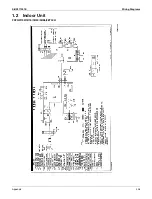
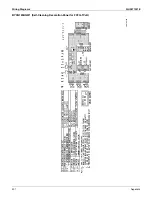
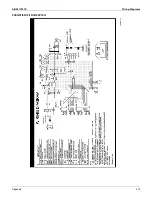
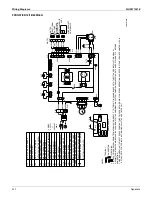
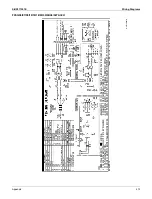
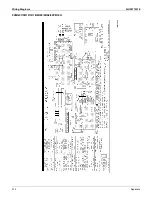
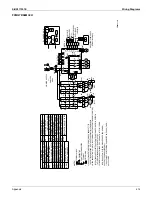
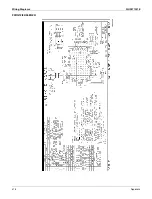
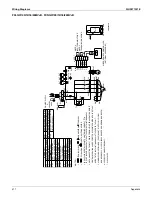
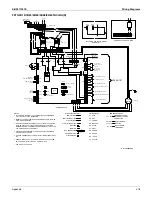
FXZQ05/07/09/12/15/18TAVJU

3D110443A

Summary of Contents for REYQ-XA

Page 1: ...Service Manual SiUS371901E REYQ72 456XATJU REYQ72 456XAYDU REYQ72 432XAYCU Heat Recovery 60 Hz...

Page 2: ...Appearance 5 2 1 Indoor Unit 5 2 2 Outdoor Unit 6 2 3 Air Treatment Equipment 7 2 4 Branch Selector Unit 7 3 Combination of Outdoor Units 8 3 1 REYQ XATJU REYQ XAYDU REYQ XAYCU 8 4 Capacity Range 9 4...

Page 3: ...90 3 2 When Wireless Remote Controller is Used Together 91 4 Address Setting for Wireless Remote Controller 92 5 Centralized Control Group No Setting 94 5 1 BRC1E73 94 5 2 Wireless Remote Controller...

Page 4: ...ntrol Temperature 138 9 3 Remote Controller Thermistor 140 9 4 Thermostat Control 142 9 5 Drain Pump Control 145 9 6 Control of Electronic Expansion Valve 147 9 7 Freeze Up Prevention 148 9 8 List of...

Page 5: ...Troubleshooting by Error Code 236 3 1 Error Codes and Descriptions 236 3 2 Error Codes Sub Codes 238 3 3 External Protection Device Abnormality 251 3 4 Indoor Unit Control PCB Abnormality 253 3 5 Dra...

Page 6: ...mality 312 3 45 Outdoor Fan PCB Abnormality 313 3 46 Thermistor Abnormality 314 3 47 High Pressure Sensor Abnormality 316 3 48 Low Pressure Sensor Abnormality 317 3 49 Inverter PCB Abnormality 318 3 5...

Page 7: ...Initial Setting for Communication Completes 372 3 78 Climate Talk Communication System Combination Error After Initial Setting for Communication Completes 373 4 Check 374 4 1 High Pressure Check 374...

Page 8: ...n is shown in the illustration or near the symbol 1 1 Warnings and Cautions Regarding Safety of Workers This manual is for the person in charge of maintenance and inspection Warning Do not store the e...

Page 9: ...r exclusive use with the R 410A refrigerant The use of materials for other refrigerant models may cause a serious accident such as damage to the refrigerant cycle or equipment failure Do not mix air o...

Page 10: ...iate tools to conduct repair work Never attempt to modify the equipment The use of inappropriate parts or tools may cause an electrical shock excessive heat generation or fire If the power cable and l...

Page 11: ...efrigerant gas leaks be sure to locate the leakage and repair it before charging the refrigerant After charging the refrigerant make sure that there is no leakage If the leakage cannot be located and...

Page 12: ...t generation fire or an electrical shock If the installation platform or frame has corroded replace it A corroded installation platform or frame may cause the unit to fall resulting in injury Check th...

Page 13: ...tion is used when there is danger that the reader through incorrect manipulation may damage equipment lose data get an unexpected result or has to restart part of a procedure Note Note A Note provides...

Page 14: ...Appearance 5 2 1 Indoor Unit 5 2 2 Outdoor Unit 6 2 3 Air Treatment Equipment 7 2 4 Branch Selector Unit 7 3 Combination of Outdoor Units 8 3 1 REYQ XATJU REYQ XAYDU REYQ XAYCU 8 4 Capacity Range 9 4...

Page 15: ...P One way blow cassette type FXEQ 07P 09P 12P 15P 18P 24P Slim ceiling mounted duct type FXDQ 07M 09M 12M 18M 24M MSP concealed ducted type FXSQ 05TA 07TA 09TA 12TA 15TA 18TA 24TA 30TA 36TA 48TA 54TA...

Page 16: ...56XA TJU Capacity range ton 6 8 10 12 14 16 Power supply Standard Capacity index 72 96 120 144 168 192 Heat recovery REYQ 72XA 96XA 120XA 144XA 168XA 192XA YDU Capacity range ton 18 20 22 24 26 28 Pow...

Page 17: ...ngeability with BSVQ36 60 96PVJU VJ 1 phase 208 230 V 60 Hz Multi Branch Selector Unit Note No interchangeability with BSV4 6Q36PVJU VJ 1 phase 208 230 V 60 Hz Series Model name Power supply Standard...

Page 18: ...ette type FXZQ TA Shown with BYFQ60C3W1W Ceiling suspended type FXHQ M 4 way blow ceiling suspended type FXUQ P Wall mounted type FXAQ P One way blow cassette type FXEQ P Floor standing type FXLQ M Sl...

Page 19: ...or Unit Triple Outdoor Unit REYQ72 96 120 144 168XATJU REYQ72 96 120 144 168XAYDU REYQ72 96 120 144 168XAYCU REYQ192 216 240 264 288 312 336XATJU REYQ192 216 240 264 288 312 336XAYDU REYQ192 216 240 2...

Page 20: ...01E 7 General Information 2 3 Air Treatment Equipment 2 4 Branch Selector Unit Outdoor air processing unit FXMQ MF Energy recovery ventilator VAM series VAM G Single branch selector unit BSQ T Multi b...

Page 21: ...the outdoor unit multi connection piping kit separately sold is required 2 Except REYQ XAYCU Systemcapacity Ton Number of units Module Outdoor unit multi connection piping kit 1 72 96 120 144 168 6 1...

Page 22: ...ion ratio Max connection ratio Types of connected indoor units Type of connected air treatment equipments When using only FXDQ M FXSQ07 54TA FXMQ PB FXAQ P When using at least one FXFQ07 09T FXZQ05TA...

Page 23: ...er of connectable indoor units per branch 5 5 5 5 5 Number of branches 4 6 8 10 12 Maximum capacity index of connectable indoor units 144 or less 216 or less 290 or less 290 or less 290 or less Maximu...

Page 24: ...e Volume m3 h 12 7 Number of revolutions r min 3 738 Motor output Number of units kW 3 9 1 Starting method Soft start Fan Type Propeller fan Motor output kW 0 8 2 Airflow rate cfm m3 min 7 283 206 Dri...

Page 25: ...7 4 Number of revolutions r min 5 142 Motor output Number of units kW 5 4 1 Starting method Soft start Fan Type Propeller fan Motor output kW 0 8 2 Airflow rate cfm m3 min 7 989 226 Drive Direct drive...

Page 26: ...4 Number of revolutions r min 6 888 Motor output Number of units kW 7 2 1 Starting method Soft start Fan Type Propeller fan Motor output kW 0 8 2 Airflow rate cfm m3 min 7 989 226 Drive Direct drive...

Page 27: ...7 7 Number of revolutions r min 5 214 Motor output Number of units kW 8 0 1 Starting method Soft start Fan Type Propeller fan Motor output kW 0 8 2 Airflow rate cfm m3 min 9 480 268 Drive Direct drive...

Page 28: ...3 6 Number of revolutions r min 6 330 Motor output Number of units kW 9 7 1 Starting method Soft start Fan Type Propeller fan Motor output kW 0 8 2 Airflow rate cfm m3 min 9 480 268 Drive Direct drive...

Page 29: ...aled scroll type Volume m3 h 17 7 17 7 Number of revolutions r min 5 214 5 214 Motor output Number of units kW 5 4 1 5 4 1 Starting method Soft start Fan Type Propeller fan Motor output kW 0 8 2 2 Air...

Page 30: ...ealed scroll type Volume m3 h 20 3 20 3 Number of revolutions r min 5 994 5 994 Motor output Number of units kW 6 2 1 6 2 1 Starting method Soft start Fan Type Propeller fan Motor output kW 0 8 2 2 Ai...

Page 31: ...aled scroll type Volume m3 h 22 7 22 7 Number of revolutions r min 6 702 6 702 Motor output Number of units kW 7 0 1 7 0 1 Starting method Soft start Fan Type Propeller fan Motor output kW 0 8 2 2 Air...

Page 32: ...ealed scroll type Volume m3 h 22 0 27 7 Number of revolutions r min 6 504 5 214 Motor output Number of units kW 6 8 1 8 0 1 Starting method Soft start Fan Type Propeller fan Motor output kW 0 8 2 2 Ai...

Page 33: ...aled scroll type Volume m3 h 25 4 25 4 Number of revolutions r min 4 794 4 794 Motor output Number of units kW 7 3 1 7 3 1 Starting method Soft start Fan Type Propeller fan Motor output kW 0 8 2 2 Air...

Page 34: ...sealed scroll type Volume m3 h 28 0 28 0 Number of revolutions r min 5 286 5 286 Motor output Number of units kW 8 1 1 8 1 1 Starting method Soft start Fan Type Propeller fan Motor output kW 0 8 2 2 A...

Page 35: ...sealed scroll type Volume m3 h 30 0 30 0 Number of revolutions r min 5 664 5 664 Motor output Number of units kW 8 7 1 8 7 1 Starting method Soft start Fan Type Propeller fan Motor output kW 0 8 2 2 A...

Page 36: ...ally sealed scroll type Volume m3 h 22 4 22 4 22 4 Number of revolutions r min 6 606 6 606 6 606 Motor output Number of units kW 6 9 1 6 9 1 6 9 1 Starting method Soft start Fan Type Propeller fan Mot...

Page 37: ...lly sealed scroll type Volume m3 h 21 8 21 8 26 9 Number of revolutions r min 6 426 6 426 5 070 Motor output Number of units kW 6 7 1 6 7 1 7 7 1 Starting method Soft start Fan Type Propeller fan Moto...

Page 38: ...ly sealed scroll type Volume m3 h 20 9 23 7 23 7 Number of revolutions r min 6 162 4 470 4 470 Motor output Number of units kW 6 4 1 6 8 1 6 8 1 Starting method Soft start Fan Type Propeller fan Motor...

Page 39: ...ally sealed scroll type Volume m3 h 23 1 23 1 23 1 Number of revolutions r min 4 350 4 350 4 350 Motor output Number of units kW 6 6 1 6 6 1 6 6 1 Starting method Soft start Fan Type Propeller fan Mot...

Page 40: ...lly sealed scroll type Volume m3 h 23 7 23 7 23 7 Number of revolutions r min 4 470 4 470 4 470 Motor output Number of units kW 6 8 1 6 8 1 6 8 1 Starting method Soft start Fan Type Propeller fan Moto...

Page 41: ...h 12 7 Number of revolutions r min 3 738 Motor output Number of units kW 3 9 1 Starting method Soft start Fan Type Propeller fan Motor output kW 0 6 2 Airflow rate cfm m3 min 7 283 206 Drive Direct d...

Page 42: ...4 Number of revolutions r min 5 142 Motor output Number of units kW 5 4 1 Starting method Soft start Fan Type Propeller fan Motor output kW 0 6 2 Airflow rate cfm m3 min 7 989 226 Drive Direct drive C...

Page 43: ...Number of revolutions r min 6 888 Motor output Number of units kW 7 2 1 Starting method Soft start Fan Type Propeller fan Motor output kW 0 6 2 Airflow rate cfm m3 min 7 989 226 Drive Direct drive Co...

Page 44: ...7 Number of revolutions r min 5 214 Motor output Number of units kW 8 0 1 Starting method Soft start Fan Type Propeller fan Motor output kW 0 6 2 Airflow rate cfm m3 min 9 480 268 Drive Direct drive C...

Page 45: ...6 Number of revolutions r min 6 330 Motor output Number of units kW 9 7 1 Starting method Soft start Fan Type Propeller fan Motor output kW 0 6 2 Airflow rate cfm m3 min 9 480 268 Drive Direct drive C...

Page 46: ...ed scroll type Volume m3 h 17 7 17 7 Number of revolutions r min 5 214 5 214 Motor output Number of units kW 5 4 1 5 4 1 Starting method Soft start Fan Type Propeller fan Motor output kW 0 6 2 2 Airfl...

Page 47: ...led scroll type Volume m3 h 20 3 20 3 Number of revolutions r min 5 994 5 994 Motor output Number of units kW 6 2 1 6 2 1 Starting method Soft start Fan Type Propeller fan Motor output kW 0 6 2 2 Airf...

Page 48: ...ed scroll type Volume m3 h 22 7 22 7 Number of revolutions r min 6 702 6 702 Motor output Number of units kW 7 0 1 7 0 1 Starting method Soft start Fan Type Propeller fan Motor output kW 0 6 2 2 Airfl...

Page 49: ...led scroll type Volume m3 h 22 0 27 7 Number of revolutions r min 6 504 5 214 Motor output Number of units kW 6 8 1 8 0 1 Starting method Soft start Fan Type Propeller fan Motor output kW 0 6 2 2 Airf...

Page 50: ...ed scroll type Volume m3 h 25 4 25 4 Number of revolutions r min 4 794 4 794 Motor output Number of units kW 7 3 1 7 3 1 Starting method Soft start Fan Type Propeller fan Motor output kW 0 6 2 2 Airfl...

Page 51: ...aled scroll type Volume m3 h 28 0 28 0 Number of revolutions r min 5 286 5 286 Motor output Number of units kW 8 1 1 8 1 1 Starting method Soft start Fan Type Propeller fan Motor output kW 0 6 2 2 Air...

Page 52: ...aled scroll type Volume m3 h 30 0 30 0 Number of revolutions r min 5 664 5 664 Motor output Number of units kW 8 7 1 8 7 1 Starting method Soft start Fan Type Propeller fan Motor output kW 0 6 2 2 Air...

Page 53: ...ly sealed scroll type Volume m3 h 22 4 22 4 22 4 Number of revolutions r min 6 606 6 606 6 606 Motor output Number of units kW 6 9 1 6 9 1 6 9 1 Starting method Soft start Fan Type Propeller fan Motor...

Page 54: ...y sealed scroll type Volume m3 h 21 8 21 8 26 9 Number of revolutions r min 6 426 6 426 5 070 Motor output Number of units kW 6 7 1 6 7 1 7 7 1 Starting method Soft start Fan Type Propeller fan Motor...

Page 55: ...sealed scroll type Volume m3 h 20 9 23 7 23 7 Number of revolutions r min 6 162 4 470 4 470 Motor output Number of units kW 6 4 1 6 8 1 6 8 1 Starting method Soft start Fan Type Propeller fan Motor o...

Page 56: ...ly sealed scroll type Volume m3 h 23 1 23 1 23 1 Number of revolutions r min 4 350 4 350 4 350 Motor output Number of units kW 6 6 1 6 6 1 6 6 1 Starting method Soft start Fan Type Propeller fan Motor...

Page 57: ...y sealed scroll type Volume m3 h 23 7 23 7 23 7 Number of revolutions r min 4 470 4 470 4 470 Motor output Number of units kW 6 8 1 6 8 1 6 8 1 Starting method Soft start Fan Type Propeller fan Motor...

Page 58: ...h 12 7 Number of revolutions r min 3 738 Motor output Number of units kW 3 9 1 Starting method Soft start Fan Type Propeller fan Motor output kW 0 7 2 Airflow rate cfm m3 min 7 283 206 Drive Direct d...

Page 59: ...4 Number of revolutions r min 5 142 Motor output Number of units kW 5 4 1 Starting method Soft start Fan Type Propeller fan Motor output kW 0 7 2 Airflow rate cfm m3 min 7 989 226 Drive Direct drive C...

Page 60: ...Number of revolutions r min 6 888 Motor output Number of units kW 7 2 1 Starting method Soft start Fan Type Propeller fan Motor output kW 0 7 2 Airflow rate cfm m3 min 7 989 226 Drive Direct drive Co...

Page 61: ...7 Number of revolutions r min 5 214 Motor output Number of units kW 8 0 1 Starting method Soft start Fan Type Propeller fan Motor output kW 0 7 2 Airflow rate cfm m3 min 9 480 268 Drive Direct drive C...

Page 62: ...6 Number of revolutions r min 6 330 Motor output Number of units kW 9 7 1 Starting method Soft start Fan Type Propeller fan Motor output kW 0 7 2 Airflow rate cfm m3 min 9 480 268 Drive Direct drive C...

Page 63: ...ed scroll type Volume m3 h 17 7 17 7 Number of revolutions r min 5 214 5 214 Motor output Number of units kW 5 4 1 5 4 1 Starting method Soft start Fan Type Propeller fan Motor output kW 0 7 2 2 Airfl...

Page 64: ...led scroll type Volume m3 h 20 3 20 3 Number of revolutions r min 5 994 5 994 Motor output Number of units kW 6 2 1 6 2 1 Starting method Soft start Fan Type Propeller fan Motor output kW 0 7 2 2 Airf...

Page 65: ...ed scroll type Volume m3 h 22 7 22 7 Number of revolutions r min 6 702 6 702 Motor output Number of units kW 7 0 1 7 0 1 Starting method Soft start Fan Type Propeller fan Motor output kW 0 7 2 2 Airfl...

Page 66: ...led scroll type Volume m3 h 22 0 27 7 Number of revolutions r min 6 504 5 214 Motor output Number of units kW 6 8 1 8 0 1 Starting method Soft start Fan Type Propeller fan Motor output kW 0 7 2 2 Airf...

Page 67: ...ed scroll type Volume m3 h 25 4 25 4 Number of revolutions r min 4 794 4 794 Motor output Number of units kW 7 3 1 7 3 1 Starting method Soft start Fan Type Propeller fan Motor output kW 0 7 2 2 Airfl...

Page 68: ...aled scroll type Volume m3 h 28 0 28 0 Number of revolutions r min 5 286 5 286 Motor output Number of units kW 8 1 1 8 1 1 Starting method Soft start Fan Type Propeller fan Motor output kW 0 7 2 2 Air...

Page 69: ...aled scroll type Volume m3 h 30 0 30 0 Number of revolutions r min 5 664 5 664 Motor output Number of units kW 8 7 1 8 7 1 Starting method Soft start Fan Type Propeller fan Motor output kW 0 7 2 2 Air...

Page 70: ...ly sealed scroll type Volume m3 h 22 4 22 4 22 4 Number of revolutions r min 6 606 6 606 6 606 Motor output Number of units kW 6 9 1 6 9 1 6 9 1 Starting method Soft start Fan Type Propeller fan Motor...

Page 71: ...y sealed scroll type Volume m3 h 21 8 21 8 26 9 Number of revolutions r min 6 426 6 426 5 070 Motor output Number of units kW 6 7 1 6 7 1 7 7 1 Starting method Soft start Fan Type Propeller fan Motor...

Page 72: ...sealed scroll type Volume m3 h 20 9 23 7 23 7 Number of revolutions r min 6 162 4 470 4 470 Motor output Number of units kW 6 4 1 6 8 1 6 8 1 Starting method Soft start Fan Type Propeller fan Motor o...

Page 73: ...ly sealed scroll type Volume m3 h 23 1 23 1 23 1 Number of revolutions r min 4 350 4 350 4 350 Motor output Number of units kW 6 6 1 6 6 1 6 6 1 Starting method Soft start Fan Type Propeller fan Motor...

Page 74: ...1 REYQ72 96 120XATJU REYQ72 96 120XAYDU REYQ72 96 120XAYCU 74 2 2 REYQ144 168XATJU REYQ144 168XAYDU REYQ144 168XAYCU 76 3 Refrigerant Flow for Each Operation Mode 78 3 1 Cooling Operation 78 3 2 Heati...

Page 75: ...r 16 S1NPH High pressure sensor Used to detect the high pressure 17 S1NPL Low pressure sensor Used to detect the low pressure 18 S1PH High pressure switch This functions when pressure increases to sto...

Page 76: ...20XAYDU REYQ72 96 120XAYCU S1PH S1NPH S1NPL C 3D119212 28 R7T 36 R16T 29 R8T 25 R4T 24 R3T 26 R5T 30 R9T 32 R11T 10 Y2S 22 R1T 4 Y2E 8 Y7E 11 Y3S 19 14 Y6S 16 6 Y4E 15 Y7S 9 Y1S 21 13 Y5S 2 M1F M2F 3...

Page 77: ...8XAYDU REYQ144 168XAYCU S1PH S1NPH S1NPL C 3D119213 28 R7T 36 R16T 29 R8T 25 R4T 24 R3T 26 R5T 30 R9T 32 R11T 10 Y2S 22 R1T 4 Y2E 8 Y7E 11 Y3S 19 14 Y6S 16 6 Y4E 15 Y7S 9 Y1S 21 13 Y5S 2 M1F M2F 3 Y1E...

Page 78: ...rheating degree control while in cooling or subcooling degree control while in heating 4 Gas pipe thermistor R3T R3T R3T Used for gas superheating degree control while in cooling 5 Discharge air therm...

Page 79: ...MQ PB FXTQ TA CXTQ TA Indoor heat exchanger Fan Filter Filter 4 2 1 3 Gas piping connection port Liquid piping connection port C 4D034245R 5 C 4D068194 4 1 3 Indoor heat exchanger Filter Filter 4 1 3...

Page 80: ...pressure from high to low in bypassing hot gas 4 R1T Suction air thermistor Used to turn ON or OFF the thermostat 5 R2T Liquid pipe thermistor Used to control the opening degree of electronic expansio...

Page 81: ...unit downstream of this Branch Selector unit is in heating Max 480 pulse 2 Electronic expansion valve EVH Y2E Opens while in heating or all indoor units are in cooling Max 760 pulse 3 Electronic expa...

Page 82: ...nic Expansion Valve Subcooling Electronic Expansion Valve Subcooling Electronic Expansion Valve Subcooling Electronic Expansion Valve HP LP gas Electronic Expansion Valve Suction Electronic Expansion...

Page 83: ...id pipe connection port Suction gas pipe connection port HP LP gas pipe connection port Gas pipe connection port Liquid pipe connection port Gas pipe connection port Liquid pipe connection port Gas pi...

Page 84: ...pipe connection port Gas pipe connection port Liquid pipe connection port Gas pipe connection port Liquid pipe connection port Gas pipe connection port Liquid pipe connection port Gas pipe connection...

Page 85: ...nsion Valve HP LP gas Electronic Expansion Valve Suction Electronic Expansion Valve HP LP gas Electronic Expansion Valve Suction Electronic Expansion Valve HP LP gas Electronic Expansion Valve Suction...

Page 86: ...iquidpipe connectionport Gaspipe connectionport Liquidpipe connectionport Gaspipe connectionport Liquidpipe connectionport Gaspipe connectionport Liquidpipe connectionport Gaspipe connectionport Liqui...

Page 87: ...per R8T Solenoid valve Oil separator oil return Y1S Solenoid valve Hot gas bypass Y2S Solenoid valve Liquid shutoff Y3S High pressure sensor S1NPH Section W W Thermistor Heat exchanger gas lower R9T T...

Page 88: ...ail Thermistor Receiver gas purge R13T Electronic expansion valve Receiver gas purge Y7E Thermistor Heat exchanger liquid upper R4T Thermistor Heat exchanger liquid lower R5T Thermistor Subcooling gas...

Page 89: ...valve Oil separator oil return Y1S Solenoid valve Hot gas bypass Y2S Solenoid valve Liquid shutoff Y3S High pressure sensor S1NPH Section W W Thermistor Heat exchanger gas lower R9T Thermistor Suction...

Page 90: ...il Thermistor Receiver gas purge R13T Electronic expansion valve Receiver gas purge Y7E Thermistor Heat exchanger liquid upper R4T Thermistor Heat exchanger liquid lower R5T Thermistor Subcooling gas...

Page 91: ...ger Electronic Expansion Valve EVSC Electronic Expansion Valve EVH Electronic Expansion Valve EVL OFF Fan OFF Cooling Unit Double pipe heat exchanger Electronic Expansion Valve EVSC Electronic Expansi...

Page 92: ...EVSC Electronic Expansion Valve EVH Electronic Expansion Valve EVL Double pipe heat exchanger Electronic Expansion Valve EVSC Electronic Expansion Valve EVH Electronic Expansion Valve EVL Double pipe...

Page 93: ...anger Electronic Expansion Valve EVSC Electronic Expansion Valve EVH Electronic Expansion Valve EVL Double pipe heat exchanger Electronic Expansion Valve EVSC Electronic Expansion Valve EVH Electronic...

Page 94: ...nger Electronic Expansion Valve EVSC Electronic Expansion Valve EVH Electronic Expansion Valve EVL Double pipe heat exchanger Electronic Expansion Valve EVSC Electronic Expansion Valve EVH Electronic...

Page 95: ...tronic Expansion Valve EVSC Electronic Expansion Valve EVH Electronic Expansion Valve EVL Double pipe heat exchanger Electronic Expansion Valve EVSC Electronic Expansion Valve EVH Electronic Expansion...

Page 96: ...uble pipe heat exchanger Electronic Expansion Valve EVSC Electronic Expansion Valve EVH Electronic Expansion Valve EVL Double pipe heat exchanger Electronic Expansion Valve EVSC Electronic Expansion V...

Page 97: ...Controller 89 3 Main Sub Setting 90 3 1 BRC1E73 90 3 2 When Wireless Remote Controller is Used Together 91 4 Address Setting for Wireless Remote Controller 92 5 Centralized Control Group No Setting 94...

Page 98: ...emote controller Navigation FXFQ T BRC1E73 FXZQ TA BRC082A42W for BYFQ60C3W1W BRC082A42S for BYFQ60C3W1S BRC082A41W for BYFQ60B3W1 FXUQ P FXEQ P FXDQ M BRC4C82 FXSQ TA BRC082A43 FXMQ PB BRC4C82 Fan 2...

Page 99: ...o press the buttons on the remote controller damage may result 1 Operation mode selector button Press this button to select the operation mode of your preference Available modes vary with the indoor u...

Page 100: ...ghlight the next items on the right hand side Each screen is scrolled in the right hand direction 7 Left button W Used to highlight the next items on the left hand side Each screen is scrolled in the...

Page 101: ...ode changeover Fan speed control Menu display Confirmation of each setting On Off Cancel Operation lamp Press the Cancel button for 4 seconds or more Press the Cancel button once Press the Cancel butt...

Page 102: ...display shows the set fan speed When the INSPECTION TEST button is pressed the display shows the system mode is in 13 14 15 16 17 TIMER RESERVE CANCEL BUTTON AIRFLOW DIRECTION ADJUST BUTTON OPERATION...

Page 103: ...to Sub To change a remote controller from Main to Sub proceed as follows 3 1 1 Field Settings The designation of the main and sub remote controllers can be swapped Note that this change requires turni...

Page 104: ...ible to change the Main Sub setting from Main to Sub when only one remote controller is connected 2 When 2 remote controllers are being used it is not possible to change the setting from Main to Sub i...

Page 105: ...trol using the group operation For the wiring for the group operation please refer to the installation manual attached to the indoor unit and technical guide Setting for signal receiver PCB The addres...

Page 106: ...tting options provided to enable discriminating by a beeping sound according to the operation A Standard or b Multi System Set the setting according to the customer s intention Field setting mode Addr...

Page 107: ...once Service settings menu is displayed Item 2 is displayed Item 2 is displayed Item 2 is displayed Basic screen is displayed Press the Cancel button once Select the desired Group Address using the S...

Page 108: ...peration manual for maintenance Group Address Group Select Group Address and then press the Menu OK button Select Group Address Group and then press the Menu OK button Select the desired Group Address...

Page 109: ...INSPECTION TEST button for 4 seconds or more to enter field setting mode 2 Set mode No 00 with MODE button 3 Set the group No for each group with UP button or DOWN button 4 Enter the selected group n...

Page 110: ...isplayed once for about 1 minute on the liquid crystal display This is not an operative fault Central Remote Controller F1 F2 F1 F2 F1 F2 F1 F2 P1 P2 RC RC RC RC RC F1 F2 P1 P2 F1 F2 P1 P2 F1 F2 P1 P2...

Page 111: ...button for 4 seconds or more Press and hold the Cancel button for 4 seconds or more Select the desired item from the Maintenance menu and then press the Menu OK button Maintenance menu is displayed I...

Page 112: ...roup Address Unit Unit No Gr Addr Set Indoor unit AirNet Address Unit No Address Set Outdoor unit AirNet Address Unit No Address Set Error History RC Error History Unit No Error Date Time Up to 10 err...

Page 113: ...us Unit No Select the unit number you want to check FAN Fan tap 1 Speed Fan speed rpm 2 FLAP Swing fixed EV Degree that electronic expansion valve is open pulse MP Drain pump ON OFF EH Electric heater...

Page 114: ...lays neither errors nor warnings Display warning ON Displays a warning on the screen if an error occurs Display warning OFF No warning is displayed Swap Unit No Current Unit No A unit No can be transf...

Page 115: ...112 5 4 Electronic Expansion Valve PI Control 114 5 5 Step Control of Outdoor Fans 115 5 6 Heat Exchanger Control 116 6 Protection Control 117 6 1 High Pressure Protection Control 117 6 2 Low Pressur...

Page 116: ...50 9 9 Hot Start Control In Heating Only 151 9 10 Louver Control for Preventing Ceiling Dirt 152 9 11 Heater Control Except FXTQ TA Models 153 9 12 Heater Control FXTQ TA Models 154 9 13 Gas Furnace C...

Page 117: ...eater control Startup control include pressure equalization before startup 1 Startup control in cooling 2 Startup control in heating Basic control 1 Normal control 2 Compressor PI control 3 Operation...

Page 118: ...electronic expansion valve Y1E Normal opening degree 0 pulse 0 pulse Normal opening degree 192 pulse 192 pulse Branch Selector unit actuator Normal cooling Normal simultaneous cooling heating Normal h...

Page 119: ...s certain number Refer to Error Codes and Descriptions on page 236 of the troubleshooting for the items to determine the error 2 2 When System is in Stop Control The four way valves retain the conditi...

Page 120: ...system In addition the outdoor fan carry out the residual control for a while to accelerate pressure equalizing and to suppress melting of the refrigerant to the evaporator 3 2 Crankcase Heater Contr...

Page 121: ...its simultaneously to position the four way valve 4 1 Startup Control in Cooling DSH Discharge pipe superheating degree Pc High pressure sensor detection value Pe Low pressure sensor detection value T...

Page 122: ...etection value 0 Hz 10 rps 10 sec A B C D E 0 pulse Step 4 Step 8 OR PI control Compressor M1C Electronic expansion valve main Y1E Inverter fan M1F M2F Frequency step up 5 sec interval Initial opening...

Page 123: ...ge pipe protection Electric expansion valve Subcooling injection Y4E Compressor injection control Compressor injection control Compressor injection control Electronic expansion valve Refrigerant cooli...

Page 124: ...Te Low pressure equivalent saturation temperature TeS Target temperature of Te Varies depending on Te setting operating frequency etc Te set value Make this setting while in Setting mode 2 Te setting...

Page 125: ...77 45 8 137 105 6 18 20 1 78 46 5 138 107 1 19 20 5 79 47 1 139 108 4 20 20 7 80 47 8 140 110 1 21 21 0 81 48 5 141 111 7 22 21 3 82 49 1 142 113 2 23 21 6 83 49 8 143 114 8 24 21 9 84 50 5 144 116 4...

Page 126: ...23 18 6 83 32 8 143 75 6 24 18 7 84 33 3 144 76 6 25 18 8 85 33 7 145 77 7 26 18 9 86 34 2 146 78 8 27 19 0 87 34 7 147 79 9 28 19 1 88 35 2 148 81 0 29 19 2 89 35 7 149 82 2 30 19 3 90 36 2 150 83 3...

Page 127: ...oling electronic expansion valve EVT control In order to make the maximum use of the subcooling heat exchanger this function is used to exert PI control on the electronic expansion valve Y2E Y5E or Y3...

Page 128: ...287 317 21 300 330 300 330 22 314 344 314 344 23 320 350 320 350 24 332 362 332 362 25 345 375 345 375 26 358 388 358 388 27 372 402 372 402 28 386 416 386 416 29 401 431 401 431 30 417 447 417 447 3...

Page 129: ...e Lower side Upper side Condenser Condenser Condenser Condenser Lower side Upper side Outdoor unit Lower side Upper side Lower side Upper side Condenser Condenser Condenser Lower side Upper side Outdo...

Page 130: ...down 1 step up 2 step down After 10 seconds After 15 seconds After 15 seconds After 10 seconds Pc 3 57 MPa 518 psi Pc 3 70 MPa 537 psi Pc 3 14 MPa 455 psi Pc 3 45 MPa 500 psi Pc 3 67 MPa 532 psi Pc 3...

Page 131: ...Pa 540 psi Normal control 9 step down All units Compressor step 1 3 step up Current step maintained High pressure standby 2 times within 40 minutes Pc High pressure sensor detection value for master u...

Page 132: ...is displayed Low pressure standby 3 times within 60 minutes Low pressure standby 4 times within 60 minutes Normal control 9 step down 9 step up 3 step up 21 step down After 10 seconds After 15 second...

Page 133: ...ressor step 1 After 20 seconds HTdi 135 C 275 F HTdi 120 C 248 F continues for 10 minutes Ti 120 C 248 F continues for 5 seconds Ti 115 C 239 F continues for 10 minutes OR HTdi Value of compressor dis...

Page 134: ...rotection control This control is performed for each compressor Normal control Compressor body temperature standby Reduce compressor capacity step Compressor body temperature 108 C 226 4 F Compressor...

Page 135: ...199 4 F less than 87 C 188 6 F C more than 100 C 212 F more than 100 C 212 F more than 95 C 203 F Condition REYQ144 168XATJU REYQ144 168XAYDU REYQ144 168XAYCU A more than 70 C 158 F more than 70 C 15...

Page 136: ...e For heat exchanger mode Electronic expansion valve Heat exchanger upper Y1E Same as normal control Same as normal control Electronic expansion valve Heat exchanger lower Y3E Electronic expansion val...

Page 137: ...from Tc Te and compressor loads Part name Electric symbol Oil return control Compressor M1C Constant low pressure control Inverter fan M1F M2F For heat exchanger mode Electronic expansion valve Heat...

Page 138: ...control Non operating unit 224 pulse Thermostat OFF unit Forced thermostat ON PI control Branch Selector unit actuator Normal cooling Electronic expansion valve EVSC Y1E Thermostat ON 0 pulse Non oper...

Page 139: ...per Y6S Hold Solenoid valve Accumulator oil return Y7S Same as normal control Ending condition A lapse of 8 minutes while the frequency is more than that of oil return control Indoor unit actuator Coo...

Page 140: ...ur way valve Heat exchanger upper Y6S Hold Solenoid valve Accumulator oil return Y7S ON Ending condition A lapse of 15 minutes Tb 11 C 51 8 F continues for 30 seconds or more OR Indoor unit actuator D...

Page 141: ...he following diagram shows outdoor unit rotation in combination of 3 outdoor units Note Master unit slave unit 1 and slave unit 2 in this section are the names for installation They are determined in...

Page 142: ...nic expansion valve will fully open and the electronic expansion valve of the indoor unit will open to activate the heating circuit The required switching time is approximately 6 minutes Field setting...

Page 143: ...ve will fully open and the electronic expansion valve of the indoor unit will open to activate the heating circuit The required switching time is approximately 6 minutes Field settings however can sho...

Page 144: ...time 30 seconds switching control time While switching The compressor stops operating 4 Startup control Switching the dual pressure gas pipe from low pressure to high pressure 5 Into heating operatio...

Page 145: ...pansion valves of branch selector unit Required switching time 2 to 4 minutes switching control time While switching The compressor stops operating 4 Startup control Switching the dual pressure gas pi...

Page 146: ...e other outdoor units On the system with 1 outdoor unit this emergency operation is not available This function will work for 72 hours from the moment you set Emergency operation with outdoor unit PCB...

Page 147: ...MP Drain pump kit ON MP Drain pump kit ON MP Closed Electronic expansion valve Capacity control Electronic expansion valve Closed YE MA OFF EH OFF EH Humidifier OFF Hu Humidifier OFF Hu YE The previo...

Page 148: ...Fan Operating in L mode MF Fan Operating in L mode after it stops for 6 min MF YE Drain pump kit YE MP Swing flap Swing flap Set wind direction Fan MF Operating with set airflow rate YE Closed Program...

Page 149: ...OFF Humidifier OFF ON Humidifier ON OFF Humidifier OFF OFF MP Yes Yes No No No No 13 14 13 18 Yes Yes Yes Yes Swing flap Is defrost operation in progress Yes No Option Yes Swing flap Set wind directi...

Page 150: ...t wind direction According to wind direction instruction from the remote controller the wind direction is set to 100 horizontal while in heating operation 12 Fan According to fan speed instruction fro...

Page 151: ...uction air thermistor Default setting When using the remote controller thermistor Field setting is required Examples are given to illustrate a control target temperature that satisfies the remote cont...

Page 152: ...target temperature for operation What is the temperature around people The temperature around people refers to the temperature of the living space obtained from the temperature around the ceiling and...

Page 153: ...ion temperature is near the set temperature Assuming the set temperature in the figure above is 24 C 75 F and the suction temperature has changed from 18 C 64 F to 30 C 86 F A F This example also assu...

Page 154: ...there are several other air conditioners and the suction temperature changes even when the thermostat sensor is off Suction air thermistor is used for temperatures from 18 C 64 F to 25 C 77 F A C Rem...

Page 155: ...he field setting 14 24 5 is set to 02 Tro will be the same as the cooling set temperature T Room temperature Remote controller set temperature Tro Room temperature at the start of dry operation Tr Roo...

Page 156: ...outside of use range To avoid the above condition a limit based on the suction air temperature is set for the use range of the temperature around people Cooling operation When the floor temperature i...

Page 157: ...ontrol temp Differential value set to 1 C 1 8 F Set heating temp Set cooling temp Heating mode Control temp Differential value set to 2 C 3 6 F Heating mode Control temp Differential value set to 3 C...

Page 158: ...y After the thermostat turns OFF the drain pump continues to operate for another 5 minutes 1 If the float switch turns ON again during the residual operation of the drain pump cooling operation also t...

Page 159: ...e drain pump turns ON simultaneously 1 If the float switch continues to turn OFF and ON 5 times consecutively it is judged as a drain system error and the error code AF is displayed on the remote cont...

Page 160: ...es lower As T Remote controller set temp Suction air temp becomes smaller SHS becomes higher Subcooling degree control in heating operation This function is used to adjust the opening of the electroni...

Page 161: ...or starting Liquid pipe temperature 1 C 30 2 F for total of 40 minutes or Liquid pipe temperature 5 C 23 F for total of 10 minutes Condition for cancelling Liquid pipe temperature 7 C 44 6 F for 10 mi...

Page 162: ...al of 15 minutes or Liquid pipe temperature 0 C 32 F for 1 minute continuously During freeze up prevention control the airflow rate is fixed to LL The cancelling conditions are same as the standard 0...

Page 163: ...OFF mode for prevention of cold air Swing LL Horizontal Horizontal Horizontal Horizontal Airflow direction set LL Horizontal Horizontal Horizontal Horizontal Stop Swing OFF Horizontal Horizontal Hori...

Page 164: ...fore initiating the hot start OFF Hot start control Hot start in progress Normal control Normal control H L remote controller setting LL OFF Remote controller setting P0 Horizontal Fan Louver Ending c...

Page 165: ...XZQ TA and FXEQ P models Factory setting FXFQ T models draft prevention position FXZQ TA FXEQ P models standard position P0 P1 P2 P4 P3 P0 P1 P2 P4 P3 P0 P0 P1 P2 P4 P4 P2 P1 P0 P4 P4 P3 P2 P1 P0 P3 E...

Page 166: ...ted by converting the heater temperature into the condensing pressure equivalent saturated temperature Tc according to the temperature detection through the high pressure sensor S1NPH of the outdoor u...

Page 167: ...tric heater Heating Automatic heating Auxiliary heater enabled 1 Not in heating Automatic heating Auxiliary heater enabled 0 3 Heater not allowed Heater allowed Heater 1 OFF Heater 2 OFF OR OR OR Ther...

Page 168: ...e condition ON 1 Liquid pipe temperature condition ON 2 Heater ON permission Defrost oil return 0 4 Not during defrost oil return No fan motor system error During defrost oil return Heater ON permissi...

Page 169: ...set to the initial value Thermostat OFF Operation OFF ENTRY 5 minutes timer starts Condition A Time up 2 H P Heating Not in operation Heater 1 ON Heater 2 OFF Fan ON ENTRY 5 minutes timer starts OR T...

Page 170: ...mbustion heating Detail Note The airflow rate during gas furnace operation depends on the intensity of combustion heating and therefore may be different from the airflow setting displayed on the remot...

Page 171: ...4 A and B values vary automatically based on the field setting 12 22 2 5 If directly after a change in conditions it is such that the thermostat could be either ON or OFF controlled temperature is wi...

Page 172: ...input signal to the X1M AIR CLEANER terminal on the PCB 9 16 2 Humidifier When a humidifier is connected onsite the fan operates with the airflow rate set of the remote controller or with the H tap 1...

Page 173: ...turns ON the relay on the X2M ECONOMIZER2 on the PCB 2 External input ON is an input signal to the X1M ECONOMIZER1 terminal on the PCB 3 Refer to Optional Kit Setting UV lamp Humidifier Economizer for...

Page 174: ...nit 186 1 6 Setting of Operation Control Mode 186 2 Field Settings for Outdoor Unit 188 2 1 DIP Switch Setting Mounting a Spare PCB 188 2 2 Accessing the BS Buttons on the PCB 190 2 3 Operating the BS...

Page 175: ...nit In the case of group total setting 1 Press and hold Cancel button for 4 seconds or more Service settings menu is displayed 2 Select Field Settings in the Service Settings menu and press Menu OK bu...

Page 176: ...returns 8 In the case of multiple setting changes repeat 3 to 7 9 After all setting changes are completed press Cancel button twice 10 Backlight goes out and Checking the connection Please standby is...

Page 177: ...button for 4 seconds during normal mode to enter the field setting mode 2 Press the MODE button to select the desired mode No 3 Press the UP button to select the first code No 4 Press the DOWN button...

Page 178: ...ture setting W 4 During group control when setting by each indoor unit mode No 20 22 and 23 have been selected press the BS8 4 button unit No and select the indoor unit No to be set This operation is...

Page 179: ...andard Slightly increased Increased 3 6 Electric heater setting Refer to page 174 for details 5 6 Electric heater capacity setting Refer to page 175 for details 6 9 Setting the rate of human detection...

Page 180: ...dels 10 Only for CXTQ TA models 11 Only for FXTQ TA and CXTQ TA models 12 Only for FXDQ M models 13 Only for FXEQ P models Mode No 2 First Code No Setting Contents Second Code No 01 02 03 04 14 24 4 1...

Page 181: ...ON OFF input z z z z z z z 2 Thermostat switching z z z z z z z 3 Airflow setting when heating thermostat is OFF z z z z z z z 4 Setting of operation mode to AUTO z z z z z z z 5 Auto restart after po...

Page 182: ...OFF input z z z z z z z 2 Thermostat switching z z z z z z z 3 Airflow setting when heating thermostat is OFF z z z z z z z 4 Setting of operation mode to AUTO z z z z z z z 5 Auto restart after power...

Page 183: ...d Code No is set to 03 room temperature is controlled by the remote controller thermistor Setting 10 20 1 01 Long life filter 02 Ultra long life filter Filter contamination heavy light 10 20 0 Light 0...

Page 184: ...66 2 62 6 69 8 73 4 77 80 6 84 2 87 8 91 4 95 98 6 F F 57 2 60 8 64 4 68 71 6 75 2 78 8 82 4 86 89 6 93 2 In cooling In heating Suction air temperature Suction air temperature Suction air thermistor...

Page 185: ...e floor sensor only By selecting the energy saving operation mode in the absence the target temperature is shifted to the energy saving end by 1 C 1 8 F maximum 2 C 3 6 F after the state of absence co...

Page 186: ...ON Mode No First Code No Symbol Second Code No 01 02 03 04 05 06 11 21 1 Ton 4 C 7 2 F 3 5 C 6 3 F 3 C 5 4 F 2 5 C 4 5 F 2 C 3 6 F 1 5 C 2 7 F Toff 2 C 3 6 F 1 5 C 2 7 F 1 C 1 8 F 0 5 C 0 9 F 0 C 0 F...

Page 187: ...C 6 3 F 3 C 5 4 F 2 5 C 4 5 F 2 C 3 6 F 1 5 C 2 7 F 100 C 148 F 2 Toff 2 C 3 6 F 1 5 C 2 7 F 1 C 1 8 F 0 5 C 0 9 F 0 C 0 F 0 5 C 0 9 F 98 C 144 4 F Second Code No Ton 01 02 03 04 05 06 07 4 C 7 2 F 3...

Page 188: ...sence Model Mode No First Code No Second Code No 01 02 03 04 05 06 07 08 09 10 Heater kW No heater kit 3 5 6 8 10 15 19 20 25 FXTQ09TAVJUA 11 21 5 z z z FXTQ09TAVJUD z z z FXTQ12TAVJUA z z z z FXTQ12T...

Page 189: ...as in the following table by indoor unit with the Mode No 11 21 If operation does not stop automatically or the Second Code No is not set to 02 return to the step 3 above to make settings again Notes...

Page 190: ...de No Second Code No Contents 11 21 9 01 4 C 7 2 F 02 2 C 3 6 F 03 0 C 0 F 04 2 C 3 6 F Environment Operation Mode Problem Setting Value The unit is installed close to a wall or a window High thermal...

Page 191: ...he units may start automatically after power failure reset or the main power supply turned ON again return to the same operation condition as that of before power failure For the above reasons when th...

Page 192: ...n 2 7 m 8 3 4 ft Lower than 3 0 m 10 ft Lower than 3 5 m 11 1 2 ft 02 High Ceiling 1 Lower than 3 0 m 10 ft Lower than 3 3 m 10 3 4 ft Lower than 3 8 m 12 1 2 ft 03 Higher Ceiling 2 Lower than 3 5 m 1...

Page 193: ...MQ15 18 24 30 36 48 54PB at factory setting 1 FXMQ15 18 24 30 36 48PB cannot be set to 30 Pa 0 12 inWG 2 FXMQ07 09 12PB cannot be set to 110 200 Pa 0 44 0 80 inWG 3 FXMQ54PB cannot be set to 30 Pa 0 1...

Page 194: ...0 Pa 0 24 inWG 07 70 Pa 0 28 inWG 08 80 Pa 0 32 inWG 09 90 Pa 0 36 inWG 10 100 Pa 0 40 inWG 11 110 Pa 0 44 inWG 12 120 Pa 0 48 inWG 13 130 Pa 0 52 inWG 14 140 Pa 0 56 inWG 15 150 Pa 0 60 inWG 2 Mode N...

Page 195: ...r the thermostat is stopped For the purpose of preventing dust on the air filter from falling off Interlocked Operation between Humidifier and Drain Pump This is used to interlock the humidifier with...

Page 196: ...above Room Temperature Display For BRC1E73 only A Detailed display screen can be selected as the display screen This setting is used if you do not want to display Room temperature display on the Deta...

Page 197: ...RC1E73 only Select the operation mode in which the setback function is available Button Level 2 Level 3 Selectable Enable Unselectable Disable On Off Selectable Enable Unselectable Enable Mode Selecta...

Page 198: ...irflow Trim 15 10 OFF OFF OFF OFF 12 8 ON OFF OFF OFF 9 6 OFF ON OFF OFF 6 4 ON ON OFF OFF 3 2 OFF OFF ON OFF 0 0 ON OFF ON OFF 3 2 OFF ON ON OFF 6 4 ON ON ON OFF 9 6 OFF OFF OFF ON 12 8 ON OFF OFF ON...

Page 199: ...ly possible by remote controller Used when you want to turn ON by central remote controller only and OFF by remote controller only Centralized Used when you want to turn ON by central remote controlle...

Page 200: ...ol Operation mode setting Unified operation individual operation by central remote controller or operation controlled by timer Unified OFF individual stop by central remote controller or timer stop ON...

Page 201: ...ettings of spare PCB is different from that used for factory settings described above Be sure to refer to the table shown on the following page in order to make settings of spare PCB after replacement...

Page 202: ...r disconnected Application model The setting method represents the position of switches REYQ72XA Set DS2 2 to ON REYQ96XA Set DS2 1 and DS2 2 to ON REYQ120XA Set DS2 3 to ON REYQ144XA Set DS2 2 and DS...

Page 203: ...igure You can see the 3 BS buttons and 3 seven segment displays and DIP switches Operate the switches and BS buttons with an insulated stick such as a closed ballpoint pen to avoid touching of live pa...

Page 204: ...tions of the BS button switches which are located on the main PCB A1P Turn ON the power supply of the outdoor unit and all indoor units When the communication between indoor units and outdoor unit s i...

Page 205: ...of parameter 1 10 to know how many indoor units are connected to the system A B C in this case defined as A 1 B 10 C the value we want to know monitor Make sure the segment indication is displayed in...

Page 206: ...se defined as A 2 B 10 C the value we want to know change Make sure the segment indication is as during normal operation default situation when shipped from factory Press the MODE BS1 button for over...

Page 207: ...nection of the optional PC configurator cable to the outdoor unit has to be done on A1P Connect the 999482P3 cable to the 5 pin blue connector X27A Caution Works executed on the outdoor unit are best...

Page 208: ...g under low noise restrictions 0 unit is currently not operating under low noise restrictions Night time low noise operation reduces the sound generated by the unit compared to nominal operating condi...

Page 209: ...he 2nd last error code 1 19 shows the 3rd last error code When the latest error codes were reset by accident on an indoor unit user interface they can be checked again through this monitoring settings...

Page 210: ...tting Used to make setting of targeted condensing temperature for heating operation 2 0 9 Auto 38 46 C 100 4 114 8 F 0 41 C 105 8 F 1 43 C 109 4 F 3 46 C 114 8 F 6 12 External low noise setting demand...

Page 211: ...ntrol signal is input 2 3 1 Level 1 40 1 Level 2 50 2 Level 3 55 3 32 Normal demand setting Used to set permanent demand 1 or 2 control without inputting any external signal 2 3 2 OFF 0 Demand 1 2 30...

Page 212: ...is not applicable to multi Branch Selector unit 2 4 5 Low ambient cooling not available 0 Low ambient cooling available 1 47 Te setting Heat recovery operation Used to make setting of targeted evapor...

Page 213: ...edium fan speed 1 30 minutes OFF 1 minute ON with high fan speed 2 90 Indoor unit without power Multi tenant function setting 2 9 0 Invalid 0 Valid 1 92 Te target temperature upper limit Used to make...

Page 214: ...ton Setting does not return to factory setting when exit mode 2 To cancel the function change setting manually to factory setting Once function is activated t01 appears To stop current function press...

Page 215: ...tion when outdoor units are connected in multiple system combination a Change 2 0 to 0 1 or 2 in function of required functionality 2 2 Low noise demand address Address for low noise demand operation...

Page 216: ...ional external control adaptor DTA104A61 62 is installed Default value 0 To activate this function change 2 12 to 1 2 13 AIRNET address When an AIRNET system will be used outdoor unit needs an AIRNET...

Page 217: ...button is not pressed the system will remain in refrigerant recovery vacuuming mode 2 22 Automatic night time low noise setting and level during night time By changing this setting you can activate th...

Page 218: ...er checker module All 3 phases and neutral are available and Inverter PCB control is active Check if the green LED HAP on the inverter PCBs are blinking normal approx 1 second If LEDs are OFF need to...

Page 219: ...note 6 sec 3 sec 3 sec 30 sec Check 4 Check 5 Check 1 AC power input terminal L1B L2B L3B at REYQ72 120XATJU 208 230 V unbalance maximum 2 terminal L1D L2D L3D at REYQ144 168XATJU 208 230 V unbalance...

Page 220: ...external signal is sent to the unit this setting defines the level power consumption limitation that will be applied for step 2 The level is according to the table Default value 1 Change 2 31 to 1 2...

Page 221: ...on a higher position than outdoor units and the height difference between the highest indoor unit and the outdoor unit exceeds 40 m 130 ft the setting 2 35 should be changed to 0 Value 2 32 Restrictio...

Page 222: ...e 0 Compressor operation enabled Field setting Set 3 Slave 2 module is disabled permanently Combination table setting 2 38 2 39 and 2 40 2 42 Outdoor fan noise countermeasure Change fans rotational sp...

Page 223: ...ster F1F2 Ind terminals should be connected to indoor units 2 forced Slave 1 only Q1Q2 terminals should be wired to Master module 3 forced Slave 2 only Q1Q2 terminals should be wired to Master module...

Page 224: ...me indoor units are temporarily without power supply Field setting 2 It is possible to operate system with U4 warning when some indoor units are temporarily without power supply Following conditions n...

Page 225: ...limit Default value 1 If Auto Te then use this setting to address different load profiles If the frequent operation is at lower system load then use a higher setting under 2 92 Note In high humid area...

Page 226: ...um allowable temperature Item Description Min Max Increments Auxiliary heater allowable temperature Below this temperature auxiliary heater can be energized based on the indoor temperature condition 0...

Page 227: ...5 F 10 F default 15 F Value 2 16 Auxiliary heater 0 default OFF 1 ON Value 2 37 Controlling mode 0 default OFF 1 Mode 1 2 Mode 2 3 Mode 3 4 Mode 4 5 Mode 5 6 Mode 6 Type Description Actions Field set...

Page 228: ...ut temperature When heat pump lockout mode has been set the auto backup function will automatically be set This will allow the auxiliary or secondary heat source to be automatically energized in the e...

Page 229: ...pressor surface temperature thermistor R14T abnormality J3 Accumulator inlet thermistor R10T abnormality J5 Heat exchanging deicer thermistor R11T and heat exchanger gas pipe thermistor R8T R9T abnorm...

Page 230: ...1P ON OFF 1 2 3 4 F2 B C A F2 F1 F1 F2 F1 Outdoor unit TOIN DUNIT TOOUT DUNIT F1 F2 F1 F2 F1 F2 F1 F2 IN D OUT D BS REMOTE CONTROLLER Branch Selector unit A F1 F2 F1 F2 IN D OUT D BS Branch Selector u...

Page 231: ...al operation mode B When night time low noise operation is carried out automatically External control adaptor for outdoor unit is not required 1 While in setting mode 2 select a night time low noise o...

Page 232: ...eration level setting Factory setting is OFF Night time Operation sound level set with night time low noise operation setting 6 00 AM 8 00 PM 10 00 PM 12 00 AM 7 00 AM 8 00 AM Set with night time low...

Page 233: ...figure above 2 While in setting mode 2 set the item 2 12 External low noise or demand setting to ON 3 If necessary while in setting mode 2 select a demand 1 level for the item 2 30 Description of set...

Page 234: ...or for outdoor unit as shown below To other external control adaptor for outdoor unit Outdoor wiring indicated by dotted line 1 2 3 C Demand Low noise Power consumption Rated 40 Forced thermostat OFF...

Page 235: ...match the LED display with the Setting No you want 3 Press the RETURN BS3 button once and the present setting content is displayed Press the SET BS2 button several times and match the LED display with...

Page 236: ...ts Cautions or warnings Are all units securely installed z Dangerous for turning over during storm z Possible damage to pipe connections Is the ground wire installed according to the applicable local...

Page 237: ...stopped if the compressor is running at this time After that the gas furnace will run in tens of seconds Tens of minutes might well be needed to stop compressor if the outdoor unit is particular opera...

Page 238: ...4 3 11 Low Indoor Airflow 265 3 12 Swing Flap Motor Abnormality 266 3 13 Power Supply Voltage Abnormality 268 3 14 Blower Motor Stops for Over Under Voltage 269 3 15 Electronic Expansion Valve Coil Ab...

Page 239: ...Overcurrent 327 3 55 Compressor Startup Abnormality 329 3 56 Transmission Error between Inverter PCB and Outdoor Unit Main PCB 331 3 57 Power Supply Voltage Imbalance 333 3 58 Reactor Surface Thermist...

Page 240: ...73 4 Check 374 4 1 High Pressure Check 374 4 2 Low Pressure Check 375 4 3 Superheat Operation Check 376 4 4 Power Transistor Check 377 4 5 Refrigerant Overcharge Check 382 4 6 Refrigerant Shortage Che...

Page 241: ...ying in a room The model must be selected to match the air conditioning load In cooling Too many heat sources e g OA equipment located in a room 4 The system does not operate The system stops and imme...

Page 242: ...cording to the setting Even pressing the airflow rate setting button makes no changes in the airflow rate In heating operation when the room temperature reaches the set degree the outdoor unit will st...

Page 243: ...operating sounds changes The reason is that the compressor changes the operating frequency Normal operation 12 Dust comes out from the system Dust comes out from the system when it restarts after the...

Page 244: ...ration while the compressor is during operation or under stop control or right after defrost IN or defrost OUT Wait until the operation becomes stable 2 Operation does not switch from heat pump to gas...

Page 245: ...range P0 P3 8 When using airflow block the airflow block will be routinely lifted become horizontal during heating operation No defect Set louver to horizontal P0 during thermostat OFF 9 Although peo...

Page 246: ...ing 2 Taking corrective action Screen Operation lamp Operation Status Display Abnormal shutdown The system stops operating The operation lamp green starts to blink The message Error Push Menu button w...

Page 247: ...operation in step 4 until you hear a continuous beep This continuous beep indicates that the error code is confirmed Continuous beep There is no abnormality 3 Press MODE button The left 0 upper digit...

Page 248: ...eturns to the normal mode 0 1 2 3 4 5 6 7 8 9 A H C J E F UP button DOWN button If no button is pressed for 1 minute equipment returns to normal mode 3 Press MODE button The upper digit blinks Normal...

Page 249: ...error 276 Climate Talk communication error 277 C4 l Heat exchanger liquid pipe thermistor abnormality 278 C5 l Heat exchanger gas pipe thermistor abnormality 278 C6 l Combination error between indoor...

Page 250: ...pressor overcurrent 327 L9 l Compressor startup abnormality 329 LC l Transmission error between inverter PCB and outdoor unit main PCB 331 P1 l Power supply voltage imbalance 333 P3 l Reactor surface...

Page 251: ...he brush unit S shaped pipe and dust box Furthermore check for any stains of the light receiving and emitting parts of the infrared unit AH 06 Air filter rotation error when the self cleaning decorati...

Page 252: ...al and make a diagnosis of the relevant unit based on the Error code shown to the left E3 03 E3 04 Activation of high pressure switch S1PH Slave 1 E3 05 E3 06 Activation of high pressure switch S1PH S...

Page 253: ...9 Fan motor M1F IPM error Master E7 10 Fan motor M2F IPM error Master E7 13 Fan motor M1F lock Slave 1 E7 14 Fan motor M2F lock Slave 1 E7 17 Fan motor M1F momentary overcurrent Slave 1 E7 18 Fan moto...

Page 254: ...ronic expansion valve coil Y1E Slave 1 E9 22 Defective electronic expansion valve coil Y1E Slave 2 E9 23 Defective electronic expansion valve coil Y2E Master E9 24 Defective electronic expansion valve...

Page 255: ...ansion valve of the relevant unit based on the Error code shown to the left F9 02 Electronic expansion valve error suction pipe F9 05 Electronic expansion valve error subcooling H3 02 Harness abnormal...

Page 256: ...ve compressor body thermistor R14T Open Slave 1 J3 50 Defective compressor body thermistor R14T Short Slave 1 J3 51 Defective compressor body thermistor R14T Open Slave 2 J3 52 Defective compressor bo...

Page 257: ...e 1 J6 16 Error detection of heat exchanger gas upper thermistor R8T Slave 2 J6 17 Error detection of heat exchanger gas lower thermistor R9T Master J6 18 Error detection of heat exchanger gas lower t...

Page 258: ...or detection of subcooling heat exchanger gas pipe thermistor R6T Slave 1 J9 10 Error detection of subcooling heat exchanger gas pipe thermistor R6T Slave 2 J9 11 Receiver gas purge thermistor R13T Ma...

Page 259: ...r 2 Compressor M1C Slave 2 L1 14 IGBT error Compressor M1C Slave 2 L1 15 Jumper settings error Slave 1 L1 16 Jumper settings error Slave 2 L1 21 DIP switch settings error Master L1 26 DIP switch setti...

Page 260: ...ster L4 12 Inverter radiation fin temperature rise abnormality Master L4 13 Inverter radiation fin temperature rise abnormality Slave 1 L4 14 Inverter radiation fin temperature rise abnormality Slave...

Page 261: ...levant unit based on the Error code shown to the left P1 02 Inverter 1 power supply unbalanced voltage Slave 1 P1 03 Inverter 1 power supply unbalanced voltage Slave 2 P3 01 Defective reactor surface...

Page 262: ...ollow the U2 flowchart Open phase of power supply The wiring between power supply and inverter PCB may be disconnected Check that power supply is connected to terminal block terminal block is connecte...

Page 263: ...each manual and make a diagnosis of the relevant unit based on the Error code shown to the left UA 17 Connection of excessive indoor units Refer to the UA flowchart of each manual and make a diagnosis...

Page 264: ...Causes Activation of external protection device Improper field setting Defective indoor unit control PCB Troubleshooting ON OFF input from outdoor mode No 12 first code No 1 has been set to external p...

Page 265: ...n 24 VAC power is not supplied to TH2 and TR2 terminals FXTQ TA or R and C terminals CXTQ TA on the indoor unit PCB Troubleshooting Fuse F1U is blown 24 VAC power is supplied to TH2 and TR2 terminals...

Page 266: ...atile memory Maintains memory contents even when the power supply is turned OFF Supposed Causes Defective indoor unit control PCB External factor Noise etc Troubleshooting Turn the power supply OFF th...

Page 267: ...ctors or parts may be damaged Replace the float switch S1L Modify the float switch s connection and turn ON again Connect the drain pump and turn ON again Connect either a short circuit connector or f...

Page 268: ...n the power supply is reset for the indoor unit The voltage of drain pump terminals 2 is in accordance to the criteria 3 within 5 minutes of resetting the power supply A Model 1 Float switch S1L short...

Page 269: ...t increase Supposed Causes Broken wires in short circuit of or disconnection of connectors from the fan motor harness Defective fan motor Broken wires or defective insulation Abnormal signal output fr...

Page 270: ...atter around the fan YES Is the resistance between the pins more than the judgment criteria Disconnect the connector from the fan motor and then make measurement of resistance between pins Turn OFF th...

Page 271: ...upposed Causes Defective indoor fan motor Broken wires Defective contact Troubleshooting Refer to page 390 NO YES YES Is the X4A connector securely connected NO Is the power of 12 VDC supplied between...

Page 272: ...position signal of the fan motor Error from the current flow on the fan PCB when the fan motor starting operation Error Decision Conditions An overcurrent flows The rotation speed is less than a certa...

Page 273: ...ce the indoor fan motor M1F YES NO YES The fan can be moved lightly by hand after the fan motor connector of the fan PCB A2P is removed Replace the indoor fan motor M1F NO YES NO YES There is a foreig...

Page 274: ...ls are short circuited Replace the indoor fan motor M1F YES Replace the fan PCB A2P YES NO The resistance among U V and W are unbalanced or short circuited NO The HAP lamp of the indoor unit control P...

Page 275: ...tion Supposed Causes Defective power supply for the indoor fan motor Clogged drain piping Activation of the indoor unit safety device Defective contact in the fan wiring circuit Troubleshooting Proper...

Page 276: ...ntervals using the feedback of the fan motor Performs rotation sampling 720 times takes approximately one hour and if the rotation speed falls below 50 rpm over 100 times it is deemed abnormal operati...

Page 277: ...tion shows Motor Lost Control or Current Trip status it will be deemed a MOTOR TRIP abnormal operation The system stops operating Error Reset Conditions If the indoor unit stops receiving abnormal inf...

Page 278: ...ng this the rotation command is stopped the 5 second interval check is halted but the counted number will be kept When the rotation command is restarted the checks will resume Error Reset Conditions D...

Page 279: ...d with a swing flap function The swing motor works when the power supply is turned OFF and then restart The relay cable is short circuited or disconnected Caution Be sure to turn off the power switch...

Page 280: ...XAQ P X36A M1S Replace the power supply relay cable Replace the defective swing motor 2 Take the flap cam mechanism apart reassemble and turn ON again YES NO YES NO The relay cable has no continuity W...

Page 281: ...tive wiring Instantaneous power failure others Troubleshooting Check the condition of the power supply 1 Check if power supply voltage is 208 230 V 10 2 Check if there is power open phase or defective...

Page 282: ...Decision Conditions If the information shows Over Under Voltage status it will be deemed a MOTOR VOLTS abnormal operation Error Reset Conditions If the information is normal the error will be cleared...

Page 283: ...n air R2T temperature of liquid pipe of heat exchanger Supposed Causes Defective electronic expansion valve coil Defective indoor unit control PCB Defective relay cables Troubleshooting Refer to page...

Page 284: ...de of the gas furnace Refer to the gas furnace manual for details Troubleshooting Note 1 In some cases of gas furnace abnormality regarding gas combustion once an error occurs display indication of AA...

Page 285: ...mpressor is not in operation Error code is displayed but the system operates continuously Supposed Causes Humidifier unit optional accessory leaking Defective drain pipe upward slope etc Defective ind...

Page 286: ...apacity code is not saved to the PCB and the capacity setting adaptor is not connected When a capacity that does not exist for that unit is set Supposed Causes The capacity setting adaptor was not ins...

Page 287: ...B A1P Defective fan PCB A2P External factor such as instantaneous power failure Troubleshooting Under above field setting mode second code No is 01 NO NO YES Replace the fan PCB A2P YES YES Is the con...

Page 288: ...ove the connector X70A of indoor unit control PCB A1P 2 Short circuit X70A 3 After turning ON the power check below numbers under field setting from remote controller Confirmation Second code No at th...

Page 289: ...sage and determined as such by the indoor unit the indoor unit will execute a retry If everything fails for 5 seconds it is deemed to be a transmission abnormality Error Reset Conditions If the indoor...

Page 290: ...ed Causes Disconnection of the communication wire between the CXTQ TA and the gas furnace Power supply to the gas furnace is cut Troubleshooting NO Caution Be sure to turn off the power switch before...

Page 291: ...Q TA and CXTQ TA models Refer to page 385 Is the thermistor normal Caution Be sure to turn off the power switch before connecting or disconnecting connectors or parts may be damaged Remove the thermis...

Page 292: ...pacity setting adaptor Field setting error Troubleshooting NO Caution Be sure to turn off the power switch before connecting or disconnecting connectors or parts may be damaged Was indoor unit control...

Page 293: ...ion on the manufacturer ID and output of the fan motor when initializing the fan motor If those figures are not the values recognized by the indoor unit it will be deemed abnormal operation If deemed...

Page 294: ...ed among the periodic control status information Error is issued when the information shows abnormality Error Decision Conditions If the parameter information shows abnormality it will be deemed abnor...

Page 295: ...ing Note 1 Connector and indoor unit control PCB Refer to page 385 Is the optional remote sensor is installed Field setting 10 20 2 is set to 03 Connector is connected to the indoor unit control PCB 1...

Page 296: ...the check mode 2 To display the code the INSPECTION TEST button of the remote controller must be pressed and held in the normal mode 3 If CC is displayed even after replacing the humidity sensor PCB a...

Page 297: ...sor connector CE 01 Defective infrared floor sensor Temperature compensation circuit disconnection CE 02 Defective infrared floor sensor Temperature compensation short circuit CE 03 Defective infrared...

Page 298: ...nd address data No 22 25 Connect the connector correctly Connect the connector correctly NO YES YES Is the connection of the connector on infrared presence sensor PCB A4P and the connector 1 normal NO...

Page 299: ...r and address data No 26 Connect the connector correctly Connect the connector correctly NO YES YES Is the connection of the connector on infrared floor sensor PCB A3P and the connector 1 normal NO YE...

Page 300: ...sensor output refer to sensor and address data No 26 Is the connection of the sensor connector normal Displays by the above verification method Displays CE 03 again or for sensor and address data Repl...

Page 301: ...sensor output refer to sensor and address data No 26 Is the connection of the sensor connector normal Displays by the above verification method Displays CE 04 again or for sensor and address data Repl...

Page 302: ...ing Note 1 How to delete the history of error codes Press the ON OFF button for 4 seconds or more while the error code is displayed in the inspection mode Clear the error code history 1 While in inspe...

Page 303: ...ween the indoor unit and the outdoor unit are not normal Supposed Causes Defective outdoor unit main PCB A1P Defective connection communication line between indoor and outdoor units Troubleshooting Re...

Page 304: ...YES NO NO Is wiring passing through the current sensor T1A proper Insulation failure of compressor Insulation failure of component except compressor Pass proper wiring through the sensor Turn OFF the...

Page 305: ...ection Defective outdoor unit main PCB Troubleshooting Sub code 06 08 NO YES YES Is the system reset to normal Is X101A connected The error is considered to have resulted from external factors other t...

Page 306: ...pressure sensor Troubleshooting NO YES YES Replace the high pressure switch S1PH Remedy defective points Replace the high pressure sensor S1NPH YES Are the above 3 points OK Does the error E3 recur N...

Page 307: ...page 388 Replace the outdoor unit main PCB A1P NO YES Check if the high pressure value and the actual value measured by pressure sensor are the same The high pressure sensor is normal and outdoor unit...

Page 308: ...rt it to pressure Refer to page 375 Refer to page 388 YES NO NO YES Are the characteristics of the low pressure sensor normal 1 NO YES 1 Mount a pressure gauge on the low pressure service port 2 Reset...

Page 309: ...rential pressure 0 5 MPa 72 5 psi or more UVW connection error Defective inverter PCB Stop valve is not opened Troubleshooting Make proper wire connections Make proper wire connections NO NO NO NO YES...

Page 310: ...it work Pressure equalization failure may have occurred Check for the refrigerant system YES YES NO Replace the inverter PCB REYQ XATJU A3P REYQ XAYDU A3P REYQ XAYCU A4P NO The error recurs at startup...

Page 311: ...m will return an alarm if there is any operational unit other than that applicable to E6 or determine to be error if not Supposed Causes Defective compressor Defective high pressure sensor Defective l...

Page 312: ...nector block to convert it to pressure Refer to page 377 Refer to page 388 NO YES Are the high pressure and low pressure checked by the service checker the same as the actual measured values of the hi...

Page 313: ...and the PCB Fan does not rotate due to foreign matter caught in it Clearing condition fan motor performs normal operation for a period of 5 minutes Troubleshooting There are foreign matter around the...

Page 314: ...stance between U V W phases of the fan motor power supply cable has lost balance or short circuit is caused between U V W phases Check for the connector power supply cable of the fan motor NO CHECK 16...

Page 315: ...ere are foreign matter around the applicable fan Remove the foreign matter YES Check for the connections of all fan motor connectors 1 NO Turn OFF the power supply and then wait for a period of 10 min...

Page 316: ...lace the relevant fan motor M1F M2F YES NO YES Resistance between U V W phases of the fan motor power supply cable has lost balance or short circuit is caused between U V W phases Check for the connec...

Page 317: ...Return to normal Investigate external causes other than failures e g noise YES NO Connector for the electronic expansion valve of the outdoor unit main PCB A1P is connected Properly and securely conne...

Page 318: ...ormally high i e 135 C 275 F or more When discharge pipe temperature sharply rises remains at 120 C 248 F or more for a period of consecutive 10 minutes When compressor surface temperature becomes abn...

Page 319: ...ction with the outdoor unit main PCB is also normal The discharge pipe temperature or compressor surface temperature has really become high CHECK 3 Eliminate the causes of superheat operation Service...

Page 320: ...Error Decision Conditions When the following wet state continues for a period of 90 minutes an alert is issued An error is defined for 120 minutes Wet state in outdoor units When the following wet sta...

Page 321: ...Replace the indoor unit electronic expansion valve Replace the relevant thermistor YES YES Caution Be sure to turn off the power switch before connecting or disconnecting connectors or parts may be da...

Page 322: ...igerant overcharged Disconnection of outdoor air thermistor Disconnection of heat exchanger deicer thermistor Disconnection of liquid pipe temperature thermistor Troubleshooting Refer to page 385 Chec...

Page 323: ...ve subject to error code F9 Refer to page 393 While in monitor mode identify an electronic expansion valve subject to the Error Code F9 1 Caution Be sure to turn off the power switch before connecting...

Page 324: ...r is not running Supposed Causes Defective connection of jumpers between PCB Defective outdoor unit main PCB A1P Defective inverter PCB Troubleshooting Check for the transmission conditions of the fol...

Page 325: ...r PCB A3P Troubleshooting Refer to page 391 Properly connect the connector NO YES Replace the fan motor M1F M2F NO YES Turn OFF the power supply Check for fan motor applicable to the error code H7 whi...

Page 326: ...motor M1F M2F NO YES Check for fan PCB applicable to the error code H7 while in monitor mode H7 21 23 25 Fan PCB A6P Master Slave 1 Slave 2 H7 22 24 26 Fan PCB A5P Master Slave 1 Slave 2 Replace the f...

Page 327: ...ing disconnection or short circuit in it Supposed Causes Defective connection of thermistor Defective thermistor Defective outdoor unit main PCB Troubleshooting Thermistor is connected to the connecto...

Page 328: ...oup connector Suction pipe thermistor R10T X29A Group connector J6 Heat exchanger deicer thermistor R11T X15A Group connector Heat exchanger gas pipe thermistor R8T R9T X29A Group connector J7 Receive...

Page 329: ...388 Are the characteristics of the high pressure sensor normal Make a comparison between voltage characteristics and gauge pressure Replace the high pressure sensor S1NPH Replace the outdoor unit main...

Page 330: ...8 Are the characteristics of the low pressure sensor normal Make a comparison between voltage characteristics and gauge pressure Replace the low pressure sensor S1NPL Replace the outdoor unit main PCB...

Page 331: ...cted during the output of waveform before compressor startup Detect according to current value detected with the current sensor during synchronous operation for startup Error Decision Conditions When...

Page 332: ...ternal factors other than failures e g external noise or thunder YES Replace the compressor and the inverter PCB together 1 Replace the inverter PCB 1 NO NO YES Replace the inverter PCB 1 and the fan...

Page 333: ...etection circuit on the outdoor unit main PCB Supposed Causes Defective wiring Defective outdoor unit main PCB Troubleshooting Error recurs after turning OFF the power and ON again Any disconnection o...

Page 334: ...ctor surface thermistor is more than the specified temperature Supposed Causes Defective connection of harness Defective reactor surface thermistor Defective inverter PCB Troubleshooting Is reactor ha...

Page 335: ...l outdoor unit models Method of Error Detection Detect temperature of power module of the inverter PCB Error Decision Conditions Thermistor located inside the power module of the inverter PCB for comp...

Page 336: ...YCU A4P Connect to power supply within 10 of the rated voltage NO YES Rectify troubles Normal Power OFF NO NO Check for the cooling conditions of cooling tube used to cool the inverter 1 Is the coolin...

Page 337: ...xed with screws U0 error Defective fan PCB High outdoor air temperature Troubleshooting Continue operation Field factor Radiation fin temperature may have risen due to high outdoor air temperature Tur...

Page 338: ...inverter PCB Troubleshooting Power OFF Open the stop valve YES NO Is the stop valve open YES YES Are wiring and wire connections to the relevant compressor normal Rectify the wiring and wire connectio...

Page 339: ...e operation Replace the compressor NO YES Replace the inverter PCB YES Restarting the system results in the recurrence of the error Continue operation The error could have resulted from causes such as...

Page 340: ...age Troubleshooting Power OFF Open the stop valve YES NO Is the stop valve open YES YES Are wiring and wire connections to the relevant compressor normal Rectify the wiring and wire connections NO Cau...

Page 341: ...Connect to power supply within 10 of the rated voltage NO NO Pressure equalization failure Check the refrigerant system Power supply voltage falls within 10 of the rated voltage YES YES Replace the in...

Page 342: ...then restart operation NO Are the leads of the compressor disconnected Connect the leads of the compressor YES Is the insulation resistance of the relevant compressor 100 k or more Solve the refrigera...

Page 343: ...XAYCU A4P NO YES NO There is wiring disconnection in the compressor Replace the compressor YES Is the insulation resistance of the relevant compressor 100 k or more Refrigerant is stagnated The unit i...

Page 344: ...nit main PCB transmission block Defective noise filter compressor or fan motor External factors e g noise Failure of inverter PCB or fan PCB Troubleshooting Does the inverter PCB part No match that of...

Page 345: ...on the outdoor unit main PCB A1P is blinking Properly connect the connector NO YES Is the connector between the outdoor unit main PCB and the sub PCB securely connected Properly connect the connector...

Page 346: ...lance through PCB Error Decision Conditions When power supply voltage imbalance exceeds approximately 12 V Error is not decided while the unit operation is continued P1 will be displayed by pressing t...

Page 347: ...tdown or loose contact of magnetic relay 3 Wiring disconnection in or loose contact of noise filter Replace the inverter PCB REYQ XATJU A3P REYQ XAYDU A3P REYQ XAYCU A4P YES Explanation to users Use t...

Page 348: ...auses wiring disconnection or short circuit in it Supposed Causes Defective connection of thermistor Defective reactor surface thermistor Defective inverter PCB Troubleshooting Make measurement of res...

Page 349: ...ed P4 will be displayed by pressing the inspection button Supposed Causes Defective radiation fin temperature thermistor Defective inverter PCB Defective compressor Defective fan motor Troubleshooting...

Page 350: ...nt to open or short circuit Supposed Causes Defective fan PCB Defective fan motor Troubleshooting The insulation resistance of the relevant fan motor is not more than 1 M Turn ON the power supply Does...

Page 351: ...leshooting Does the inverter PCB part No match that of the spare parts list Does the fan PCB part No match that of the spare parts list Has the DIP switch setting been made properly to replace the out...

Page 352: ...ue by using pressure gauge in operation 2 Compare the actual measurement value by pressure sensor with the value by the pressure gauge To gain actual measurement value by pressure sensor measure the v...

Page 353: ...se phase or T phase is open phase Supposed Causes Power supply reverse phase T phase open phase Defective outdoor unit main PCB A1P Troubleshooting There is an open phase at the power supply T phase t...

Page 354: ...n PCB A1P Troubleshooting There is an open phase at the power supply T phase terminal section X1M of the outdoor unit Operation is normal if one phase of power supply line phase is replaced Faulty wir...

Page 355: ...Open phase Defective inverter PCB Defective outdoor unit main PCB Defective compressor Defective main circuit wiring Defective fan motor Defective connection of signal cable Troubleshooting There are...

Page 356: ...ly damaged the compressor and the fan motor M1F M2F may have been damaged Replace the inverter PCB If the inverter PCB gets severely damaged check for the compressor Continue operation The error could...

Page 357: ...de and then go to the following Conduct the test operation The test operation has not been conducted U3 03 Check for the refrigerant piping and then conduct the test operation U3 04 Conduct the test o...

Page 358: ...computer checks if transmission between indoor and outdoor units is normal Error Decision Conditions Transmission is not carried out normally for a certain amount of time Supposed Causes Open phase in...

Page 359: ...LINK SEG1 SEG2 SEG3 1 2 Correct the voltage Replace the fuse Press and hold the RETURN BS3 button on the outdoor unit main PCB for a period of 5 seconds or more YES NO YES YES Replace the indoor unit...

Page 360: ...CB 2 Test operation was interrupted by the MODE BS1 button YES Check all indoor error indication NO Operate all indoor units YES Do all units display U9 Carry out the diagnosis again after a lapse of...

Page 361: ...etting Control by 2 remote controllers Main Sub setting of both remote controllers is set to Main All indoor unit control PCB microcomputer normal monitors blinking Resets normally when power supply i...

Page 362: ...ions When transmission is not carried out normally for a certain amount of time Supposed Causes Connection error of transmission wirings between outdoor unit and external control adaptor for outdoor u...

Page 363: ...or is mounted Error code Sub code Error code Sub code Error code Sub code Error code Sub code Error code Sub code Error code Sub code Error code Sub code Error code Sub code Go to Diagnosis Flowchart...

Page 364: ...r unit Diagnosis Flowchart 1 Supply power to the outdoor unit Is power supplied to the outdoor unit Is the normal operation monitor LED on the outdoor unit main PCB blinking Is the normal operation mo...

Page 365: ...error recur when setting Cool Heat selection for the external control adaptor for outdoor unit to IND NO NO NO NO NO NO NO NO YES YES YES YES YES YES YES YES Replace the outdoor unit main PCB A1P Repl...

Page 366: ...sion wirings to multi slave 1 have caused wiring disconnection in them or are being disconnected Modify the outdoor unit multi transmission wirings and then reset the power supply Replace the outdoor...

Page 367: ...eplace the outdoor unit main PCB A1P Replace the outdoor unit main PCB A1P Rectify the error in the connection of transmission wirings and then reset the power supply One of outdoor unit multi transmi...

Page 368: ...en main and sub remote controller Connection between sub remote controllers Defective remote controller PCB Troubleshooting Refer to page 90 for Main Sub setting Main Sub setting of both remote contro...

Page 369: ...Defective electronic expansion valve of other indoor unit Defective indoor unit control PCB of other indoor unit Improper connection of transmission wiring between indoor and outdoor unit Multi tenan...

Page 370: ...indoor Branch Selector and outdoor units The number of indoor units is out of the allowable range Signal transmission between indoor Branch Selector and outdoor units is abnormal Error Decision Condi...

Page 371: ...t Error code Sub code UA 28 Go to Diagnosis Flowchart 9 DIP switch setting error of multi Branch Selector unit Error code Sub code UA 53 Ensure the sub code or the lamp display of monitor mode and the...

Page 372: ...P Refer to Incorrect electric heater capacity setting troubleshooting 1 Excess indoor units are connected Check for the connection to connect the proper number of indoor units NO Diagnosis Flowchart 1...

Page 373: ...PCB made Diagnosis Flowchart 4 NO Correct the wirings If no defect is found in the wirings replace the outdoor unit main PCB A1P YES NO YES NO YES Error in the system design Replace with a single out...

Page 374: ...Correct the wiring Diagnosis Flowchart 5 Is the wiring between outdoor unit and Branch Selector unit correct Error code Sub code UA 25 YES Replace the relevant Branch Selector unit PCB NO Correct the...

Page 375: ...eplace the indoor unit PCB or the Branch Selector unit PCB Is the Branch Selector unit PCB correct Error code Sub code UA 27 YES Replace the outdoor unit main PCB A1P NO Connect the correct model Diag...

Page 376: ...lector unit correct the DIP switch settings Turn ON the power supply of the multi Branch Selector unit and press the RETURN BS3 button on the outdoor unit main PCB A1P for 5 seconds or more Diagnosis...

Page 377: ...e and other indoor units other than CXTQ TA are connected Error Decision Conditions Check that two or more CXTQ TA gas furnace and other indoor units other than CXTQ TA are not connected Operation Aft...

Page 378: ...pplicable value Operation After Error Codes Decided The error code UA 17 is displayed on the remote controller Indoor units can operate continuously Incorrect setting is kept Even if the ON condition...

Page 379: ...its own on any other indoor unit Error Decision Conditions The error decision is made as soon as the abnormality aforementioned is detected Supposed Causes Address duplication of centralized controll...

Page 380: ...of central control group No be made in one and the same refrigerant system Has the setting of central control group No been made with the indoor unit on which the UE occurred Can the setting of centr...

Page 381: ...ralized controller Centralized controller Normal OK Correct the wiring NG A NO Correct the wiring NG YES YES Disconnect the transmission wiring of the main centralized controller and then check the vo...

Page 382: ...wiring between indoor outdoor units and outdoor outdoor units Failure to execute check operation Defective indoor unit control PCB Stop valve is not opened Troubleshooting Is indoor outdoor and outdoo...

Page 383: ...tdoor unit models Method of Error Detection Detect an indoor unit with no auto address setting Error Decision Conditions The error decision is made as soon as the abnormality aforementioned is detecte...

Page 384: ...eplaced Does an error occur even after 12 minutes elapses from the time when electricity is introduced to indoor and outdoor units NO Replace the indoor unit control PCB Does a UH error occur for all...

Page 385: ...e gas furnace is turned ON after a certain period of time has been elapsed after the power of the CXTQ TA was turned ON Disconnection of the communication wire between the CXTQ TA and the gas furnace...

Page 386: ...mmunication with the gas furnace completes and after elapsing 4 minutes after the power is turned ON Two or more gas furnaces are detected Any unit other than the gas furnace is detected Supposed Caus...

Page 387: ...condensablegas Decreased airflow rate Decreased fan output Defective fan motor Defective outdoor unit main PCB Including capacity setting High airflow passage resistance Dirty filter Obstacle Excessi...

Page 388: ...ping length Bent or crashed pipe Cloggingofforeignmaterials Stop valve closed Less circulation quantity of refrigerant Degradation in evaporating capacity Refrigerant shortage Moisture choke Dirty eva...

Page 389: ...ntrol Superheat due to shaft damage Superheat due to defective compressor Defective indoor unit electronic expansion valve Defective control Defective control Defective outdoor unit electronic expansi...

Page 390: ...ent mode in the x1 k range When using the digital type of multimeter make measurement in diode check mode No Measuring point Judgment criteria Remarks No Measuring point Judgment criteria Remarks 1 P4...

Page 391: ...ent criteria Remarks 1 P31 U 2 30 k 1 P31 U 1 2 V or more Due to condenser charge and so on resistance measurement may require some time 2 P31 V 2 P31 V 3 P31 W 3 P31 W 4 U P31 15 k or more including...

Page 392: ...teria Remarks 1 P21 U 2 30 k 1 P21 U 1 2 V or more Due to condenser charge and so on resistance measurement may require some time 2 P21 V 2 P21 V 3 P21 W 3 P21 W 4 U P21 15 k or more including Due to...

Page 393: ...arks 1 P31 U 2 30 k 1 P31 U 1 2 V or more Due to condenser charge and so on resistance measurement may require some time 2 P31 V 2 P31 V 3 P31 W 3 P31 W 4 U P31 15 k or more including Due to condenser...

Page 394: ...ent criteria Remarks No Measuring point Judgment criteria Remarks 1 P31 U 2 30 k 1 P31 U 1 2 V or more Due to condenser charge and so on resistance measurement may require some time 2 P31 V 2 P31 V 3...

Page 395: ...e Low pressure Frequency High pressure gradually rises with increase in frequency Subcooling degree becomes higher Liquid connection pipe temperature lowers Low pressure rises due to decreased compres...

Page 396: ...minimum level Fan control is activated for high pressure protection under cooling control at low outdoor air temperature i e the fan is hunting at high pressure High pressure drops with decrease in c...

Page 397: ...4 6 psi or less for a period of 1 hour or more and then check to be sure that the vacuum gauge reading does not rise If the reading rises moisture may have remained in the system or refrigerant leakag...

Page 398: ...MQ MF Type B Type J Type J Thermistor Thermistor type R1T Outdoor air thermistor Type E R21T Discharge pipe thermistor Type H R3T Receiver inlet thermistor Type A R4T Heat exchanger liquid pipe upper...

Page 399: ...07 10 50 39 91 39 9149 39 97 15 59 31 44 31 4796 31 51 20 68 24 95 25 0060 25 02 25 77 19 94 20 0000 20 00 30 86 16 04 16 1008 16 10 35 95 12 99 13 0426 13 04 40 104 10 58 10 6281 10 63 45 113 8 669...

Page 400: ...160 2244 16 1860 35 95 13 0683 130 0697 13 1222 40 104 10 6490 106 1517 10 7042 45 113 8 7269 87 0725 8 7834 50 122 7 1905 71 7703 7 2479 55 131 5 9524 59 4735 6 0131 60 140 4 9536 49 5180 5 0144 65 1...

Page 401: ...0 0 5 0 0 5 0 5 0 0 5 1 1 5 2 2 5 3 3 5 4 VDC kg cm2 psi MPa PH PL PH MPa VH 0 5 PL MPa VL 0 5 PH High pressure MPa PL Low pressure MPa VH Output Voltage High Side VDC VL Output Voltage Low Side VDC...

Page 402: ...ng indoor outdoor unit transmission wiring for broken wires for checking the indoor outdoor unit transmission wiring of the Outdoor Unit C for broken wires Turn OFF the power supply to all equipment s...

Page 403: ...re is no short circuiting while connector or relay connector is disconnected CHECK 16 FXDQ M FXHQ M FXSQ54TA FXMQ15 54PB Remove the X1A connector from the fan PCB A2P and measure the resistance betwee...

Page 404: ...5 6 7 FG Vsp Vcc GND Vdc Measuring point 1 4 2 4 3 4 7 4 Criteria 1 1 1 1 Judgment criteria Measuring point 2 5 3 5 4 5 8 5 Criteria 1 1 1 1 Judgment criteria FG Vsp Vcc GND Vdc 1 White 2 Orange 3 Br...

Page 405: ...motor side connectors 5 core wire to check that the values are balanced within the range of 20 while connector or relay connector is disconnected Furthermore to use a multimeter for measurement conne...

Page 406: ...ype according to the connector wire color and measure the resistance Outdoor unit Y1E Y3E Y4E Y7E Y2E Y5E CHECK 18 Measuring points 1 6 2 6 3 6 4 6 120 180 35 55 White 1 Yellow 2 Orange 3 Blue 4 5 Red...

Page 407: ...riteria 35 55 Orange 1 Red 2 Yellow 3 Black 4 5 Gray 6 White 1 Yellow 2 Orange 3 Blue 4 Red 5 Brown 6 Measuring points 1 3 1 5 2 4 2 6 Judgment criteria 300 150 300 150 Orange White Yellow Red 1 2 5 B...

Page 408: ...371901E 395 Service Diagnosis Branch Selector unit EVH EVL Measuring points 1 6 2 6 3 6 4 6 Judgment criteria 120 180 2 4 White 1 2 Yellow 4 Blue 5 White 1 Yellow 2 Orange 3 Blue 4 5 Red 6 Red 6 Orang...

Page 409: ...cured to the housing Ensure bracket is not cracked or broken Emerson UltraCheck EZTM Diagnostic Tool The Emerson UltraCheck EZTM diagnostic tool may be used to diagnose the ECM motor HIGH VOLTAGE Disc...

Page 410: ...s 4 and 3 Voltage should be approximately half of the voltage measured in step 4 6 Measure voltage between pins 5 and 3 Voltage should be approximately half of the voltage measured in step 4 7 If no v...

Page 411: ...dular blower NOTE Motor contains capacitors that can hold a charge for several minutes after disconnecting power Wait 5 minutes after removing power to allow capacitors to discharge 2 Disconnect the m...

Page 412: ...death 1 Disconnect power to air handler or modular blower NOTE Motor contains capacitors that can hold a charge for several minutes after disconnecting power Wait 5 minutes after removing power to al...

Page 413: ...SiUS371901E Appendix 400 Part 7 Appendix 1 Wiring Diagrams 401 1 1 Outdoor Unit 401 1 2 Indoor Unit 406 1 3 Air Treatment Equipment 420 1 4 Branch Selector Unit 423...

Page 414: ...Wiring Diagrams SiUS371901E 401 Appendix 1 Wiring Diagrams 1 1 Outdoor Unit REYQ72 96 120XATJU 2D119205A...

Page 415: ...SiUS371901E Wiring Diagrams Appendix 402 REYQ144 168XATJU 2D119206A...

Page 416: ...Wiring Diagrams SiUS371901E 403 Appendix REYQ72 96 120XAYDU 2D119207B...

Page 417: ...SiUS371901E Wiring Diagrams Appendix 404 REYQ144 168XAYDU 2D119208B...

Page 418: ...Wiring Diagrams SiUS371901E 405 Appendix REYQ72 96 120 144 168XAYCU 2D119209A...

Page 419: ...SiUS371901E Wiring Diagrams Appendix 406 1 2 Indoor Unit FXFQ07 09 12 15 18 24 30 36 48TVJU 3D086460B...

Page 420: ...Wiring Diagrams SiUS371901E 407 Appendix BYCQ125BGW1 Self Cleaning Decoration Panel for FXFQ TVJU 3D076375A...

Page 421: ...SiUS371901E Wiring Diagrams Appendix 408 FXZQ05 07 09 12 15 18TAVJU 3D110443A...

Page 422: ...ENTRAL REMOTE CONTROLLER CONNECT IT TO THE UNIT IN ACCORDANCE WITH THE ATTACHED INSTALLATION MANUAL 3 IN CASE OF MAIN SUB CHANGEOVER SEE THE INSTALLATION MANUAL ATTACHED TO REMOTE CONTROLLER 4 SYMBOLS...

Page 423: ...SiUS371901E Wiring Diagrams Appendix 410 FXEQ07 09 12 15 18 24PVJU 3D098557A...

Page 424: ...NITOR GREEN MAGNETIC RELAY M1P MOTOR INDOOR FAN MOTOR DRAIN PUMP THERMAL PROTECTOR M1F EMBEDDED THERMISTOR AIR THERMISTOR COIL 1 THERMISTOR COIL 2 FLOAT SWITCH TRANSFORMER 208 230V 25V PHASE CONTROL C...

Page 425: ...SiUS371901E Wiring Diagrams Appendix 412 FXSQ05 07 09 12 15 18 24 30 36 48 54TAVJU C 3D110467C...

Page 426: ...Wiring Diagrams SiUS371901E 413 Appendix FXMQ07 09 12 15 18 24 30 36 48 54PBVJU 3D093209B...

Page 427: ...2 FIELD WIRING 3 IN CASE USING CENTRAL REMOTE CONTROLLER CONNECT IT TO THE UNIT IN ACCORDANCE WITH THE ATTACHED INSTALLATION MANUAL 4 WHEN CONNECTING THE INPUT WIRES FROM OUTSIDE FORCED OFF OR ON OFF...

Page 428: ...Wiring Diagrams SiUS371901E 415 Appendix FXHQ12 24 36MVJU 3D048116C...

Page 429: ...SiUS371901E Wiring Diagrams Appendix 416 FXAQ07 09 12 18 24PVJU C 3D075354D...

Page 430: ...CT IT TO THE UNIT IN ACCORDANCE WITH THE ATTACHED INSTALLATION MANUAL 4 WHEN CONNECTING THE INPUT WIRES FROM OUTSIDE FORCED OFF OR ON OFF CONTROL OPERATION CAN BE SELECTED BY REMOTE CONTROLLER IN DETA...

Page 431: ...VOLTAGE FIELD JUNCTION TERMINAL PLUG CONNECTION EQUIPMENT GND FIELD GROUND X1A X3A X38A BS1 X12A X13A HAP X8A INDOOR UNIT PCB THERMISTOR HEAT EXCHANGER 1 2 MPU MULTI TENANT OPTION EEV COIL M K1R K3R T...

Page 432: ...ON TERMINAL PLUG CONNECTION EQUIPMENT GND FIELD GROUND 0140D00002 A X3A X38A BS1 X12A X13A HAP X8A INDOOR UNIT PCB THERMISTOR HEAT EXCHANGER 1 2 MPU EEV COIL M K3R TB6 TB8 LEARN PS TB5 TB4 ACC OUT REL...

Page 433: ...SiUS371901E Wiring Diagrams Appendix 420 1 3 Air Treatment Equipment 1 3 1 Outdoor Air Processing Unit FXMQ48 72 96MFVJU 3D065426D...

Page 434: ...Wiring Diagrams SiUS371901E 421 Appendix 1 3 2 Energy Recovery Ventilator VAM Series VAM300 470 600GVJU 3D073269D...

Page 435: ...SiUS371901E Wiring Diagrams Appendix 422 VAM1200GVJU 3D073270D...

Page 436: ...Wiring Diagrams SiUS371901E 423 Appendix 1 4 Branch Selector Unit 1 4 1 Single Branch Selector Unit BSQ36 60 96TVJ 3D089521B...

Page 437: ...SiUS371901E Wiring Diagrams Appendix 424 1 4 2 Multi Branch Selector Unit BS4Q54TVJ 3D089123B...

Page 438: ...Wiring Diagrams SiUS371901E 425 Appendix BS6 8Q54TVJ 2D089122B...

Page 439: ...SiUS371901E Wiring Diagrams Appendix 426 BS10 12Q54TVJ 2D089121B...

Page 440: ...Revision History Month Year Version Revised contents 04 2019 SiUS371901E First edition...

Page 441: ...of unauthorized parts and accessories or improper installation of parts and accessories can result in water or refrigerant leakage electrical shock fire or explosion z Read the user s manual carefull...

Reviews: