


2 General safety precautions
Installation manual
4
EZESHP20 EZLSHP20AUAW1B
Exigo E1500 Trailer Refrigeration Unit
4P726857-1 – 2023.03
CAUTION
Working on or around the unit raises multiple risks. Use
adequate personal protective equipment as indicated when
installing, maintaining or servicing the system.
INFORMATION
The sound power level (according to 2000/14/CE) is less
than 96 dBA. It is recommended to wear ear protection
when in the vicinity of the working unit.
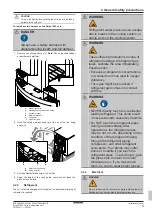
WARNING
The screws for fixing the upper grids and the engine belt
guard are captive. Do not replace the existing captive
screws with not-captive types.
WARNING
Tear apart and throw away plastic packaging bags so that
nobody, especially NOT children, can play with them.
Possible consequence:
suffocation.
WARNING
Make sure that the forklift, or any other lifting device used,
can bear the weight of the unit.
WARNING
The unit must be fully and correctly fastened to the cold
room wall before removing the safety lifting device. Do not
stand below the unit while fixing the unit to the cold room.
WARNING
If diesel leaks from the fuel system, it evaporates. These
vapors are irritating to eyes, respiratory system and skin
and can ignite if an open flame is in the area.
CAUTION
Diesel is a polluting substance. Any diesel leaking from the
fuel system may not be released in the environment.
WARNING
When the unit is operating, a magnetic field is generated.
This can disturb the functioning of cardiac devices like
pacemakers and defibrillators. People who have such
devices implanted must stay clear of the working unit when
the service doors are opened.
DANGER: RISK OF ELECTROCUTION
Do not wash the unit while the electric grid plug is
connected.
NOTICE
To clean the plate work:
▪ Do not use any cleaning agents or chemicals.
▪ Do not use pressurized water.
NOTICE
To clean the interior:
▪ Even if the main components of the device have a
sufficiently high IP rating, do not wash the device and
its electrical components and electrical boxes with
pressurized water.
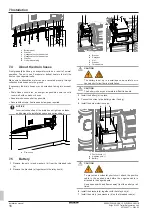
WARNING
Make sure that no people are left in the cold room before
you close the doors:
▪ Risk of suffocation. 12 m
3
must be left empty inside the
cold room.
▪ Risk of frostbite.
▪ Risk of freezing to death.
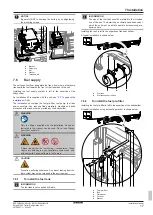
DANGER
Always use a safety harness when working at height.
CAUTION
The top panel of the unit is fragile.
▪ Do not lean, sit or stand on it.
▪ Do not place any objects or equipment on it.
CAUTION
Use a door lock system to block the service doors when
working inside the service compartment.


