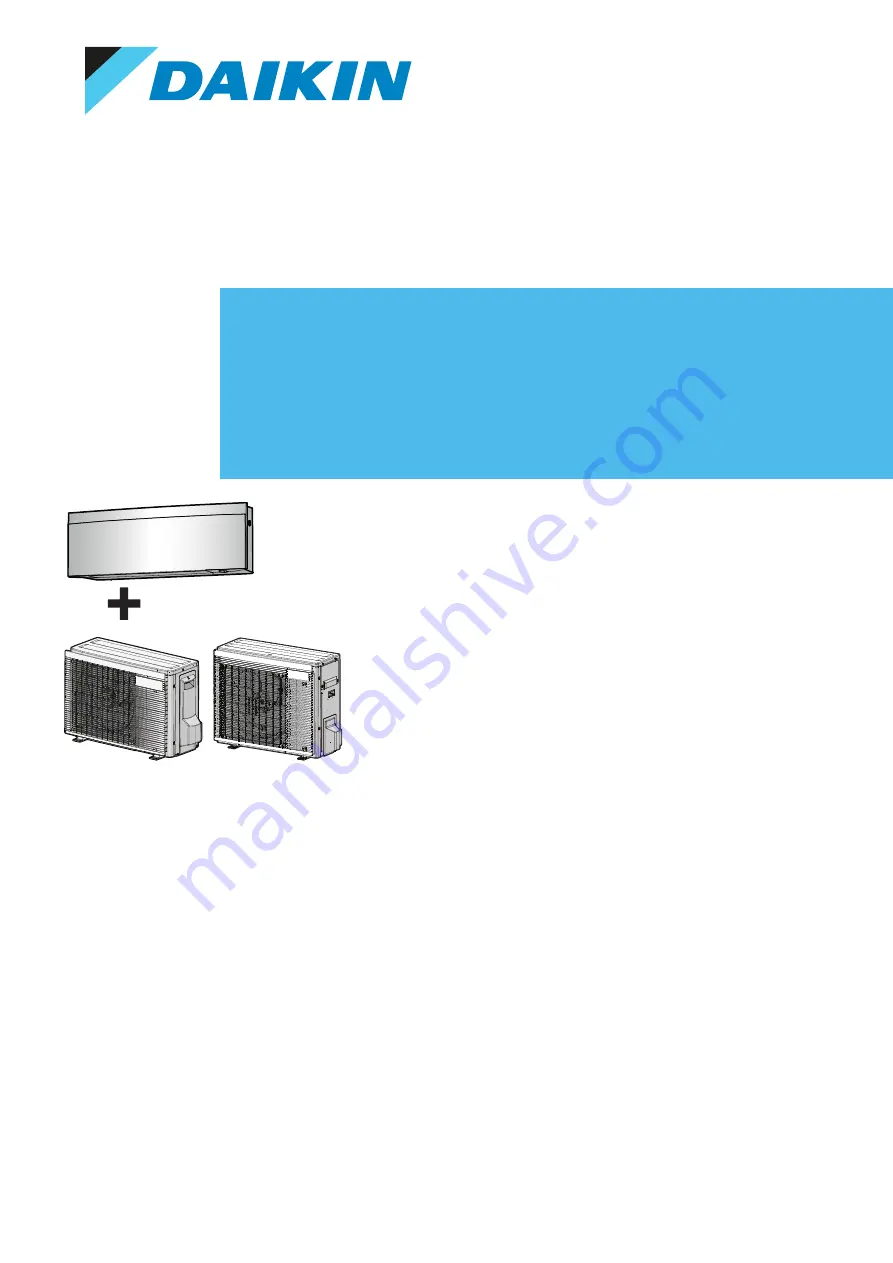
background image

Service manual 

Split Emura 3 R32

RXJ20A5V1B
RXJ25A5V1B
RXJ35A5V1B
RXJ42A2V1B
RXJ50A2V1B

FTXJ20A2V1BW
FTXJ25A2V1BW
FTXJ35A2V1BW
FTXJ42A2V1BW
FTXJ50A2V1BW

FTXJ20A2V1BS
FTXJ25A2V1BS
FTXJ35A2V1BS
FTXJ42A2V1BS
FTXJ50A2V1BS

FTXJ20A2V1BB
FTXJ25A2V1BB
FTXJ35A2V1BB
FTXJ42A2V1BB
FTXJ50A2V1BB

draft – 22/04/2022 08:50

Summary of Contents for Emura 3 Series

Page 1: ...B RXJ35A5V1B RXJ42A2V1B RXJ50A2V1B FTXJ20A2V1BW FTXJ25A2V1BW FTXJ35A2V1BW FTXJ42A2V1BW FTXJ50A2V1BW FTXJ20A2V1BS FTXJ25A2V1BS FTXJ35A2V1BS FTXJ42A2V1BS FTXJ50A2V1BS FTXJ20A2V1BB FTXJ25A2V1BB FTXJ35A2V...

Page 2: ...ts knowledge No express or implied warranty is given for the completeness accuracy reliability or fitness for particular purpose of its content and the products and services presented therein Specific...

Page 3: ...Version log Service manual 3 RXJ20 50A FTXJ A W S B Split Emura 3 R32 ESIE22 04 2022 04 Version log Version code Description Date ESIE22 04 Document release April 2022 draft 22 04 2022 08 50...

Page 4: ...system in case of an emergency Name and address of fire department police and hospital Name address and day and night telephone numbers for obtaining service In Europe EN378 provides the necessary gui...

Page 5: ...ain circuit capacitors or electrical components before servicing The voltage MUST be less than 50 V DC before you can touch electrical components For the location of the terminals see the wiring diagr...

Page 6: ...or other substances Protect bystanders from injury and property from possible damage cause by service works WARNING If any work is to be conducted on the refrigerating equipment or any associated part...

Page 7: ...nt precautions in case of refrigerant leakage If refrigerant gas leaks ventilate the area immediately Possible risks Excessive refrigerant concentrations in a closed room can lead to oxygen deficiency...

Page 8: ...ipe surge absorber or telephone earth Incomplete earthing may cause electrical shock WARNING ONLY use copper wires Make sure the field wiring complies with the applicable legislation All field wiring...

Page 9: ...required prior to re use of recovered refrigerant It is essential that electrical power is available before the task is commenced Become familiar with the equipment and its operation Isolate system el...

Page 10: ...any associated electrical components are sealed to prevent ignition in the event of a refrigerant release Consult manufacturer if in doubt Do NOT overfill the refrigerant cylinder confirm with the sup...

Page 11: ...y objects or equipment on top of the unit Do NOT sit climb or stand on the unit 1 5 Notices NOTICE Make sure water quality complies with EU directive 2020 2184 Check the system for leaks after each re...

Page 12: ...rant is increased The hot refrigerant is carried to the outdoor heat exchanger which will cool down the hot refrigerant by the fan The temperature of the refrigerant is further decreased by expansion...

Page 13: ...our selection Error code indication Error code list 1 00 6 Aim the wireless remote control at the unit and scroll through the list of error codes using and until you hear a long beep Result A long bee...

Page 14: ...d OFF it consumes electricity When the power turns back on after a power break the previously selected mode will be resumed 3 4 1 To perform a test run using the wireless remote control 1 Press to ent...

Page 15: ...set via outdoor unit To solve the error code INFORMATION It is recommended to perform the checks in the listed order 1 Check for improper combination of the indoor unit and the outdoor unit See the co...

Page 16: ...air filter of the indoor unit s See 6 Maintenance 472 Possible cause Faulty or dirty air filter 3 Clean the indoor unit heat exchanger See 6 Maintenance 472 Possible cause Dirty indoor unit heat exch...

Page 17: ...the error code INFORMATION It is recommended to perform the checks in the listed order 1 Perform a check of the streamer unit See Streamer unit Possible cause Faulty streamer unit INFORMATION If all p...

Page 18: ...ossible cause Faulty indoor unit air room thermistor 2 Perform a check of the indoor unit main PCB See Indoor unit PCB Possible cause Faulty indoor unit main PCB INFORMATION If all procedures listed a...

Page 19: ...ll stop operating Manual reset via user interface Power reset To solve the error code INFORMATION It is recommended to perform the checks in the listed order 1 Perform a check of the main PCB See Main...

Page 20: ...ace High pressure control measured pressure just below high pressure switch operating point occurs 16 times within 300 minutes To solve the error code INFORMATION It is recommended to perform the chec...

Page 21: ...istors Possible cause Faulty discharge pipe thermistor or connector fault 3 Perform a check of the outdoor unit fan motor See Outdoor unit fan motor Possible cause Faulty outdoor unit fan motor 4 Perf...

Page 22: ...osed stop valve in the refrigerant circuit 3 Check if the refrigerant circuit is clogged See 5 2 Refrigerant circuit 462 Possible cause Clogged refrigerant circuit 4 Check if the refrigerant circuit i...

Page 23: ...ause Faulty main PCB INFORMATION If all procedures listed above have been performed and the problem is still present contact the helpdesk 3 5 14 E8 00 Outdoor unit Power input overvoltage Trigger Effe...

Page 24: ...See 4 way valve Possible cause Faulty 4 way valve 2 Perform a check of the main PCB See Main PCB Possible cause Faulty main PCB 3 Perform a check of the indoor unit air room thermistor See Thermistor...

Page 25: ...2 Check if the refrigerant circuit is correctly charged See 5 2 Refrigerant circuit 462 Possible cause Refrigerant overcharge or shortage 3 Check for the presence of non condensables and or humidity...

Page 26: ...ossible cause Faulty expansion valve 5 Perform a check of the main PCB See Main PCB Possible cause Faulty main PCB 6 Check if the refrigerant circuit is correctly charged See 5 2 Refrigerant circuit 4...

Page 27: ...ischarge pipe thermistor See Thermistors Possible cause Faulty discharge pipe thermistor or connector fault INFORMATION If all procedures listed above have been performed and the problem is still pres...

Page 28: ...function of high pressure switch Trigger Effect Reset High pressure switch is activated when compressor is off Unit will stop operating Manual reset via user interface To solve the error code INFORMAT...

Page 29: ...t all stop valves of the refrigerant circuit are open See 5 2 Refrigerant circuit 462 Possible cause Closed stop valve in the refrigerant circuit 4 Check if the refrigerant circuit is clogged See 5 2...

Page 30: ...or Possible cause Faulty compressor or miswiring of the compressor power supply cable 3 Perform a check of the reactor See Reactor Possible cause Faulty reactor INFORMATION If all procedures listed ab...

Page 31: ...the problem is still present contact the helpdesk 3 5 25 J6 00 Outdoor unit Malfunction of heat exchanger thermistor Trigger Effect Reset Outdoor heat exchanger thermistor input is out of range Unit...

Page 32: ...above have been performed and the problem is still present contact the helpdesk 3 5 27 L4 00 Outdoor unit Malfunction of inverter radiating fin temperature rise Trigger Effect Reset Radiating fin the...

Page 33: ...nual reset via user interface To solve the error code INFORMATION It is recommended to perform the checks in the listed order 1 Check that all stop valves of the refrigerant circuit are open See 5 2 R...

Page 34: ...sink Adjust if needed Possible cause Thermal interface grease NOT applied properly on the heat sink INFORMATION If all procedures listed above have been performed and the problem is still present con...

Page 35: ...use Non condensables and or humidity in the refrigerant circuit 6 Perform a check of the compressor See Compressor Possible cause Faulty compressor or miswiring of the compressor power supply cable 7...

Page 36: ...7 Perform a check of the indoor unit power PCB See Indoor unit power PCB Possible cause Faulty indoor unit power PCB INFORMATION If all procedures listed above have been performed and the problem is...

Page 37: ...is applied properly on the PCB or refrigerant piping contact surface of the heat sink Adjust if needed Possible cause Thermal interface grease NOT applied properly on the heat sink INFORMATION If all...

Page 38: ...door unit See 5 1 Electrical circuit 460 Possible cause Faulty wiring between the outdoor unit and the indoor unit 3 Perform a check of the main PCB See Main PCB Possible cause Faulty main PCB 4 Perfo...

Page 39: ...or unit Shortage of refrigerant UA 00 Indoor unit outdoor unit mismatching problem Possible cause Error on other indoor unit 2 Perform a check of the indoor unit main PCB See Indoor unit PCB Possible...

Page 40: ...he outdoor temperature is below 10 C DB When the operation lamp blinks there may be an error code activating the protection device Diagnose with remote controller indication See 3 5 Error based troubl...

Page 41: ...a refrigerant leakage Is there capacity loss over the condensor saturation pressure or sound because of air mixed in to the circuit Incorrect size of connection wiring When the operation lamp blinks...

Page 42: ...is too thin you must use cushion material or rubber or change the installation place Refrigerant piping is too short is the length within specified range Due to bad installation or general conditions...

Page 43: ...nduct refrigerant collection and vacuum drying and then add proper amount refrigerant Is the refrigerant overcharged Conduct refrigerant collection and vacuum drying and then add proper amount refrige...

Page 44: ...llary Check if there is a temperature difference before and after expansion valve capillary Check if the main valve unit of expansion valve operates by noise vibration Is the check valve if applicable...

Page 45: ...Check the thermistor Connection with PCB Output Check PCB s HAP LED s if applicable if green led on the control PCB is not blinking then the microprocessor is not working if the green led on the main...

Page 46: ...or Check the magnetic switch Check the overcurrent relay Check the four way valve coil Is there a short circuit Is the four way valve coil broken Check the outdoor PCB Is there a short circuit Is the...

Page 47: ...tion hose Is the length of the humidification hose correct within specified length Is setting correct for the humidification hose length Check the outdoor temperature and humidity In case of extremely...

Page 48: ...ed 4 1 Plate work 4 1 1 Outdoor unit To remove the refrigerant connection cover DANGER RISK OF ELECTROCUTION DANGER RISK OF BURNING SCALDING 1 1 2 2 1 1 3 To remove the top plate INFORMATION This proc...

Page 49: ...s just an example and may differ on some details for your actual unit Prerequisite Remove the top plate see 4 1 Plate work 448 1 Loosen and remove the screws that fix the front plate a a a a a a a Scr...

Page 50: ...n PCB 2 Disconnect all connectors from the main PCB 3 Disconnect the electrical power supply wiring from the wire terminals f a d c b e a Electrical power supply wiring b Wire terminals c Screws d Wir...

Page 51: ...h box 8 Lift and remove the switch box from the outdoor unit 9 To install the switch box see 4 1 Plate work 448 To install the switch box INFORMATION This procedure is just an example and may differ o...

Page 52: ...nstall the wire clamp and fix it using the screws 5 Connect all connectors to the main PCB INFORMATION Use the wiring diagram and connection diagram for correct installation of the connectors see 7 2...

Page 53: ...Insulation b Main PCB 4 1 2 Indoor unit To open the front panel 1 Stop operation by Result The front panel closes automatically 2 Open the front panel using the wireless remote control Result The fro...

Page 54: ...up by hand as shown in the following figure To remove the front panel INFORMATION Remove the front panel only in case it MUST be replaced 1 Open the front panel See 4 1 Plate work 448 2 Open the pane...

Page 55: ...Open the front panel See 4 1 Plate work 448 2 Remove the service cover See 4 1 Plate work 448 3 Remove the wire harness from the wire clamp disconnect the connector and place it in the connector holde...

Page 56: ...iangle symbol 8 Slightly press down the front grille and insert the screwdriver in slot next to the hooks 9 Pull the front grille up using the flat screwdriver and pull towards the front side b a a Sl...

Page 57: ...er first attach the electrical wiring box to the hooks close the electrical wiring box and re install the screw NOTICE When closing the electrical wiring box cover make sure that the tightening torque...

Page 58: ...switch box 7 Remove the screw and remove the switch box from the indoor unit 8 To install the switch box see 4 1 Plate work 448 To install the switch box 1 install the switch box in the correct locat...

Page 59: ...covers back 3 Re install the flap 4 Insert the wire harness back into the connector and secure it with the wire clamp 5 Close the front panel see 4 1 Plate work 448 To re install the front panel 1 At...

Page 60: ...AC 10 5 Unbalance between the phases MUST NOT exceed 2 Is the measured voltage power supply correct Action Yes Return to the troubleshooting of the specific error and continue with the next procedure...

Page 61: ...5 1 2 Repair procedures 461 To check the wiring between the outdoor unit and the indoor unit 1 Check that all wires are properly connected and that all connectors are fully plugged in 2 Check that no...

Page 62: ...blem solved Action Yes No further actions required No Return to the troubleshooting of the specific error and continue with the next procedure To correct the wiring between PCB s Prerequisite Stop the...

Page 63: ...2 Check that all field piping is done according to the refrigeration practice and installer reference guide Correct piping diameters Piping distance limits are followed NO pipes are squeezed NO short...

Page 64: ...cording to operating conditions Refer to the procedures shown below for correct examination Refrigerant overcharge diagnosis 1 High pressure rises Consequently overload control is conducted to cause i...

Page 65: ...as rises Consequently the electronic expansion valve turns open more than normal or completely open for average output 3 Low pressure drops to cause the unit not to reach cooling capacity or heating c...

Page 66: ...ant until correctly charged see 5 2 2 Repair procedures 467 To check for non condensables in the refrigerant circuit Prerequisite Stop the unit operation via the user interface Prerequisite Turn OFF t...

Page 67: ...Adjust as needed See installation manual for field piping specifications Is the problem solved Action Yes No further actions required No Return to the troubleshooting of the specific error and contin...

Page 68: ...ure To recuperate the refrigerant Prerequisite Stop the unit operation via the user interface 1 Manually open all expansion valves 2 Connect the vacuum pump manifold recovery unit and refrigerant bott...

Page 69: ...t according to the available service ports Use related field setting where necessary to open expansion valve solenoid valve To perform refrigerant pump down operation The unit is equipped with an auto...

Page 70: ...rticles remain in the piping Apply just a drop of refrigerant oil on the inner surface of the flare Make sure the flare connection is tightened with the correct torque torque values refer to installat...

Page 71: ...actions required No Return to the troubleshooting of the specific error and continue with the next procedure To check the required space around the outdoor unit heat exchanger 1 Check if the space aro...

Page 72: ...ger from dust leaves using a fin comb or compressed air N2 CAUTION Avoid bending or damaging the hair fins of the outdoor unit heat exchanger during the cleaning process Do NOT use a high pressure was...

Page 73: ...pecific error and continue with the next procedure 6 4 To clean the indoor unit and wireless remote control WARNING Improper detergents or cleaning procedure may cause damage on plastic components or...

Page 74: ...s use water or a neutral detergent 6 6 To clean the air filters 1 Push the tab at the centre of each air filter then pull it down 2 Pull out the air filters 1 2 3 Remove the titanium apatite deodorisi...

Page 75: ...the troubleshooting of the specific error and continue with the next procedure 6 7 To clean the titanium apatite deodorising filter and the silver particle filter Ag ion filter INFORMATION Clean the...

Page 76: ...every 3 years To order titanium apatite deodorising filter or silver particle filters contact your dealer Item Part number Titanium deodorising filter KAF970A46 Silver particle filter KAF057A41 1 Rem...

Page 77: ...tting mode Indoor unit See the installer reference guide on business portal for more information 7 1 2 Detailed information setting mode Outdoor unit See the installer reference guide on business port...

Page 78: ...ive earth Connection Protective earth screw Connector A Rectifier Earth Relay connector Field wiring Short circuit connector Fuse Terminal INDOOR Indoor unit Terminal strip OUTDOOR Outdoor unit Wire c...

Page 79: ...R KCR KFR KHuR K M Magnetic relay L Live L Coil L R Reactor M Stepper motor M C Compressor motor M F Fan motor M P Drain pump motor M S Swing motor MR MRCW MRM MRN Magnetic relay N Neutral n N Number...

Page 80: ...ostat S RH Humidity sensor S W SW Operation switch SA F1S Surge arrester SR WLU Signal receiver SS Selector switch SHEET METAL Terminal strip fixed plate T R Transformer TC TRC Transmitter V R V Varis...

Page 81: ...0 A7P BLK BLK BLK BLK BLK MS M1F 3 S801 WHT BLK RED S200 A1P t S1T BLK BLK BLK BLK BLK BLK BLK BLK BLK BLK BLK BLK BLK BLK BLK BLK BS1 H1O H3P H2P H1P A3P S900 SR 1 TC V1R S102 S103 S101 F1U N 2 Z1C 2...

Page 82: ...ction Protective earth screw Connector A Rectifier Earth Relay connector Field wiring Short circuit connector Fuse Terminal INDOOR Indoor unit Terminal strip OUTDOOR Outdoor unit Wire clamp Residual c...

Page 83: ...K M Magnetic relay L Live L Coil L R Reactor M Stepper motor M C Compressor motor M F Fan motor M P Drain pump motor M S Swing motor MR MRCW MRM MRN Magnetic relay N Neutral n N Number of passes thro...

Page 84: ...RH Humidity sensor S W SW Operation switch SA F1S Surge arrester SR WLU Signal receiver SS Selector switch SHEET METAL Terminal strip fixed plate T R Transformer TC TRC Transmitter V R V Varistor V R...

Page 85: ...30A MR4 Z3C Wiring diagram Indoor Outdoor 3 15A Outdoor Discharge Condenser RXJ42 50A INFORMATION The diagrams shown in this manual may be incorrect due to changes updates to the unit Correct diagrams...

Page 86: ...may be incorrect due to changes updates to the unit Correct diagrams are supplied with the unit and can also be found in the technical data book a b c d R1T M1F 9 5 CuT 6 4 CuT e M e a Field piping l...

Page 87: ...ges updates to the unit Correct diagrams are supplied with the unit and can also be found in the technical data book a b c d R1T M1F 12 7 CuT 6 4 CuT e e M e e a Field piping liquid 6 4 mm flare conne...

Page 88: ...CuT 6 4 CuT 7 9 CuT 7 9 CuT 9 5 CuT 9 5 CuT 9 5 CuT 9 5 CuT 9 5 CuT 9 5 CuT 9 5 CuT 4 0 x ID 2 0 CuT e f R2T e Y1E e c a b d h h g M1C R3T h Y1S R1T M1F a Field piping liquid 6 4 mm flare connection M...

Page 89: ...7 CuT 12 7 CuT 12 7 CuT 6 4 CuT 9 5 CuT 6 4 CuT 6 4 CuT 6 4 CuT 6 4 CuT 4 0 CuT 4 0 CuT 4 0 CuT 9 5 CuT 6 4 CuT 9 5 CuT 9 5 CuT 12 7 CuT a Field piping liquid 6 4 mm flare connection M1C Compressor b...

Page 90: ...7 Technical data Service manual 90 RXJ20 50A FTXJ A W S B Split Emura 3 R32 ESIE22 04 2022 04 7 4 Field information report See next page draft 22 04 2022 08 50...

Page 91: ...onal information is required Please fill out the following form before contacting your distributor FIELD INFORMATION REPORT Key person information Name Company name Your contact details Phone number E...

Page 92: ...sion hydro PCB A1P Software version hydro PCB A5P Software version user interface Software version outdoor PCB Minimum water volume Maximum water volume Brine composition and mixture Brine freeze up t...

Page 93: ...Daikin Business Portal authentication required 2 Go to the tab After sales support on the left navigation pane and select Technical support 3 Click the button Service tools An overview of the availab...

Page 94: ...avigation left right buttons f Confirm button g Main menu button h Outdoor unit silent operation i Mode selection button automatic cooling heating dry fan only j Airflow rate setting button 1 Press bu...

Page 95: ...ed 8 Enter password 5902 using and 9 Press to confirm password 10 Navigate to the Service menu using and Service menu 11 Press to confirm Result Service menu is entered 12 Navigate to the desired sett...

Page 96: ...room temperature correction 0 Low 2 1 Low 1 2 Standard 3 High 1 4 High 2 7 Heating room temperature correction 0 Low 2 1 Low 1 2 Standard 3 High 1 4 High 2 10 Auto restart after power resume after sh...

Page 97: ...k see 4 1 Plate work 448 1 Cut the J5 jumper on the main PCB of the outdoor unit RXJ20 35A RXJ42 50A Field setting Sound level reduction To be used at Cut J5 jumper 1 dB Day J5 jumper ECONO mode activ...

Page 98: ......

Page 99: ......

Page 100: ...draft 22 04 2022 08 50 ESIE22 04 2022 04 Copyright 2022 Daikin Verantwortung f r Energie und Umwelt...

Reviews: