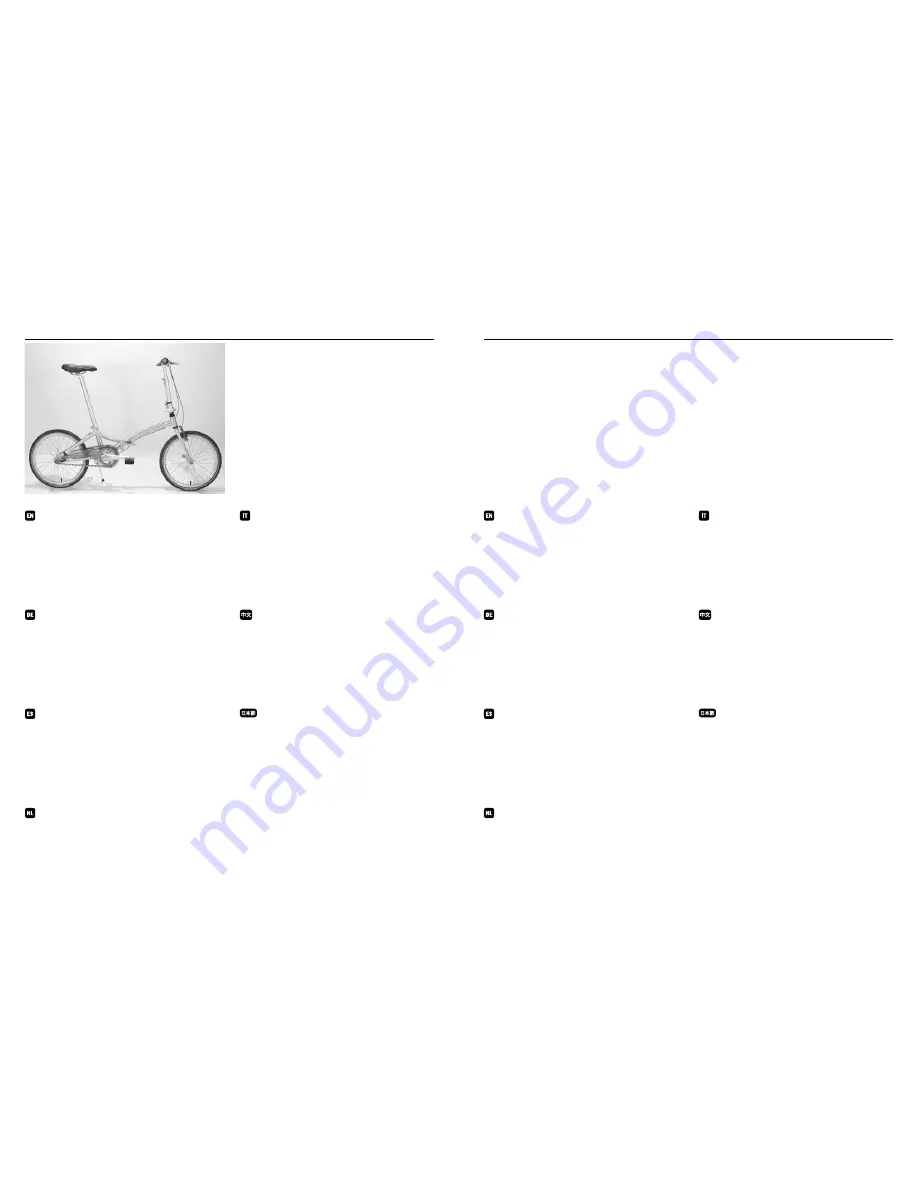
background image

Page 28 

Page 29

Prepare to fold your bicycle by standing on the 

side with the chain. The chain and crank will 

be in front of you.

Wenn Sie Ihr Faltrad transportbereit machen 

wollen, stellen Sie sich bitte auf der  Seite 

auf der sich die Antriebskette befindet, in 

Fahrtrichtung gesehen meist auf die rechte 

Seite des Rades.

Per chiudere la bici posizionatevi nel lato dove 

si trova la catena, la guarnitura e la catena si 

troveranno di fronte a voi.

站在大齿盘一侧准备折叠自行车,车子的链
条和曲柄位于你的前方。

Prepárese para plegarla desde el lado de 

la cadena. La biela y la cadena enfrente de 

usted.

Ga zo voor de fiets staan, dat u tegen de 

ketting en het crankblad aankijkt.

チェーンの付いている側に立って下さい。

folding instructions

zusammenfalten – transportbereit machen

instrucciones de plegado

vouw instructies

come chiuderla

折叠指南

折り畳み方法

step 1

schritt 1

paso 1

stap 1

punto 1

步骤

 1

ステップ

 1

步骤2-4分为6种不同的类型。
步骤2a-4a:铝制双节竖管。
步骤2b-4b:铝制单节竖管。
步骤2c-4c:带转把竖管系统。
2d-4d:铁制双节竖管。
2e-4e:铁制单节竖管。
2f-4f:转动竖管。
2g-4g:带磁性扣钩的竖管。

die Schritte 2-4 sind in unterschiedliche Kategorien 

unterteilt.

2a-4a:

 Lenkersäule aus Aluminium

2b-4b:

 Lenkersäule aus Aluminium, nicht 

höhenverstellbar

2c-4c: 

verstellbarer Lenker und Lenksäule

2d-4d:

 teleskopische Lenkersäule aus Stahlrohr

2e-4e:

 Lenkersäule aus Stahlrohr, nicht verstellbar

2f-4f:

 drehbare Lenkersäule

6g-8g: 

Lenkersäule mit magnetischem Verschluss

ステップ

2-6

には以下の

6

項目があります。

2a-4a: 

アルミ.テレスコープ.ハンドルポスト

2b-4b: 

アルミ.ワンピース. ハンドルポスト

2c-4c: 

アジャスト.ハンドルステム

2d-4d: 

スチール.テレスコープ. ハンドルポ

スト

2e-4e: 

スチール. ワンピース. ハンドルポスト

6f -8f: 

スチール. ワンピース. ハンドルポスト

6g-8g: 

マグネット付きハンドル・ポスト


steps 2-4 are separated into 6 different 

categories. 

2a-4a: 

aluminum  telescope handle pos

t

2b-4b: 

aluminum non-adjustable handle post

2c-4c: 

adjustable handlebar and stem system 

2d-4d: 

steel telescope handle post

2e-4e: 

steel non-adjustable handle post

2f-4f: 

rotating handle post

2g-4g

 handle post with magnetic latch

I punti da 2-4 sono separati in sei diverse categorie. 

2a-4a:

 cannotto manubrio telescopico in alluminio. 

2b-4b:

 cannotto manubrio telescopico in alluminio 

non regolabile. 

2c-4c

: sistema con manubrioo e attacco manubrio 

regolabile 

2d-4d

: cannotto manubrio telescopico in acciaio

2e-4e

: cannotto manubrio in acciaio non regolabile.

2f-4f

: cannotto manubrio rotante.

2g-4g: 

cannootto manubrio con chiusura magnetica

pasos 2-4 están separados en 6 diferentes 

categorías. 

2a-4a

: potencia telescópica de aluminio

2b-4b

: potencia de aluminio no ajustable

2c-4c

: potencia y manillar ajustables 

2d-4d

: potencia de acero telescópica,

2e-4e

: potencia de acero no ajustable

2f-4f: 

potencia de acero rotatoria.

2g-4g: 

potencia con imán

De stappen 2-4 zijn onderverdeeld in 6 

verschillende stappen:

2a-4a: 

 aluminium telescoop stuurkolom.

2b-4b: 

 aluminium niet-verstelbare stuurkolom.

2c-4c:

  verstelbare stuurpen en stuurkolom 

systeem.

2d-4d:

  stalen telescoop stuurkolom.

2e-4e: 

 stalen niet-verstelbare stuurkolom.

2f-4f: 

 draaibare stuurkolom.

2g-4g:

 stuurpen met magneetgrendel.

.

folding instructions

zusammenfalten – transportbereit machen

instrucciones de plegado

vouw instructies

come chiuderla

折叠指南

折り畳み方法

steps 2-4

schritt 2-4

paso 2-4

stappen 2-4

punto 2-4

步骤

 2-4

ステップ

 2-4

Summary of Contents for 2007 Compact series

Page 1: ...instruction manual compact bikes ...

Page 2: ...nos Disfrute del paseo contenido Seguridad 4 Partes de la bicicleta 7 Instrucciones de desplegado 9 Instrucciones de desplegado 27 Ajuste del cierre del cuadro 47 Ajuste del cierre telescópico de acero del manillar 53 Ajuste del cierre telescópico de aluminio del manilla 61 Hartelijk dank voor het aanschaffen van deze vouwfiets Voordat u de fiets in gebruik gaat nemen raden wij u sterk aan eerst t...

Page 3: ... rendimiento Antes de cada paseo asegúrese de que todos los cierres estén cerrados correctamente También compruebe sus frenos y neumáticos Si su bicicleta está dañada y el cierre del cuadro o del manillar no funcionan correctamente no monte en su bicicleta Hágala revisar por un profesional competente El peso máximo del ciclista y equipaje no debería exceder los 105 kilos Antes de montar asegúrese ...

Page 4: ... J Handle post Latch Lenksaeulen Verschlusshebel Cierre de la potencia Stuurpengrendel Chiusura regisella manubrio 竖管快锁 ハンドルポスト ラッチ E G S D I C J Pedal Pedal Pedal Pedaal Pedale 脚踏 ペダル E G S D I C J Crank Tretlager Biela Crank Guarnitura 大齿盘 クランク E G S D I C J Chain Kette Cadena Ketting Catena 链条 チェーン E G S D I C J Seat post quick release Schnellverschluss für Sattelstange Cierre de la tija de sil...

Page 5: ...unfolding instructions auseinanderfalten fahrbereit machen instrucciones de desplegado uitvouw instructies come aprirla 展开指南 組立方法 ...

Page 6: ...modelos tienen la potencia plegada en la parte exterior Paso 6g 8g Ga zo voor de fiets staan dat u tegen de ketting en het crankblad aankijkt Let op bij sommige modellen dient de stuurpen naar buiten gedraaid te worden Stap 6g 8g 先ずチェーンの付いている側に立ってくだ さい ハンドルポストを外側に折畳むタイ プのモデルがあります ステップ6g 8g step 2 schritt 2 paso 2 stap 2 punto 2 步骤 2 ステップ 2 Unfold the frame by swinging the front and rear halves of ...

Page 7: ...bove Sichern Sie den Rahmenverschluss mit dem kleinen Sicherungshaken aus Kunststoff Hinweis Der Sicherungshebel fuer den Rahmenverschluss befindet sich in einer leicht von dem Bild abweichenden Position Muovere il gancio di sicurezza della chiusura del telaio in posizione di chiusura Il gancio di sicurezza è nella giusta posizione quando non permette alla leva di chiusura del telaio di aprirsi De...

Page 8: ...pico in alluminio 6b 8b cannotto manubrio telescopico in alluminio non regolabile 6c 8c sistema con manubrioo e attacco manubrio regolabile 6d 8d cannotto manubrio telescopico in acciaio 6e 8e cannotto manubrio in acciaio non regolabile 6f 8f cannotto manubrio rotante 6g 8g cannootto manubrio con chiusura magnetica 第6 8步骤分别是6种不同的竖管折叠方式 步骤 6a 8a 铝制双节竖管 步骤 6b 8b 铝制单节竖管 步骤 6c 8c 可调节车把和立管系统 步骤 6d 8d 铁...

Page 9: ...ucciones de desplegado uitvouw instructies come aprirla 展开指南 組立方法 step 6b Push the handle post latch inwards until it snaps closed step 7b Rotate the stopper hook so that it secures the post latch step 8b Note Handle bar height cannot be adjusted on this handle post schritt 6b Die Lenksaeule verriegeln Sie mit dem Verschlusshebel bis dieser einschnappt schritt 7b Auch hier sichern Sie den Verschlu...

Page 10: ...loni dell attacco manubrio e del manubrio e regolate l altezza nella posizione desiderata punto 7c Regolate il manubrio nella posizione piu comoda assicuratevi che le leve freno siano facilmente raggiungibili punto 8c Stringete i bulloni 步骤6c 松开立管上的两个调节螺丝钉 接 着调节车把到您想要的高度和您想要的骑乘 位置 步骤7c 将车把调节至舒适的位置 注意将 刹车把保持在容易掌控的范围之内 步骤8c 重新锁紧两个调节螺丝钉 ステップ 6c 2つの調整ネジをゆるめ お 好みの高に調整してください ステップ 7c その場合 ブレーキレバーが 楽に握れる高...

Page 11: ...プラスチック を回し てロックして下さい ステップ 7f ハンドルポストQRを緩め ハ ンドルを前方向に止まるまで回して ください ステップ 8f QRを締めてください steps 6e 7e 8e schritt 6e 7e 8e paso 6e 7e 8e stap 6e 7e 8e punto 6e 7e 8e 步骤 6e 7e 8e ステップ 6e 7e 8e step 6e Push the handle post latch inwards until it snaps closed step 7e Rotate the stopper hook so that it secures the post latch step 8e Note Handle bar height cannot be adjusted on this handle post schritt 6e Di...

Page 12: ... 7g 8g 步骤 6g 7g 8g ステップ 6g 7g 8g step 6g Push the handle post latch inwards until it snaps closed step 7g Rotate the stopper hook so that it secures the post step 8g Guide the magnet to the metal screw on the handle post to secure it while riding punto 6g Spingere all interno lo snodo del cannotto manubrio fino alla sua chiusura punto 7g Ruotare il gancio per assicurare la chiusura dello snodo pun...

Page 13: ... Lの刻印 は逆時計回り 左方 向 に回して締めてください step 10a schritt 10a paso 10a stap 10a punto 10a 步骤 10a ステップ 10a unfolding instructions auseinanderfalten fahrbereit machen instrucciones de desplegado uitvouw instructies come aprirla 展开指南 組立方法 If you are unfolding your pedals flip the pedal into the horizontal position Caution Be careful not to pinch your fingers Um Ihre Pedale auseinander zu falten druecken Sie das...

Page 14: ...ara montar Tenga cuidado y disfrute de su paseo De fiets is nu klaar voor gebruik Veel plezier en een prettige rit gewenst これで乗る用意が出来ました step 11 schritt 11 paso 11 stap 11 punto 11 步骤 11 ステップ 11 unfolding instructions auseinanderfalten fahrbereit machen instrucciones de desplegado uitvouw instructies come aprirla 展开指南 組立方法 folding instructions zusammenfalten transportbereit machen instrucciones de...

Page 15: ... ハンドルポ スト 2e 4e スチール ワンピース ハンドルポスト 6f 8f スチール ワンピース ハンドルポスト 6g 8g マグネット付きハンドル ポスト steps 2 4 are separated into 6 different categories 2a 4a aluminum telescope handle post 2b 4b aluminum non adjustable handle post 2c 4c adjustable handlebar and stem system 2d 4d steel telescope handle post 2e 4e steel non adjustable handle post 2f 4f rotating handle post 2g 4g handle post with magnetic latch I punt...

Page 16: ...が車軸の下に収ま る様にして下さい ステップ 3a ハンドルポストラッチからセ ーフテイーフックを外してください ステップ 4a ハンドルポストラッチを引き ロックを外してください steps 2a 3a 4a schritt 2a 3a 4a paso2a 3a 4a stap 2a 3a 4a punto 2a 3a 4a 步骤 2a 3a 4a ステップ 2a 3a 4a folding instructions zusammenfalten transportbereit machen instrucciones de plegado vouw instructies come chiuderla 折叠指南 折り畳み方法 step 2b Note Handle bar height cannot be adjusted on this handle post step 3b Rot...

Page 17: ...folding instructions zusammenfalten transportbereit machen instrucciones de plegado vouw instructies come chiuderla 折叠指南 折り畳み方法 steps 2c 3c 4c schritt 2c 3c 4c paso 2c 3c 4c stap 2c 3c 4c punto 2c 3c 4c 步骤2c 3c 4c ステップ 2c 3c 4c step 2d Move the stem into the folding position The stem should be extended far enough that the handlebars sit just under the wheel axles when the handle post is folded ste...

Page 18: ...ost latch Unlock the handle post latch by pulling it away from the handle post schritt 2f Oeffnen Sie den Schnellspanner des Lenkers und drehen den Lenker so dass die Bremshebel gerade nach oben zeigen schritt 3f Schliessen Sie den Schnellspanner schritt 4f Drehen Sie den Sicherheitshaken zurueck damit der Faltmechanismus fuer die Lenksaeule betaetigt werden kann Nun koennen Sie den Hebel nach unt...

Page 19: ...5 schritt 5 paso 5 stap 5 punto 5 步骤 5 ステップ 5 step 2g Rotate the stopper hook away from the handle post latch step 3g Unlock the handle post latch by pulling it away from the handle post step 4g Detach the magnet from the handle post and prepare to fold the handle post so that the magnets on the frame and handle post make contact schritt 2g Drehen Sie den Sicherheitshaken zurueck damit der Faltmec...

Page 20: ... en sluit de snelspanner weer シートポストQRを緩めサドルを地面に着く まで降ろして下さい サドルを左45度まで 回してシートポストQRを締めてください folding instructions zusammenfalten transportbereit machen instrucciones de plegado vouw instructies come chiuderla 折叠指南 折り畳み方法 step 6 schritt 6 paso 6 stap 6 punto 6 步骤 6 ステップ 6 Rotate the cranks so that the left crank is pointed forward and down at a 45 degree angle Drehen Sie die Tretkurbel so dass der l...

Page 21: ... estar en una posición ligeramente diferente del que se indica en la foto Draai de veiligheidshaak van de framegrendel open naar boven De hier afgebeelde veiligheidshaak kan er enigszins anders uitzien dan die op uw fiets フレームラッチ用セーフテイーフック外し て下さい セーフテイーフックの位置が 写真と違うモデルがあります folding instructions zusammenfalten transportbereit machen instrucciones de plegado vouw instructies come chiuderla 折叠指南 折り畳み...

Page 22: ...t dem Magnetix Arretiersystem ausgestattet ist treffen die beiden Magnete einer an der linken Seite der Gabel und einer am hinteren Ausfallende aufeinander Wenn nicht ueberpruefen Sie ob das Fahrrad richtig zusammengefaltet wurde Se avete una bici equipaggiata con sistema di chiusura Magnetix i due magneti situati sul fodero sinistro della forcella anteriore e sul forcellino posteriore destro dovr...

Page 23: ... instructies come chiuderla 折叠指南 折り畳み方法 Snap the folding pedal s into the folded position by pushing the pedal body inwards and rotating downwards Falten Sie das die Pedal e indem Sie es nach innen druecken zum Rahmen hin und dann abkippen Achtung Finger immer ausserhalb des Faltmechanismus halten Verletzungsgefahr Chiudere il pedale i pieghevole premendo il corpo del pedale verso se stesso e ruot...

Page 24: ... bicicleta ahora está lista para sel transportada o guardada fácilmente Uw fiets is nu opgevouwen en kan makkelijk getransporteerd worden of opgeslagen これで折り畳みは完了しました 携帯に保 管にとても便利です folding instructions zusammenfalten transportbereit machen instrucciones de plegado vouw instructies come chiuderla 折叠指南 折り畳み方法 step 13 schritt 13 paso 13 stap 13 punto 13 步骤 13 ステップ 13 adjusting the frame latch einste...

Page 25: ...ls u er niet helemaal zeker van bent dat u onderstaande aanwijzingen voor onderhoud zelf kunt raden wij u aan dit door een gekwalificeerde fietsdealer te laten doen フレームラッチは通常 調整済で出荷され ますが 適切な機能の為 定期的な調整が 必要です 調整方法は以下の手順に従って 下さい 注意 自分で調整が出来ない場合 は 定期的に自転車専門店で適切な調整を 受けて下さい adjusting the frame latch einstellen des rahmen faltmechanismus ajuste del cierre del cuadro stellen van de framegrendel regolaz...

Page 26: ...n for advice on a good quality lubricant Schmieren Sie den Verschlussmechanismus regelmaessig Vorsicht Einige Schmiermittel koennten die Lackierung beschaedigen oder die Scharniere angreifen Fragen Sie gegebenenfalls Ihren Fachhaendler nach einem Schmiermittel guter Qualitaet Per renderla più scorrevole lubrificate periodicamente la leva Attenzione alcuni lubrificanti possono danneggiare la vernic...

Page 27: ...锁进行检查 Atención El ajuste correcto del cierre del cuadro es fundamental para su seguridad Si está demasiado prieto o flojo puede resultar peligroso o dañar el sistema Por favor compruebe el cierre antes de cada paseo Waarschuwing Een juiste vergrendeling van de framegrendel is van groot belang Als de grendel te strak of te los zit kunnen er vervelende ongelukken gebeurd Controleer daarom altijd of ...

Page 28: ...arlo siga los siguientes pasos Cuidado Si no está capacitado para hacer estos ajustes usted mismo lleve su bicicleta a un mecánico especializado para un ajuste profesional Ook de stuurpengrendel is van tijd tot tijd aan onderhoud c q opnieuw stellen onderhevig om verzekerd te zijn van optimaal functioneren Het openen en sluiten van de stuurpengrendel vraagt een kracht van ongeveer 8kg Om de stuurp...

Page 29: ...t de klok mee Stel de bout met een 1 8 slag tot de grendel soepel opent en sluit ラッチボルトを逆時計回り 左方向 に回 すと硬く成ります 緩くする場合は時計回 り 右方向 に回して下さい step 2 schritt 2 paso 2 stap 2 punto 2 步骤 2 ステップ 2 Adjust until the handle post latch opens and closes with 10 kg 22 lbs of force Bitte solange einstellen bis der Verschluss mit einer Kraft von ca 10 kg zu oeffnen bzw zu schliessen ist Se ben regolata la chiusura d...

Page 30: ...lazione della chiusura del telaio è importante per la vostra sicurezza Una regolazione non corretta potrebbe causare dei danni a voi o alla vostra bici Controllate la chiusura del telaio prima di ogni uscita 定时为车子机械部件添滴润滑油 注意 一 些润滑油具有腐蚀作用 会损坏抛光烤漆 车架和接头 请向经销商咨询 应选购何种 润滑油为佳 警告 适当地调整竖管快锁对 您的骑乘安全极为重要 如果调整过紧或过 松会对接头造成永久性的损坏 进而致使在 骑乘过程中产生危险 请在每次骑乘前对竖 管快锁进行检查 Lubrique el sistema periódicamente Cuidado Al...

Page 31: ...tmechanismus der hoehenverstellbaren aluminiumlenksaeule ajuste del cierre de la potencia telescópica de aluminio stellen van de aluminium telescoop stuurpengrendel regolazione della chiusura del cannotto manubrio telescopico in alluminio 调节铝竖管快锁 アルミ ハンドルポストラッチの調整 ...

Page 32: ...o siga los siguientes pasos Cuidado Si no está capacitado para hacer estos ajustes usted mismo lleve su bicicleta a un mecánico especializado para un ajuste profesional Ook de stuurpengrendel is van tijd tot tijd aan onderhoud c q opnieuw stellen onderhevig om verzekerd te zijn van optimaal functioneren Het openen en sluiten van de stuurpengrendel vraagt een kracht van ongeveer 3 5kg Om de stuurpe...

Page 33: ... 1 8 slag tot de grendel soepel opent en sluit ラッチボルトを逆時計回り 左方向 に回 すと硬く成ります 緩くする場合は時計回 り 右方向 に回して下さい step 2 schritt 2 paso2 stap 2 punto 2 步骤 2 ステップ 2 step 3 schritt 3 paso 3 stap 3 punto 3 步骤 3 ステップ 3 Adjust the handle post latch until it opens and closes with 3 5 kg 6 11 lbs of force Bitte solange einstellen bis der Verschluss mit einer Kraft von ca 3 5 kg zu oeffnen bzw zu schliessen ist Se reg...

Page 34: ...件添滴润滑油 注意 一些 润滑油具有腐蚀作用 会损坏抛光烤漆 车架 和接头 请向经销商咨询 应选购何种润滑油 为佳 警告 适当地调整竖管快锁对您的骑乘 安全极为重要 如果调整过紧或过松会对接 头造成永久性的损坏 进而致使在骑乘过程 中产生危险 请在每次骑乘前对竖管快锁进 行检查 Lubrique el sistema periódicamente cuidado Algunos lubricantes pueden dañar la pintura o corroer algunas partes Consulte a su técnico acerca de un buen lubricante atención El ajuste correcto del cierre de la potencia es fundamental para su seguridad Si está de...

Reviews: