10
2. Installation and Video Check
2.1 Installation
On the assumption that User PC and S-160 Sever is used under static IP, and S-160 is to be directly connected
with User PC or Local Network, the installation procedure is to be ;
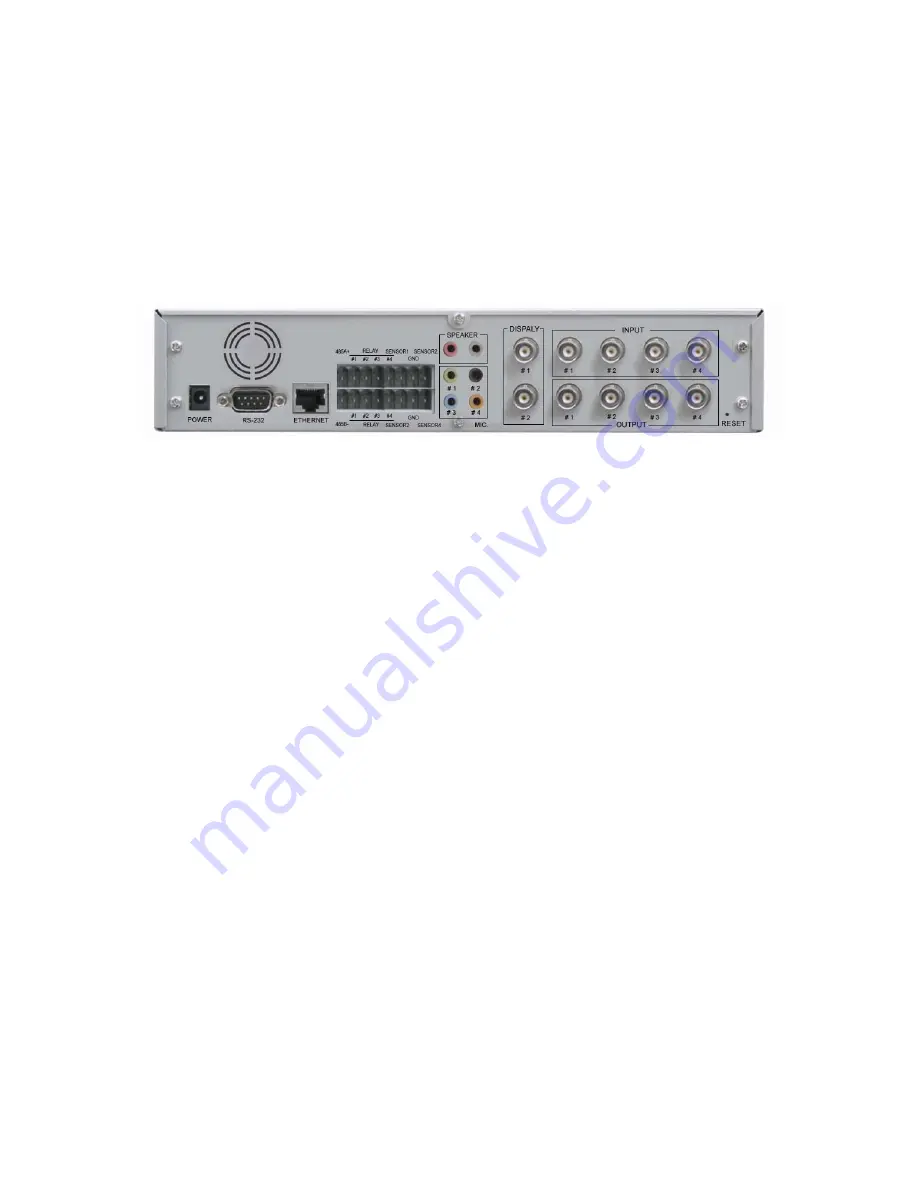
Pic. 2
―
1 Rear View
1) Connect Camera and StreamVIEW with Video Cable (8 of [Pic.2-1]).
2) If connecting a Pan/Tilt Camera for control, connect Cable into RS232 Port (7 of [2-1]) or RS485 Port (6 of
[2-1]).
3) Connect StreamVIEW and PC with LAN Cable (Cross Cable) (10 of [2-1])
4) Turn on Camera and StreamVIEW (Use provided power supply only) (1 of [2-1])
5) Wait about 2 minutes after powering up the StreamVIEW, and then the LINK LED shows that the System
has been booted normally.
2.2 Video Check
Basic network setting value of S-160 is to be ;
9
IP Address : 192.168.1.8
9
Subnet Mask : 255.255.255.0
9
Gateway : 192.168.1.1
To connect S-160 in user’s PC, change the setting value of PC network environment.
⑪
①
②
③
④ ⑤
⑥
⑦
⑧
⑨
⑩
⑪
Summary of Contents for S-160
Page 1: ...1 Network A V Server S 160 User s Manual Version1 0 ...
Page 6: ...6 1 Feature ...
Page 9: ...9 2 Installation and Video Check ...
Page 15: ...15 3 Basic Setting ...
Page 27: ...27 4 Expert Setting ...
Page 29: ...29 Pic 4 2 Administrator s Page ...
Page 48: ...48 5 Basic Use ...
Page 78: ...78 6 Network Environments ...
Page 80: ...80 7 Appendix ...


