


Universal Presentation Processor
Crestron
UPX-2
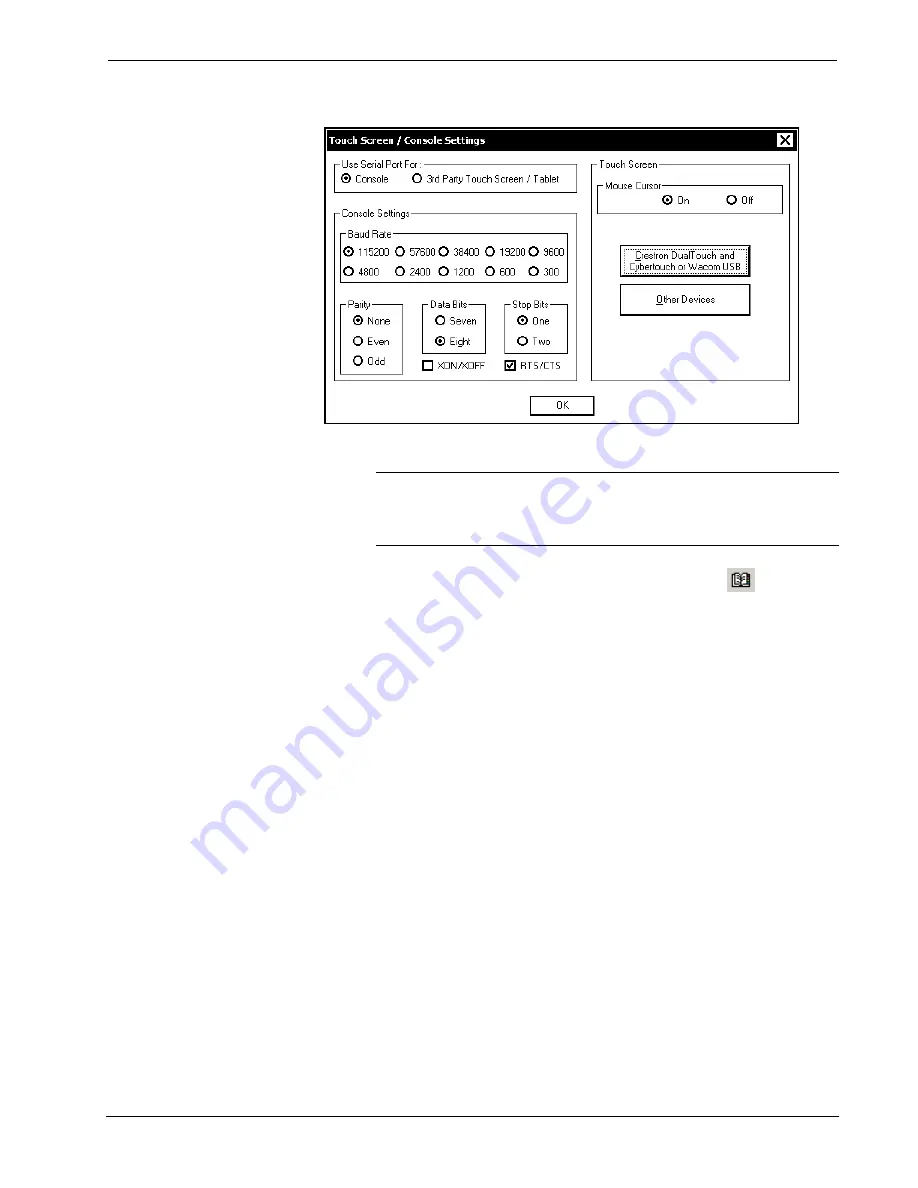
“Touch Screen / Console Settings” Window
3. Click
Save & Reboot
on the SETUP MENU. Do not click
EXIT
.
CAUTION:
At power up or reboot, the touchpanel will cycle through
colors and the Crestron logo screen for approximately 2.5 minutes prior to
displaying the progress bar. This is a normal part of the boot up process.
Do
not
turn off power to the UPX-2 while it is rebooting. Damage may occur.
4. Open Crestron Toolbox and click the
Address Book
icon
, or select
Tools | Manage Address Book
to open the Address Book. The Address
Book allows you to maintain a list of accessible control systems and
network devices. You can establish a session with any or all of the devices
in the address book (provided the PC has a valid connection to the Cresnet
or Ethernet network).
5. Select the device from the Address Book or click
Add Entry
and type a
name for the new device (UPX2 in our example).
6. Select
RS232
as the
Connection Type
and select the serial settings specified
in step 2. This sets the PC to the same serial settings as the UPX-2. Enter
the settings and click
OK
.
For the UPX-2, the default settings are:
•
Port = COM 1
•
Baud Rate = 15200 (or select Auto-Detect)
•
Parity = None
•
Data Bits = 8
•
Stop Bits = 1
•
Hardware Handshaking (RTS/CTS) enabled
•
Software Handshaking (XON/XOFF) not enabled
Operations Guide – DOC. 6276B
Universal Presentation Processor: UPX-2
¥
ix


