WR 3M
17-20
DE
EN
FR
IT
ES
PT
NL
SV
DK
FI
GR
TR
CZ
PL
HU
SK
SL
EE
LV
LT
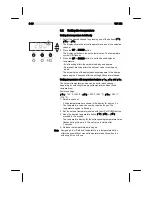
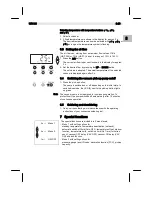
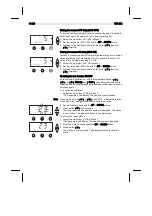
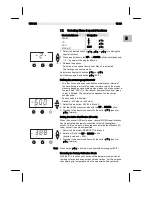
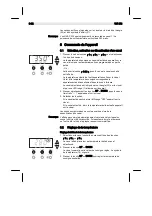
6. Press button ┌ 2 ┐ (Set) to confirm the value.
The temperature deviation is now reset to 0. Calibration
at 450 °C / 842 °F is now concluded.
7. Exit Menu 2 with button ┌ 3 ┐.
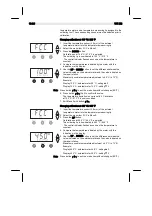
Resetting calibration to factory settings
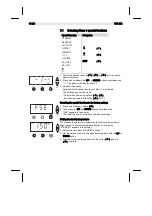
1. Select the menu item FCC in Menu 2.
2. Press and hold down button ┌ 3 ┐.
3. Then press the UP and DOWN buttons simultaneously.
"FSE“ (Factory Setting Enabled) appears in the display.
The repair station is now reset to the factory calibration.
4. Proceed to the next menu item with the button ┌ 1 ┐ (back) or
┌ 2 ┐ (forward).
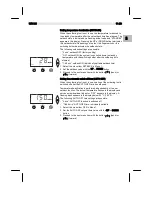
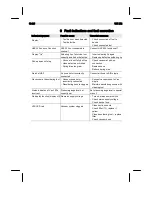
Setting the pick-up capacity
This function can be used to set the capacity of the additional
vacuum pump for pick-up operation:
−
Factory setting: 85 %
−
Settable: 50 % – 100 %
1. Select the menu item LEVEL in Menu 2.
2. Set the LEVEL pressure value with the UP or DOWN button.
3. Proceed to the next menu item with the button ┌ 1 ┐ (back) or
┌ 2 ┐ (forward).
8
Looking after and servicing the WR 3M
8.1
Servicing the filter
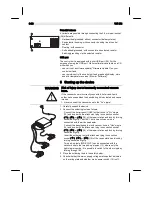
Regularly check the main filter for “VACUUM” and “AIR” and replace
if necessary.
WARNING!
Vacuum pump will be destroyed if operated without
the filter.
Z
Check before starting soldering whether a main filter is
inserted!
Replacing the filter
1. Turn the cover cap for "Vac“ (14) or "Air“ (15) 45°
counterclockwise and remove.
2. Pull out the contaminated filter and dispose of properly.
3. Insert an original WELLER filter cartridge.
Make sure that the cover seal is correctly seated.
4. Insert pressure spring.
5. Refit the cover cap under slight pressure and turn 45° clockwise.
Summary of Contents for Weller WR 3M
Page 2: ......
Page 4: ...WR 3M II ...
Page 5: ...EN FR IT ES PT NL SV DK FI GR TR CZ PL HU SK SL EE LV LT WR 3M Betriebsanleitung DE ...
Page 25: ...EN FR IT ES PT NL SV DK FI GR TR CZ PL HU SK SL EE LV LT DE WR 3M Operating Instruction ...
Page 45: ...EN FR IT ES PT NL SV DK FI GR TR CZ PL HU SK SL EE LV LT WR 3M Mode d emploi DE ...
Page 67: ...EN FR IT ES PT NL SV DK FI GR TR CZ PL HU SK SL EE LV LT WR 3M Istruzioni per l uso DE ...
Page 89: ...EN FR IT ES PT NL SV DK FI GR TR CZ PL HU SK SL EE LV LT WR 3M Manual de uso DE ...
Page 111: ...EN FR IT ES PT NL SV DK FI GR TR CZ PL HU SK SL EE LV LT WR 3M Manual do utilizador DE ...
Page 131: ...EN FR IT ES PT NL SV DK FI GR TR CZ PL HU SK SL EE LV LT WR 3M Gebruiksaanwijzing DE ...
Page 151: ...EN FR IT ES PT NL SV DK FI GR TR CZ PL HU SK SL EE LV LT WR 3M Instruktionsbok DE ...
Page 171: ...EN FR IT ES PT NL SV DK FI GR TR CZ PL HU SK SL EE LV LT WR 3M Betjeningsvejledning DE ...
Page 191: ...EN FR IT ES PT NL SV DK FI GR TR CZ PL HU SK SL EE LV LT WR 3M Käyttöohjeet DE ...
Page 211: ...EN FR IT ES PT NL SV DK FI GR TR CZ PL HU SK SL EE LV LT WR 3M Οδηγίες Λειτουργίας DE ...
Page 233: ...EN FR IT ES PT NL SV DK FI GR TR CZ PL HU SK SL EE LV LT WR 3M Kullanım kılavuzu DE ...
Page 253: ...EN FR IT ES PT NL SV DK FI GR TR CZ PL HU SK SL EE LV LT WR 3M Návod k použití DE ...
Page 273: ...EN FR IT ES PT NL SV DK FI GR TR CZ PL HU SK SL EE LV LT WR 3M Instrukcja obsługi DE ...
Page 295: ...EN FR IT ES PT NL SV DK FI GR TR CZ PL HU SK SL EE LV LT WR 3M Üzemeltetési utasítás DE ...
Page 315: ...EN FR IT ES PT NL SV DK FI GR TR CZ PL HU SK SL EE LV LT WR 3M Návod na používanie DE ...
Page 335: ...EN FR IT ES PT NL SV DK FI GR TR CZ PL HU SK SL EE LV LT WR 3M Navodila za uporabo DE ...
Page 355: ...EN FR IT ES PT NL SV DK FI GR TR CZ PL HU SK SL EE LV LT WR 3M Kasutusjuhend DE ...
Page 375: ...EN FR IT ES PT NL SV DK FI GR TR CZ PL HU SK SL EE LV LT WR 3M Lietosanas instrukcija DE ...
Page 395: ...EN FR IT ES PT NL SV DK FI GR TR CZ PL HU SK SL EE LV LT WR 3M Naudojimo instrukcija DE ...
Page 415: ...WR 3M Circuit Diagram DE EN FR IT ES PT NL SV DK FI GR TR CZ PL HU SK SL EE LV LT ...
Page 416: ...WR 3M Exploded Drawing ...
Page 417: ......

