WR 3M
7-20
DE
EN
FR
IT
ES
PT
NL
SV
DK
FI
GR
TR
CZ
PL
HU
SK
SL
EE
LV
LT
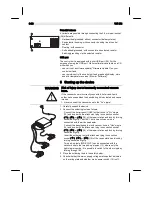
5. Connect the control unit to the mains supply (27).
6. Switch on the device at mains power switch (12).
After the device has been switched on, the microprocessor carries
out a self-test in which all the segments are briefly in operation. Then
the electronics switches automatically to the basic temperature
setting of 350 °C for all channels and 50 % for the "Air" setting.
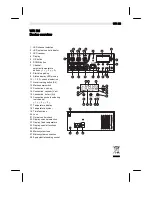
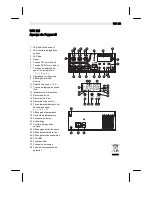
Green LED (2) lights up when activated channels are being used:
−
LED lit green constantly indicates that the connected tool is being
heated up.
−
LED flashing green indicates that the preselected tool temperature
has been reached.
Active channels are indicated in the display with a triangle (22) and a
lightning symbol (21)
Note HAP 200 can only be connected to channel 1! The maximum output
power is limited to 350 watts.
6
Operating the device
6.1
Selecting a channel, switching on or off
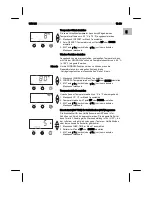
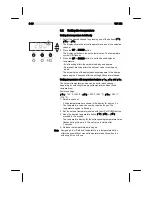
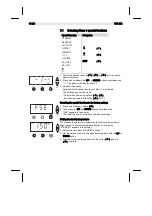
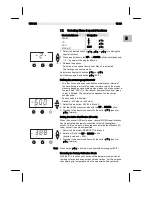
1. Press one of the buttons ┌ 1 ┐, ┌ 2 ┐ or ┌ 3 ┐ to select one of the
three channels.
The display shows the setpoint temperature of the selected
channel and - in smaller script - the permanently programmed
temperatures.
- Or -
Touch button ┌ 1·2·3 ┐ until the desired channel is displayed.
The current tool temperature then appears in the display. The
status with the corresponding setpoint temperature is also
displayed in the lower area.
The selected channel is indicated by a triangle (22) in the display
and by a red-lit LED (1) on the device.
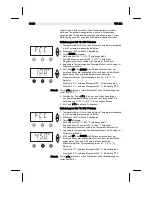
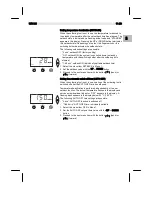
2. Press the UP and DOWN buttons simultaneously until three
dashes "- - -“ appear in the display.
3. Release the buttons.
If the channel is now deactivated, "OFF“ appears in the display.
If the channel is activated, the current actual temperature
appears in the display.
Stored data are not lost when a channel is switched off.
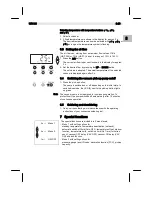
Note The display switches automatically to the channel to which a tool
has been newly connected, the finger switch has been pressed or
the tool has been removed from the switching holder.
Summary of Contents for Weller WR 3M
Page 2: ......
Page 4: ...WR 3M II ...
Page 5: ...EN FR IT ES PT NL SV DK FI GR TR CZ PL HU SK SL EE LV LT WR 3M Betriebsanleitung DE ...
Page 25: ...EN FR IT ES PT NL SV DK FI GR TR CZ PL HU SK SL EE LV LT DE WR 3M Operating Instruction ...
Page 45: ...EN FR IT ES PT NL SV DK FI GR TR CZ PL HU SK SL EE LV LT WR 3M Mode d emploi DE ...
Page 67: ...EN FR IT ES PT NL SV DK FI GR TR CZ PL HU SK SL EE LV LT WR 3M Istruzioni per l uso DE ...
Page 89: ...EN FR IT ES PT NL SV DK FI GR TR CZ PL HU SK SL EE LV LT WR 3M Manual de uso DE ...
Page 111: ...EN FR IT ES PT NL SV DK FI GR TR CZ PL HU SK SL EE LV LT WR 3M Manual do utilizador DE ...
Page 131: ...EN FR IT ES PT NL SV DK FI GR TR CZ PL HU SK SL EE LV LT WR 3M Gebruiksaanwijzing DE ...
Page 151: ...EN FR IT ES PT NL SV DK FI GR TR CZ PL HU SK SL EE LV LT WR 3M Instruktionsbok DE ...
Page 171: ...EN FR IT ES PT NL SV DK FI GR TR CZ PL HU SK SL EE LV LT WR 3M Betjeningsvejledning DE ...
Page 191: ...EN FR IT ES PT NL SV DK FI GR TR CZ PL HU SK SL EE LV LT WR 3M Käyttöohjeet DE ...
Page 211: ...EN FR IT ES PT NL SV DK FI GR TR CZ PL HU SK SL EE LV LT WR 3M Οδηγίες Λειτουργίας DE ...
Page 233: ...EN FR IT ES PT NL SV DK FI GR TR CZ PL HU SK SL EE LV LT WR 3M Kullanım kılavuzu DE ...
Page 253: ...EN FR IT ES PT NL SV DK FI GR TR CZ PL HU SK SL EE LV LT WR 3M Návod k použití DE ...
Page 273: ...EN FR IT ES PT NL SV DK FI GR TR CZ PL HU SK SL EE LV LT WR 3M Instrukcja obsługi DE ...
Page 295: ...EN FR IT ES PT NL SV DK FI GR TR CZ PL HU SK SL EE LV LT WR 3M Üzemeltetési utasítás DE ...
Page 315: ...EN FR IT ES PT NL SV DK FI GR TR CZ PL HU SK SL EE LV LT WR 3M Návod na používanie DE ...
Page 335: ...EN FR IT ES PT NL SV DK FI GR TR CZ PL HU SK SL EE LV LT WR 3M Navodila za uporabo DE ...
Page 355: ...EN FR IT ES PT NL SV DK FI GR TR CZ PL HU SK SL EE LV LT WR 3M Kasutusjuhend DE ...
Page 375: ...EN FR IT ES PT NL SV DK FI GR TR CZ PL HU SK SL EE LV LT WR 3M Lietosanas instrukcija DE ...
Page 395: ...EN FR IT ES PT NL SV DK FI GR TR CZ PL HU SK SL EE LV LT WR 3M Naudojimo instrukcija DE ...
Page 415: ...WR 3M Circuit Diagram DE EN FR IT ES PT NL SV DK FI GR TR CZ PL HU SK SL EE LV LT ...
Page 416: ...WR 3M Exploded Drawing ...
Page 417: ......

