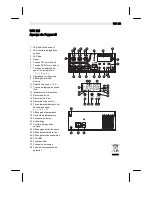
WR 3M
9-20
DE
EN
FR
IT
ES
PT
NL
SV
DK
FI
GR
TR
CZ
PL
HU
SK
SL
EE
LV
LT
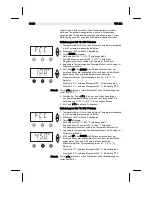
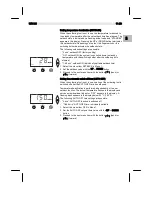
2 s ➾ Menu 1
4 s ➾ Menu 2
1x ➾ ON/OFF
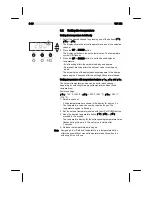
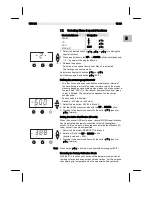
Selecting temperature with temperature buttons ┌ 1 ┐, ┌ 2 ┐
and ┌ 3 ┐
1. Select a channel.
2. 3 fixed temperatures are shown in the display for approx. 2 s.
The desired temperature can now be selected with ┌ 1 ┐, ┌ 2 ┐ or
┌ 3 ┐ as long as the temperature symbol is flashing
6.3
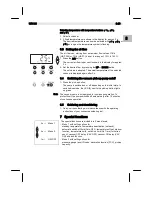
Setting the air flow
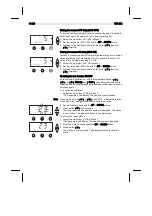
The air flow can, starting from a maximum flow value of 15 l/s
(HAP 200) or 10 l/s (HAP 1), be set in a range of 10 % to 100 %.
1. Press the AIR button.
The current air flow in per cent is shown in the display for approx.
2 s.
2. Set the desired flow by pressing the UP or DOWN button.
The set value is adopted. The actual temperature of the selected
channel is displayed again after 3 s.
6.4
Switching the vacuum pick-up pump on/off
Z
Press the pick-up button.
The pump is switched on or off, depending on the initial state. In
switched-on mode, the LED (8) next to the pick-up button lights
up green.
Note The vacuum pump is not designed for continuous operation. To
protect itself, the pump switches off automatically after 10 minutes
of continuous operation.
6.5
Soldering and desoldering
Z
Carry out the soldering work in accordance with the operating
instructions of your connected soldering tool.
7
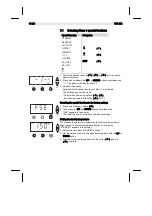
Special functions
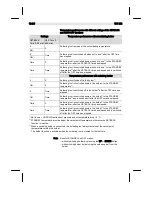
The special functions are divided into 2 menu levels:
−
Menu 1 with setting options for
standby temperature, temperature deactivation (setback),
automatic switch-off time (Auto-OFF), temperature offset, window
function, temperature units, switch-on time (On Time) for hot-air
pencil, vacuum OFF delay (VAC OFF), vacuum ON delay (VAC
ON) and lock function.
−
Menu 2 with setting options for
pressure-gauge level, ID code, calibration function (FCC), pick-up
capacity.
Summary of Contents for Weller WR 3M
Page 2: ......
Page 4: ...WR 3M II ...
Page 5: ...EN FR IT ES PT NL SV DK FI GR TR CZ PL HU SK SL EE LV LT WR 3M Betriebsanleitung DE ...
Page 25: ...EN FR IT ES PT NL SV DK FI GR TR CZ PL HU SK SL EE LV LT DE WR 3M Operating Instruction ...
Page 45: ...EN FR IT ES PT NL SV DK FI GR TR CZ PL HU SK SL EE LV LT WR 3M Mode d emploi DE ...
Page 67: ...EN FR IT ES PT NL SV DK FI GR TR CZ PL HU SK SL EE LV LT WR 3M Istruzioni per l uso DE ...
Page 89: ...EN FR IT ES PT NL SV DK FI GR TR CZ PL HU SK SL EE LV LT WR 3M Manual de uso DE ...
Page 111: ...EN FR IT ES PT NL SV DK FI GR TR CZ PL HU SK SL EE LV LT WR 3M Manual do utilizador DE ...
Page 131: ...EN FR IT ES PT NL SV DK FI GR TR CZ PL HU SK SL EE LV LT WR 3M Gebruiksaanwijzing DE ...
Page 151: ...EN FR IT ES PT NL SV DK FI GR TR CZ PL HU SK SL EE LV LT WR 3M Instruktionsbok DE ...
Page 171: ...EN FR IT ES PT NL SV DK FI GR TR CZ PL HU SK SL EE LV LT WR 3M Betjeningsvejledning DE ...
Page 191: ...EN FR IT ES PT NL SV DK FI GR TR CZ PL HU SK SL EE LV LT WR 3M Käyttöohjeet DE ...
Page 211: ...EN FR IT ES PT NL SV DK FI GR TR CZ PL HU SK SL EE LV LT WR 3M Οδηγίες Λειτουργίας DE ...
Page 233: ...EN FR IT ES PT NL SV DK FI GR TR CZ PL HU SK SL EE LV LT WR 3M Kullanım kılavuzu DE ...
Page 253: ...EN FR IT ES PT NL SV DK FI GR TR CZ PL HU SK SL EE LV LT WR 3M Návod k použití DE ...
Page 273: ...EN FR IT ES PT NL SV DK FI GR TR CZ PL HU SK SL EE LV LT WR 3M Instrukcja obsługi DE ...
Page 295: ...EN FR IT ES PT NL SV DK FI GR TR CZ PL HU SK SL EE LV LT WR 3M Üzemeltetési utasítás DE ...
Page 315: ...EN FR IT ES PT NL SV DK FI GR TR CZ PL HU SK SL EE LV LT WR 3M Návod na používanie DE ...
Page 335: ...EN FR IT ES PT NL SV DK FI GR TR CZ PL HU SK SL EE LV LT WR 3M Navodila za uporabo DE ...
Page 355: ...EN FR IT ES PT NL SV DK FI GR TR CZ PL HU SK SL EE LV LT WR 3M Kasutusjuhend DE ...
Page 375: ...EN FR IT ES PT NL SV DK FI GR TR CZ PL HU SK SL EE LV LT WR 3M Lietosanas instrukcija DE ...
Page 395: ...EN FR IT ES PT NL SV DK FI GR TR CZ PL HU SK SL EE LV LT WR 3M Naudojimo instrukcija DE ...
Page 415: ...WR 3M Circuit Diagram DE EN FR IT ES PT NL SV DK FI GR TR CZ PL HU SK SL EE LV LT ...
Page 416: ...WR 3M Exploded Drawing ...
Page 417: ......


