background image

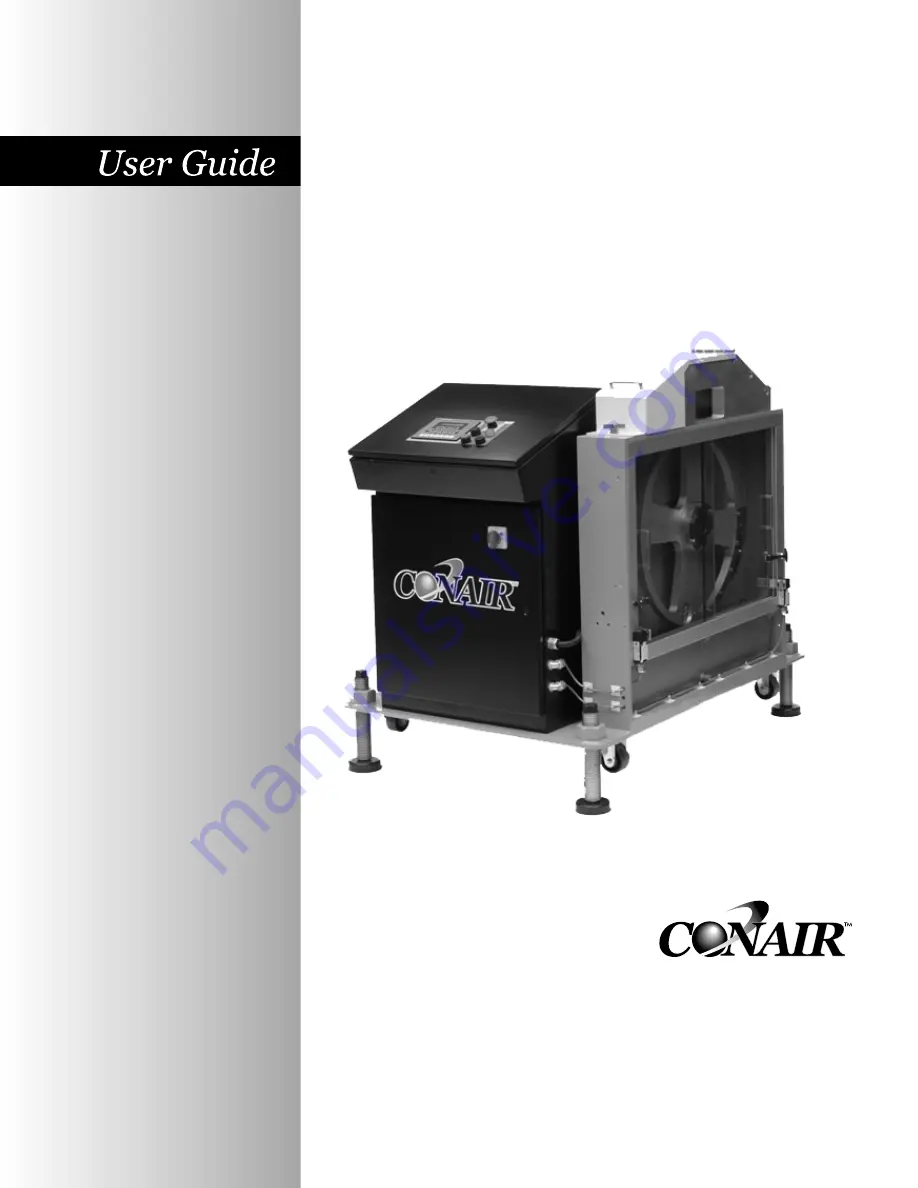
Sure Cut Rotary Knife Cutter

Instant Access 

Parts and Service

(800) 458-1960
(814) 437-6861

www.conairnet.com

The Conair Group, Inc.
One Conair Drive
Pittsburgh, PA 15202
Phone: (412) 312-6000
Fax: (412)-312-6227

SC-5 Servo Model

UGE059/1003

Installation

Operation

Maintenance

Troubleshooting

Summary of Contents for SC-5 Servo

Page 1: ...cess Parts and Service 800 458 1960 814 437 6861 www conairnet com The Conair Group Inc One Conair Drive Pittsburgh PA 15202 Phone 412 312 6000 Fax 412 312 6227 SC 5 Servo Model UGE059 1003 Installation Operation Maintenance Troubleshooting ...

Page 2: ... number s Model number s Power Specifications Amps Volts Phase Cycle DISCLAIMER The Conair Group Inc shall not be liable for errors contained in this User Guide or for incidental consequential dam ages in connection with the furnishing performance or use of this information Conair makes no warranty of any kind with regard to this information including but not limited to the implied warranties of m...

Page 3: ... 3 3 Positioning the SC 5 Sure Cut 3 4 Connecting the Main Power Source 3 6 Installing the Encoder 3 7 Installing the Cutter Blades 3 8 Mounting the Cutter Bushings 3 10 Checking Repeatability 3 12 Preparing for Testing 3 13 Testing the Installation 3 13 OPERATION 4 1 The Cutter Control Feature 4 2 Before Starting 4 3 Powering Up 4 3 Main Screen 4 5 Preset to Run 4 10 Time Preset 4 11 Cut Mode 4 1...

Page 4: ...Words of Caution 6 2 Identify the Cause of a Problem 6 3 Electrical Problems 6 4 Product Quality Problems 6 8 Replacing Safety and Proximity Switches 6 12 Checking the Servo Amplifier 6 12 Adjusting the Proximity Switches 6 14 Checking the Encoder 6 15 Checking the Motor Reducer Assembly 6 17 Checking Repeatability 6 18 APPENDIX Customer Service Information A 1 Warranty Information A 2 Cutter Blad...

Page 5: ... SURE CUT Servo Knife Cutter Purpose of the User Guide 1 2 How the User Guide is organized 1 2 Your Responsibilities as a User 1 2 ATTENTION Read this so no one gets hurt 1 3 How to Use the Lockout Device 1 5 INTRODUCTION ...

Page 6: ... could be hazardous to users or could damage equipment Read and take precautions before proceeding Numbers within shaded squares indicate tasks or steps to be performed by the user A diamond indicates the equipment s response to an action performed by the user An open box marks items in a checklist A shaded circle marks items in a list You must be familiar with all safety procedures concerning ins...

Page 7: ...outlined below and elsewhere in the User Guide ATTENTION READ THIS SO NO ONE GETS HURT UGE059 1003 SC 5 SURE CUT Servo Knife Cutter DANGER Sharp blades Most injuries caused by knife blades occur when the cutter has been turned off Handle blades with care at all times Always lock out the cutter before opening the cutting chamber Always wear cut resistant gloves when the cutting chamber is open and ...

Page 8: ...ts someone from inserting their hands or fingers in the cutting mechanism while the blade wheel is spinning Tampering with this feature will also VOID ANY responsibility for safety A lockable main power disconnect is provided to pre vent the possibility of hazardous electrical shock while servicing the main electrical enclosure See How to use the Lockout Device in Section 1 SC 5 SURE CUT Servo Kni...

Page 9: ...rom energy sources Your Conair product is equipped with the lockout device pictured below To use the lockout device Stop or turn off the equipment Do not stop the cutter by turning off the disconnect Always touch the off soft key on the interface first Isolate the equipment from electrical power Turn the rotary disconnect switch to OFF or O position Secure the device with an assigned lock or tag T...

Page 10: ......

Page 11: ...What is the SC 5 Sure Cut Knife Cutter 2 2 Typical Applications 2 4 How the SC 5Works 2 5 SC 5 Features 2 7 Specifications 2 7 Optional Equipment 2 8 DESCRIPTION UGE059 1003 SC 5 SURE CUT Servo Knife Cutter ...

Page 12: ...with 7 arc minutes maximum backlash is mounted directly to a 3000 rpm brushless servomotor A top flywheel speed of 300 rpm is realized Even though the flywheel appears to be moving slowly the actual surface speed at the blade at only 300 RPM s is over 0 438 inch per millisecond That s twice the surface speed of a typical clutch brake cutter Instead of mounting the cutter head directly to the servo...

Page 13: ...d not be necessary to cut in on demand mode in excess of 150 cuts per minute which will greatly save on premature wear to the system Not only does this cutter offer optimum blade surface speed throughout an extremely wide cuts per minute range but extreme accuracy throughout The added benefit of the 24 inch diameter by one inch thick aluminum wheel is the stored inertia which adds power for cuttin...

Page 14: ...satility to this cutter With the bushing holder above the flywheel tremendous cutting capacity is available without extreme blade length Ease of discharge conveyor interface for part support and automatic ejection systems is made simple with this layout The optional slide system can enable the use of rigids and flexibles To get the full benefit from the servo cutter Conair has provid ed several cu...

Page 15: ...e and the cutting knife The cutter head is mounted directly to the in line planetary gear reducer shaft using a B Loc coupling device and may have as many as four optional blade positions See Installation and Removal of B Loc Section 5 Two types of cutting modes are available On demand cut ting modes Timer Encoder Auto and Product provide a single rotation cut cycle However in continuous cutting m...

Page 16: ...N The cutter head holds the blade s as they rotate and pass between the bushings cutting the extrudate Extruded material enters the cutter from the upstream side 1 Cut pieces are collected or carried away on a conveyor 2 3 HOW THE SC 5 SURE CUT WORKS CONTINUED ...

Page 17: ...data entry for the operator Fixed function keys contain universal symbols and text MODELS SC 5 Performance characteristics Extruder capacity in mm Tube diameters 2 25 5 25 57 133 Profile dimensions 2x4 2x10 4x7 51x102 51x254 102x178 Blade drive motor Hp kW 4 6 3 4 Feed direction right left Dimensions in mm A Height 47 1194 B Height to centerline 40 2 1016 50 8 C Length 44 1118 D Width 52 1321 Volt...

Page 18: ...r to enhance delivery to the cutter bushings Blade Wipe The blade wipe system keeps the cutting blade clean by removing lubricant and particles from the blade A felt pad sandwiched between two pieces of stainless steel and mounted next to the bushing wipes the knife before each cut Custom Bushing Holder Sizes Available Heavy Duty Blade Positions One blade position standard Optional 2 or 4 blade po...

Page 19: ...ion transformer protects sensitive electronics from incoming power which helps prevent errors caused by electri cal noise It also protects equipment from electrical noise gen erated by the servo motor and associated amplifier NOTE An isolation transformer will not compensate for a ground that does not meet code requirements Left to Right Machine Operation This option changes the machine direction ...

Page 20: ......

Page 21: ... for Installation 3 3 Positioning the SC 5 Sure Cut 3 4 Connecting the Main Power Source 3 6 Installing the Encoder 3 7 Installing the Cutter Blades 3 8 Mounting the Cutter Bushings 3 10 Checking Repeatability 3 12 Preparing for Testing 3 13 Testing the Installation 3 13 INSTALLATION ...

Page 22: ...terial protective paper tape and plastic Compare contents to the shipping papers to ensure that you have all the parts Carefully inspect all components to make sure no damage occurred during shipping Check all wire ter minal connections bolts and any other electrical connec tions which may have come loose during shipping Record serial numbers and specifications in the blanks provided on the back o...

Page 23: ...ng If the servo cutter has the optional slide base be sure to check for clearance by extending the slide system in both directions PREPARING FOR INSTALLATION UGE059 1003 SC 5 SURE CUT Servo Knife Cutter INSTALLATION 3 3 1 2 WARNING Improper installation oper ation or servicing may result in equipment damage or personal injury This equipment should only be installed adjust ed and serviced by qualif...

Page 24: ...e deflection during cutting which could affect the cut length accuracy As a general rule place the cutter such that you feel no shock from the cut with your fingernail placed on the extrudate on the entrance of the puller If you feel shock form the cut simply allow more space between the cutter and puller SC 5 SURE CUT Servo Knife Cutter UGE059 1003 3 4 INSTALLATION 1 POSITIONING THE SERVO CUTTER ...

Page 25: ...ht of the extrusion line using a 16 or 18 inch adjustable wrench Once the correct height is reached adjust the pad assembly to remove the weight from the casters for operation This minimizes machine vibration during the cutting cycle Use a plumb line or laser to check for a straight line from the extrusion die through each line component to the cutter bushings Adjust as necessary UGE059 1003 SC 5 ...

Page 26: ... prevent injury from unexpected energization or start up A lockable device has been provid ed to isolate this product from potentially haz ardous electricity WARNING Improper installation oper ation or servicing may result in equipment damage or personal injury This equipment should only be installed adjust ed and serviced by qualified technical person nel who are familiar with the construction op...

Page 27: ...er to the puller depends on your particular puller and application If the wheel rides on the puller belt make sure that its lin ear alignment is the same as the belt Place the wheel near the center of the belt to minimize bouncing Try to avoid cracks and other belt features that may effect accuracy Make sure the location allows you to keep the wheel clean Any small buildup on the wheel will effect...

Page 28: ...attempt to change or work on Blades without first locking out power to the machine When the knife guard is opened the knife guard switch stops the cutter Two proximity type safety switches prevent operation unless the cutter bushings are in place The STOP button activates a circuit that stops the cutter head Installing the Cutter Blades Shut off the main power disconnect and unplug the main power ...

Page 29: ...eeds to be carefully checked to insure that the entire blade will pass completely through the product This is especially important with the very first insta llation and can be accomplished by rotating the wheel with the blade installed manually though the bushing and visually check to see that it will com pletely cover the entire bore of the bushing INSTALLING THE CUTTER BLADES CONTINUED CAUTION N...

Page 30: ...er formance Installation of the bushing Open the top hinged cover yellow to expose the top of the bushing holder Use the two set screws positioned on top of the bushing holder and turn them counterclock wise to loosen and remove the bushings Replace the desired bushings and tighten up the two set screws just enough to barely be able to move the bushings Rotate the blade wheel until the blade enter...

Page 31: ...ix C Checking the Alignment of bushing to blade Once you are sure that the blade will easily clear the bush ings as it goes through the space you should then make some test cuts to insure quality Close the safety cover Turn on the Power Rotary main disconnect Press the Green start button Do several test cuts by pressing the manual cut button Check the quality of the cuts Adjust the bush ing if nec...

Page 32: ... 1 millisecond at 60 feet per minute is equal to 0 012 inches The repeatability mode is built into the Conair cutter controls and allows you to perform similar tests without any external test equipment It is recommended that you check repeatability on a regular basis Refer to Operation Section 4 Control Instructions Test to run repeatability tests Acceleration decel eration delays of the servo do ...

Page 33: ...art communications and the yellow power light should now be on Make sure the bushings and the blade doors are in place and secure Check that the bushing access door is closed and the threaded knob is tight and the E stop is in the out position Press the green start button If the guard circuit is ready the green start button will now be illuminated Do a test cut by pressing the black manual cut but...

Page 34: ......

Page 35: ...set 4 11 Blade Speed 4 13 Function Areas 4 15 Test Screen 4 16 Cut Mode 4 18 Min Measurement 4 19 Maintenance Area 4 19 Encoder Area 4 20 Unit of Measure 4 22 Scale Distance 4 23 Homing 4 25 Offset Example 4 26 Preventative Maintenance 4 27 Power On Time 4 28 Checking Cut Quality 4 29 Starting the SC 5 Sure Cut 4 29 Making Adjustments During the Operation 4 30 Stopping the SC 5 Sure Cut 4 31 OPERA...

Page 36: ...nally pages will appear that allow the operator to use one of the soft keys On those occasions text would typically appear directly above the key and the key will have a function Think of the text as the soft key function indicator or title These keys will be referred to in this manual from left to right as soft keys 1 2 and 3 respectively Numeric keys These are the black keys containing numbers 0...

Page 37: ...fter any required maintenance Turn on the main power The cutter control will bootup The amber power on light illuminates While the cutter is booting up perform the next three steps Make sure the E Stop button is in the out extended position Make sure that the Cut Enable is Off If necessary press button to display off Press Start Cutter button The light in the button should light On SC 5 cutters th...

Page 38: ...eens briefly appear The software is Red Lion s Edict 97 This screen or similar shows first Next the Communications message appears If there are any problems with communications this screen will remain on longer than a couple of seconds If there are no communication problems the Conair SC 5 Cutter program will begin to run The following message or similar shows for 5 seconds After the 5 second dela...

Page 39: ...nding on the active cut mode It displays the value only when the machine is started and softkey2 On Off is on If the machine is stopped or soft key2 On Off is off this counter will be forced to zero If a negative symbol is shown to the left of the measurement value the encoder signal is reversed i e rotating in the wrong direction The Cutter will not function while the encoder is going negative It...

Page 40: ...ecade total counter is available Additional information on how to access this screen can be found in the operator display overview in Appendix E of this manual This is typically used to count cut pieces during the day or days that the product is being produced Sample or manual cuts are not counted When enabled the count continues to accumulate even if the total display is not being viewed It is al...

Page 41: ...ergizes and both outputs turn back off Sample Manual cuts are not counted When enabled the count continues to accumulate even if the batch display is not being viewed It is also possible to turn this counter off or on Change Softkey1 Under the counter on the left is a soft key labeled Change Pressing this key displays the Select Batch Area screen The operator can then choose to set the batch or al...

Page 42: ...soft key located under the word Batch on the Batch Area Screen the preset for the Batch counter is avail able The number shown is the current batch preset A cursor will appear in the least significant digit The user has a choice of ways to adjust this number Exit or Prev If no change is required press Exit or Prev to return to the Main screen Raise will increase the preset by 1 The key can be pres...

Page 43: ...reset above Please note This value must be less than the batch preset Exit or Prev if no change is required press Exit or Prev to return to the Main screen LENGTH SCREEN By pressing the soft key located under the word Length on the Encoder Follower or Auto Mode Main Screen the preset for the Length counter is available Additional information on how to access this screen can be found in the operato...

Page 44: ... or Delete If the keyed in number is correct press the enter key for it to be accepted and return to the Main screen If it is wrong press the delete key and the previous preset will reappear PRESETS TO RUN SCREEN By pressing the soft key located under the word Prst on any Length Screen the value for the number of presets to run is available Additional information on how to access this screen can b...

Page 45: ...r or Delete If the keyed in number is correct press the enter key for it to be accepted and return to the Main Timer Mode screen If it is wrong press the delete key and the previous preset will reappear TIME SCREEN By pressing the soft key located under the word Time on the Main Timer Mode Screen the preset for the timer is avail able Additional information on how to access this screen can be foun...

Page 46: ...conds Enter or Delete If the keyed in number is correct press the enter key for it to be accepted and return to the Main Timer Mode screen If it is wrong press the delete key and the previous preset will reap pear HOLD OFF TIME SCREEN By pressing the soft key located under the word Time on the Main End Sense Mode Screen the preset for the hold off timer is available Additional information on how t...

Page 47: ... will be displayed Enter or Delete If the keyed in number is correct press the enter key for it to be accepted and return to the Main End Sense Mode screen If it is wrong press the delete key and the previous preset will reappear BLADE SPEED SCREEN By pressing the soft key located under the word Blade or Speed depending on the current mode the preset for that modes blade speed is available Additio...

Page 48: ...rect press the enter key for it to be accepted and return to the Blade Select or Main Mode Screen If it is wrong press the delete key and the previous preset will reappear BLADE COUNT SCREEN By pressing the soft key located under the word Blade or Count depending on the current mode the preset for the blade count is available Additional information on how to access this screen can be found in the ...

Page 49: ...e keyed in number is correct press the enter key for it to be accepted and return to the Blade Select or Main Mode Screen If it is wrong press the delete key and the previous preset will reappear FUNCTION AREAS Additional information on how to access and navigate these screens can be found in the operator display overview section of this manual Menu fixed function key is used to access the Functio...

Page 50: ...ster displays total deviation time in milliseconds This time is from a cut being requested until the blade reaches the part The smallest measured value is sub tracted from the largest measured value and the resulting devi ation is displayed on the screen New data is sampled every consecutive cut The DevCP repeatability test is available in all on demand modes This test is used as a tool for verify...

Page 51: ... Softkey1 On the display on the lower left side is a soft key labeled On or Off Pressing this key while On is displayed will reset all values and disable testing Likewise pressing this key while Off is displayed starts the test Reset Softkey3 On the display on the lower right side is a soft key labeled Reset Pressing this key will reset all test values and start a new test Exit Pressing Exit or th...

Page 52: ... area of the operator display overview section of this manual Press the Softkey located under the cut mode desired to select that mode If the mode is available an acknowledgment will be displayed This message will be displayed for 3 seconds or until any key is pressed Next or Prev Pressing Next selects the second Cut Mode Area Pressing Prev returns the display to the first Cut Mode Area Pressing P...

Page 53: ...the second Function Area Screen the calculated cuts per minute are displayed The active mode measurement value blade speed number of blades and line speed may all contribute to determining the actual value displayed The screen will be displayed for 15 seconds or until any key is pressed then return to the second Function Area screen MAINT AREA Menu function key is used from the first Function Area...

Page 54: ... possibly cause severe damage to your machine Maint Softkey Located under the word Maint is the Maintenance soft key The Maintenance area is password protected This area should only be accessed by qualified personal After pressing the Maintenance Softkey the password entry screen is displayed With the numeral keys press 6 2 0 9 then the Enter key to access the maintenance area An improper password...

Page 55: ...the display is the status text INCORRECT CORRECT for the encoder direc tion Exit or Prev Pressing Exit or Prev will return the display to the Encoder Area screen Change Softkey With the machine stopped by pressing the soft key located under the word Change The direction of the encoder is reversed After the change if the count direction is positive the status text will now display the word CORRECT ...

Page 56: ...iption Scale Softkey By pressing the soft key located under the word Scale on the Encoder Area Screen there are two sub menus Dist and Counts accessible Additional information on how to access this screen can be found in the Maintenance Area of the oper ator display overview in Appendix E of this manual Exit or Prev Pressing Exit or Prev will return the display to the Encoder Area screen SETTING T...

Page 57: ...ill increase the value by 0 001inch The key can be pressed once for each 0 001inch increment required or held down to scroll up Releasing the key will freeze the value at the last value Lower will decrease the value by 0 001inch The key can be pressed once for each 0 001inch decrement required or held down to scroll down Releasing the key will freeze the value at the last value Numeric keys Key in...

Page 58: ... change is required press Exit or Prev to return to the Scale Value screen Raise will increase the value by 1 The key can be pressed once for each 1 increment required or held down to scroll up Releasing the key will freeze the value at the last value Lower will decrease the value by 1 The key can be pressed once for each 1 decrement required or held down to scroll down Releasing the key will free...

Page 59: ...ress any key on the operator to acknowledge the fault Disconnect power fix the problem then restart the cutter After a successful home has been completed if the cutter is stopped away from the home position and the power to the machine is left on the cutter head position is still known When the cutter is restarted the cutter head will return at the programmed On Demand blade speed to the home posi...

Page 60: ...eyed in number is correct press the enter key for it to be accepted and return to the Maintenance Area screen If it is wrong press the delete key and the previous value will reap pear HOME OFFSET EXAMPLE With the Cut Enable on off turned off and the cutter started entering a new value at the Home Offset screen will initiate a home routine using the new value The graphic example above demonstrates ...

Page 61: ...he soft key located under the word Inputs on the P M area screen selects the inputs monitoring screen This screen displays the cutters input status Active inputs are equal to On and de energized inputs are equal to Off This information could be used for troubleshooting with out the use of a meter Input 1 End Sense Trigger when On Input 2 Run when Off Input 3 Manual Cut Trigger when On Input 4 Home...

Page 62: ...ftkey under the word Exit returns the display to the Select P M area screen Cycles Softkey Pressing the soft key located under the word Cycles on the P M area screen selects the machine cycles screen The Machine Cycles screen displays the absolute total cuts that the machine has made since manufacture This informa tion could be used for scheduling preventive maintenance The displayed count can not...

Page 63: ...Cut On Off is off Inspect the cut If necessary adjust the blade design or blade speed See All About Cutter Blades Appendix B OPERATION 4 29 CHECKING CUT QUALITY 4 3 2 1 If you have not already done so check the cutter hardware power up the cutter select cutting mode and blade speed and make a test cut to check cut quality When you are satisfied with cut quality press the Cut On Off soft key and on...

Page 64: ...ring continuous cutting Count the total number of cuts by pressing the Total On Off soft key Use the Reset button to return the count to zero This feature is useful for collecting samples dur ing a production run Count the batches of cuts by pressing the Total On Off soft key Use the Reset button to return the count to zero This feature is useful for collecting samples during a pro duction run Sto...

Page 65: ... disconnect Clean the lubricant reservoir if you are shutting the servo cutter down for the day STOPPING THE SC 5 CUTTER OPERATION 4 31 WARNING Never stop the servo cut ter by opening the knife guard This can cause damage to the equipment and injury to personnel WARNING Never turn off the rotary disconnect first Doing so will turn off all power to the unit and the cutter will not be brought to a c...

Page 66: ......

Page 67: ... 5 4 Preventative Maintenance Schedule 5 4 Checking the Blades 5 6 Inspecting Cutter Bushing Screws 5 7 Checking the Closure Latch 5 7 Cleaning the Blade Tray 5 8 Lubricating the Slide Rail System 5 8 Adjusting the Proximity Switches 5 9 Checking Electrical Connections 5 10 BLoc Installation and Removal 5 12 MAINTENANCE ...

Page 68: ...daily weekly quarterly and semi annual every 6 months schedule Use this maintenance schedule as a guide You may need to shorten the time of the maintenance schedule depending on how often you use the servo cutter and the types of material flowing through it Follow all precautions and warnings when working on the equipment WARNING Improper installation operation or servicing may result in equipment...

Page 69: ...ded to isolate this product from potentially hazardous electricity DANGER Sharp blades Most injuries caused by knife blades occur when the cutter has been turned off Handle blades with care at all times Always wear cut resistant gloves when the cutting chamber is open and when handling blades Always lock out the cutter before opening the cutting chamber See Lockout tagout above Always wait until t...

Page 70: ...a lock washer and flat washer and be tightened enough to fully com press the lock washer Replace the holding pins if they appear worn Inspecting the cutter bushing screws Check that the cutter bushing screws are secure see Inspecting Cutter Bushing Screws Section 5 Checking the closure latch on the knife guard See Checking the Closure Latch Section 5 Inspecting cutter alignment Proper cutter align...

Page 71: ...ULE CONTINUED UGE059 1003 SC 5 SURE CUT Servo Knife Cutter MAINTENANCE 5 5 Clean the clear blade guard window Clean using glass cleaner or plain water Other materi als may cause premature loss of clarity or crazing Semi annual every 6 months Inspecting electrical terminals Check all electrical terminals for tightness adjust as needed See Checking Electrical Connections Section 5 Checking torque on...

Page 72: ...ys wear cut resistant gloves when the cutting chamber is open and when handling blades Always lock out the cutter before opening the cutting chamber Always wait until the cutter head has stopped completely before opening the knife guard SC 5 Sure Cut cutters are equipped with sever al safety devices to ensure safe operation Never remove or disable these devices to sus tain production Operating wit...

Page 73: ...ngs If bush ings move during cutting cutting blades and possibly the drive chain could be damaged INSPECTING CUTTER BUSHING SCREWS CHECKING THE KNIFE GUARD Check the hand knob and tighten it so the knife guard closes completely This prevents false triggering of the safety switch Cutter bushing screws Hand knob ...

Page 74: ...op vac or other similar equipment remove all liquid and solids from the cutting chamber and around the bushings Replace the lubricant For more information see Blade and Bushing Lubrication Appendix D CLEANING THE BLADE TRAY OPTIONAL Check the shafts on the slide rail system Even though these shafts are stainless steel it is recommended that a light oil WD 40 or similar be applied to the shafts as ...

Page 75: ...e bush ings themselves Check the tightness of each proximity switch s retaining screw Use an Allen wrench to perform this task IMPORTANT You can damage the proximity switch if you over tighten the retaining screw Replace cutter bushings and check for proper cut ting blade alignment See Mounting the Cutter Bushings Section 3 and the Appendix A and C Plug in the power cord and turn the main power di...

Page 76: ...r sources to prevent injury from unexpected ener gization or start up A lockable device has been provided to isolate this product from potentially hazardous electricity WARNING Improper installation oper ation or servicing may result in equipment damage or personal injury This equipment should only be installed adjust ed and serviced by qualified technical person nel who are familiar with the cons...

Page 77: ...lose the electrical enclosure door Inspect the exterior power cords Cords should not be crimped exposed or rubbing against the frame If the main power cord runs along the floor make sure it is not positioned where it could rest in pooling water or could be run over and cut by wheels or casters UGE059 1003 SC 5 SURE CUT Servo Knife Cutter MAINTENANCE 5 11 3 4 5 6 CHECKING ELECTRICAL CONNECTIONS CON...

Page 78: ...hieved 7 Continue to apply overtorque for 1 to 2 more passes This is required to compensate for a system related relaxation of locking screws since tightening of a given screw will always relax adjacent screws Without overtorquing an infinite number of passes would be needed to reach specified tightening torque 8 Reset torque wrench to specified torque MA and check all locking screws No screw shou...

Page 79: ...e Cause of a Problem 6 3 Electrical Problems 6 4 Product Quality Problems 6 8 Repair Replacing Safety and Proximity Switches 6 12 Checking the Servo Amplifier 6 12 Adjusting the Proximity Switches 6 14 Checking the Encoder 6 15 Checking the Motor Reducer Assembly 6 17 Checking Repeatability 6 18 TROUBLESHOOTING ...

Page 80: ...utter BEFORE BEGINNING SC 5 SURE CUT Servo Knife Cutter UGE059 1003 6 2 TROUBLESHOOTING A FEW WORDS OF CAUTION WARNING Improper installation oper ation or servicing may result in equipment damage or personal injury This equipment should only be installed adjust ed and serviced by qualified technical person nel who are familiar with the construction oper ation and potential hazards of this type of ...

Page 81: ...und in the manufac turer s manuals included with this User Guide IDENTIFYING THE CAUSE OF A PROBLEM UGE059 1003 SC 5 SURE CUT Servo Knife Cutter TROUBLESHOOTING 6 3 DANGER Sharp blades Most injuries caused by knife blades occur when the cutter has been turned off Handle blades with care at all times Always wear cut resistant gloves when the cutting chamber is open and when handling blades Always l...

Page 82: ...button does not produce a cut when in an on demand mode Possible cause The E stop button is pushed in A safety switch has failed There is a loose connec tion The relay is bad The guard circuit failed The servo amplifier is not in Program mode There is a loose connec tion Solution Pull out the E stop button Check to see if The blade guard is closed Master Control relay MCR has failed Replace relay ...

Page 83: ...ible cause The Blade home proximi ty switch failed or the connection to it is loose Guard circuit is open Input from encoder failed Encoder failed Solution Check connections and replace switch if needed Check to see if The blade guard is closed Loose connection to guard circuit Tighten connec tion Guard switch is bad Replace switch Check encoder cable for conti nuity Connect any loose wires Replac...

Page 84: ... loose connec tion There is an anti jam cir cuit signal There is a problem with the home proximity switch Solution Check for control output See Checking the Servo Amplifier Check wiring for loose con nections This error appears when the blade does not go through the cut cycle in the required time Check for Loose connection on cutter control or servo amplifier Fault on Amplifier prevent ing cut cyc...

Page 85: ... Possible cause There is a communication failure between the con trol and drive There is a communication failure between the con trol and drive The coupling between the servo motor and the Micron reducer has slipped The Trantorque coupling has slipped Solution Check for wiring for loose connections and tighten Check for wiring for loose connections and tighten See Checking the Motor reducer assemb...

Page 86: ...ath is causing a cheese grater effect The extrudate is too cold Solution Increase the blade speed or decrease the blade cut path area blade width Excessive blade thickness can cause frictional heat Use a thinner blade Change angle of the blade attack or the blade style to decrease the cut path area Use blade lubrication water etc or change lubricants Consider a blade wiping sys tem The cutting edg...

Page 87: ... The bushing gap is too wide The blade speed is too low Solution Change bushing design to make them more supportive The bushing gap should be no more than 001 003 inch larg er than the blade Check and adjust if necessary Low blade speeds can cause excessive blade interruption Increase blade speed or decrease the blade cut path area PRODUCT QUALITY PROBLEMS CONTINUED ...

Page 88: ...n If the extrudate is too cold it can fracture or whiten during cutting Raise the extrudate s temperature High blade speeds can cause too much impact Lower the blade speed Change the bushing design to make them more supportive A blade that is too sharp can fracture some materials espe cially rigid PVC and nylons Slightly dull the blade If nylon is cooled too quickly its molecular structure may bec...

Page 89: ...0 degrees relative to the bushing holder If the cutter bushings are not properly gapped the blade may be free to move with the extrudate Check and adjust if necessary See Appendix A If the knife bevel is asymmet ric the blade will tend to move in the direction of the smaller bevel Be sure that the bevel is symmetric NOTE You can use this to your advantage with some rigid products There must be eno...

Page 90: ... inch from the bushing surface Remove the proximity switch by loosening the set screw Test it by bringing some object close to the sensor when the power is turned on If the LED does not light replace the proximity switch The servo amplifier is equipped with a digital readout that can be seen through the viewing window on the electrical enclo sure This display shows amplifier status and error messa...

Page 91: ...tighten the jam nuts If the proximity switch does not sense the cutter head after this adjustment remove the switch and test it outside the cutter Replace if necessary ADJUSTING THE PROXIMITY SWITCHES DANGER Sharp blades Always wear cut resistant gloves when the cut ting chamber is open and when handling blades Never open cutting chamber without locking out the cutter power Most injuries caused by...

Page 92: ...es Check all connections Check the encoder cable for damage If neces sary replace Check the connector that attaches the cable to the encoder Internal wiring may be shorted out if this connector is not handled properly Check the encoder itself There should be no play in the shaft If all else fails contact Conair Customer Service See Appendix A WARNING Delicate equipment The encoder is a delicate pi...

Page 93: ...Excessive clearance in mounting hole can lead to inaccuracy If encoder is taken apart the warranty is invalidated seal bro ken Encoder wheel should not exceed 001 TIR If mounting encoder and wheel assembly on belt or roller Tighten bracket to facilitate no vertical movement Apply encoder wheel to surface to be measured in position that will not allow slippage but confirms to above warn ings Altern...

Page 94: ...ts holding the motor reducer assembly to the cutter Remove them and carefully remove the assembly from the cutter Refer to the Micron installation and maintenance information included with this User Guide to check and adjust the motor reducer assembly Refer to section 5 Installation and Removal Instructions for B Loc 6 16 TROUBLESHOOTING SC 5 SURE CUT Servo Knife Cutter UGE059 1003 CHECKING THE MO...

Page 95: ...error any error is attributed solely to motor stability couplings assembly power and proximity sensor alignment Use any blade speed and line speed The line speed is only seen while in the Encoder or Product modes It is recommend ed that the tests be performed at cut intervals between 0 5 and 5 seconds Do not change the blade speed or the line speed after starting the test To test repeatability Tur...

Page 96: ......

Page 97: ...owing checklist before calling Conair Make sure you have all model serial and parts list numbers for your particular equipment Service personnel will need this information to assist you Make sure power is supplied to the equipment Make sure that all connectors and wires within and between the cutter and related components have been installed correctly Check the troubleshooting guide of this manual...

Page 98: ...will exercise one of the following options Inspect the equipment and perform alterations or adjustments to satisfy performance claims Charges for such inspections and corrections will be waived unless failure to meet warranty is due to misapplica tion improper installation poor maintenance practices or improper operation Replace the original equipment with other Conair equipment that will meet ori...

Page 99: ...re wear resistant than stainless but is also more brittle M 2 is an excellent grade of tool steel with an HRC of 63 66 It is one of the best materials for coating with titanium nitride for improved wear resistance However coatings generally cause some slight loss of sharpness 0 025 inch material is available which covers many applications without the need for secondary grinding operations D 2 is a...

Page 100: ...ze blade and bushing buildup As a general rule curved edge knives offer improved cut qual ity on rigid materials if additional heat can be used However if used on cold rigid materials curved knives have a tendency to produce wavy or angled cuts A curved edge knife can sometimes cut larger cross section profiles and tubing with the same horse power as a straight edge blade However the use of a curv...

Page 101: ...slicing action for best results This is due to the fact that even minimal interruption can cause a blade jam on a product that has little or no internal strength On the other hand rigid extrudates may require different blade speeds to obtain the desired cut quality What s needed for a particular application depends on blade style internal heat and blade thickness Speeds as slow as 300 rpm may be r...

Page 102: ... interruption in millisec onds for an SC 5 cutter running 1 4 inch 0 250 inch OD tubing The blade speed is 718 rpm and the cutting blade is 15 16 inch 0 937 inch width at the point where it passes through the extrudate and the cut path circumference is 87 9 for the SC 5 Calculate the blade interruption time The interruption time starts when the blade makes its first contact with the extrudate and ...

Page 103: ...er and puller multiply line speed by interruption time Blade Interruption X Line speed X 12 Deflection time msec fpm 60 000 in 1 13msec X 60 fpm X 12 014 in In this example the puller and cutter must be set up to allow for 0 014 inch of product deflection during cutting Failure to do this can lead to puller stoppage which can form annular rings on the product and poor quality cuts hairs or fuzz an...

Page 104: ...ess Material inches x Length inches 0235 30496 Straight 41 4 51 4 4x10 0 025x9 5 Spring Steel 3515 30496 1 Straight 21 4 2x4 2x6 0 025x6 48 Spring Steel 3515 30496 2 Straight 31 4 2x8 2x10 0 025x8 33 Spring Steel 2x12 4x7 3515 30488 Curved 31 4 4x7 3x6 0 025x11 15 Spring Steel CONAIR CUTTER BLADES ...

Page 105: ...the size and or shape of the bushing bore In the case of tubes this causes two marks on the tube penetration marks that show where the tube flat tened before the blade actually penetrated it The tighter the bushing bore size to tube size the closer the marks become making them less obvious If the bushing bore is too tight excessive extrudate interrup tion or even jamming may occur In turn this can...

Page 106: ... the cutter bushing must be smooth and glass like when cutting flexible extrudates otherwise exces sive drag causes jamming and can lead to variations in cut to length accuracy When cutting flexible materials have the internal sur face machined to resemble glass In many cases med ical processors will actually have the ID of their bush ings either honed or burnished for best results When cutting cl...

Page 107: ...ed it has a negative effect on cut quality The shear surface of both the upstream and downstream cutter bushings should be sharp and bored to the same size NOTE In high speed cutting applications the down stream bushing is sometimes bored 0 005 larger than the upstream bushing to minimize jamming Deburr the edge after the boring operation but be careful to remove only the burr and not the edge Lea...

Page 108: ...being tapered On sticky flexible extrudates the parts will actually stick back together if the new part has to push the cut part out very far For rigid extrudates the length of the cutter bushings can result in a square cut or an angular cut The cutter bushings support the extrudate keeping it from moving from side to side and bowing from the weight of the profile itself Many proces sors make thei...

Page 109: ...o check proper gap Locate the upstream cutter bushing with 0 001 0 002 inch of the blade and lock it in place Rotate the blade through the set bushings to insure proper gap NOTE Because blades are rarely perfectly flat it is possible that a swish ing sound will be heard If hairs are present on only the upstream cut end of a tube or profile it may be necessary to allow a 0 002 0 005 inch gap on the...

Page 110: ...he cut face With flexible materials these lines will typically show an arc or S pattern which can be attrib uted to compression of the part as the blade passed through Rigid materials such as rigid PVC and styrene will tend to fracture during cutting The cut surface changes from glossy to dull and finally becomes whitened and rough Whitening occurs when cutting changes to fracturing the cut begins...

Page 111: ...ion of a minimum amount of lubricant with good consistency If the mist is applied to the product as it enters the cutter bushings the lubricant will minimize the drag between the bushing bore and the tube or profile as well as wet the blade and bushing faces With flexible and or sticky materials this can improve both cut quality and cut to length accuracy The last method of blade lubrication and t...

Page 112: ...an be a real problem in materials such as latex silicone PP and flexible PVC Benefits of using lubricants The primary benefit of using a cutting lubricant is reducing friction If the cutting blade is coated with a film of lubricant the coefficient of friction between the blade and the plastic tube or profile is reduced reducing the generation of frictional heat Lubricants also minimize the tendenc...

Page 113: ... in Exit TOTAL 0 000 000 pcs Off Exit Reset BATCH 000 000 pcs Change Off Reset SELECT BATCH AREA Preset Exit Alarm PRESET 000 000 pcs Exit ALARM 000 000 pcs Exit ENC 00000 000 in Parts Off Length ENCODER MODE OPERATOR DISPLAY OVERVIEW OR OR OR OR OR OR ...

Page 114: ... sec Exit TOTAL 0 000 000 pcs Off Exit Reset BATCH 000 000 pcs Change Off Reset SELECT BATCH AREA Preset Exit Alarm PRESET 000 000 pcs Exit ALARM 000 000 pcs Exit SNS 00000 000 sec Parts Off Time END SENSE MODE OPERATOR DISPLAY OVERVIEW OR OR OR OR OR OR ...

Page 115: ...0 000 pcs Change Off Reset TOTAL 0 000 000 pcs Off Exit Reset PRESET 000 000 pcs Exit ALARM 000 000 pcs Exit FLY 00000 000 cpm Parts Off Blade FLYWHEEL MODE OPERATOR DISPLAY OVERVIEW SELECT BATCH AREA Preset Exit Alarm SPEED 0000 0 rpm Exit RUN 1 BLADES Exit OR OR OR OR OR OR OR ...

Page 116: ... sec Exit TOTAL 0 000 000 pcs Off Exit Reset BATCH 000 000 pcs Change Off Reset SELECT BATCH AREA Preset Exit Alarm PRESET 000 000 pcs Exit ALARM 000 000 pcs Exit TMR 00000 000 sec Parts Off Time TIMER MODE OPERATOR DISPLAY OVERVIEW OR OR OR OR OR OR ...

Page 117: ...in Exit TOTAL 0 000 000 pcs Off Exit Reset BATCH 000 000 pcs Change Off Reset SELECT BATCH AREA Preset Exit Alarm PRESET 000 000 pcs Exit ALARM 000 000 pcs Exit FOL 00000 000 cpm Parts Off Length FOLLOWER MODE OPERATOR DISPLAY OVERVIEW OR OR OR OR OR OR ...

Page 118: ...n Exit TOTAL 0 000 000 pcs Off Exit Reset BATCH 000 000 pcs Change Off Reset SELECT BATCH AREA Preset Exit Alarm PRESET 000 000 pcs Exit ALARM 000 000 pcs Exit ATO 00000 000 in Parts Off Length AUTO DEMAND MODE OPERATOR DISPLAY OVERVIEW OR OR OR OR OR OR ...

Page 119: ...cs Exit ALARM 1 000 015 pcs Exit 1 ENC 00000 000 in Parts Off Length MULTIBLE PRESETS ENCODER MODE EXAMPLE OPERATOR DISPLAY OVERVIEW OR OR OR OR OR SELECT BATCH PRESET Batch1 Batch2 Next SELECT ALARM PRESET Alarm3 Alarm4 Prev SELECT ALARM PRESET Alarm1 Alarm2 Next SELECT BATCH PRESET Batch3 Batch4 Prev LENGTH 1 00000 000 in Exit Prst RUN 4 PRESETS Exit SELECT LENGTH PRESET Length3 Length4 Prev OR ...

Page 120: ...RATOR DISPLAY OVERVIEW accessed by pressing the menu button SELECT CUT MODE Encdr Sense FlyWhl SELECT CUT MODE Timer Follwr Auto SEE MODE OVERVIEWS CURRENT MIN LENGTH IS 0000 000 in MEASURMENT DEPENDENT ON MODE The Current Settings Produce 0000 000 cpm OR OR OR DevCP 000 000 mS Off Exit Reset DevCC 000 000 mS Off Exit Reset WHICH TEST OR BOTH DEPENDENT ON MODE ...

Page 121: ...Accessed by pressing the menu button from Menu Area 1 and entering the correct password OR SELECT P M AREA Inputs Time Cycles Select Encoder Area Drctn U M Scale OR OR MACH CYCLES 00000000 Exit I1 Off I2 Off I3 Off I4 On I5 On I6 Off POWER ON 00000 0 Hrs Exit OR SEL UNIT OF MEASURE In Exit mm ENTER DISTANCE PER COUNTS 12 000 in 12 000 in EQUALS 12000 COUNTS OR ...

Reviews: