


58
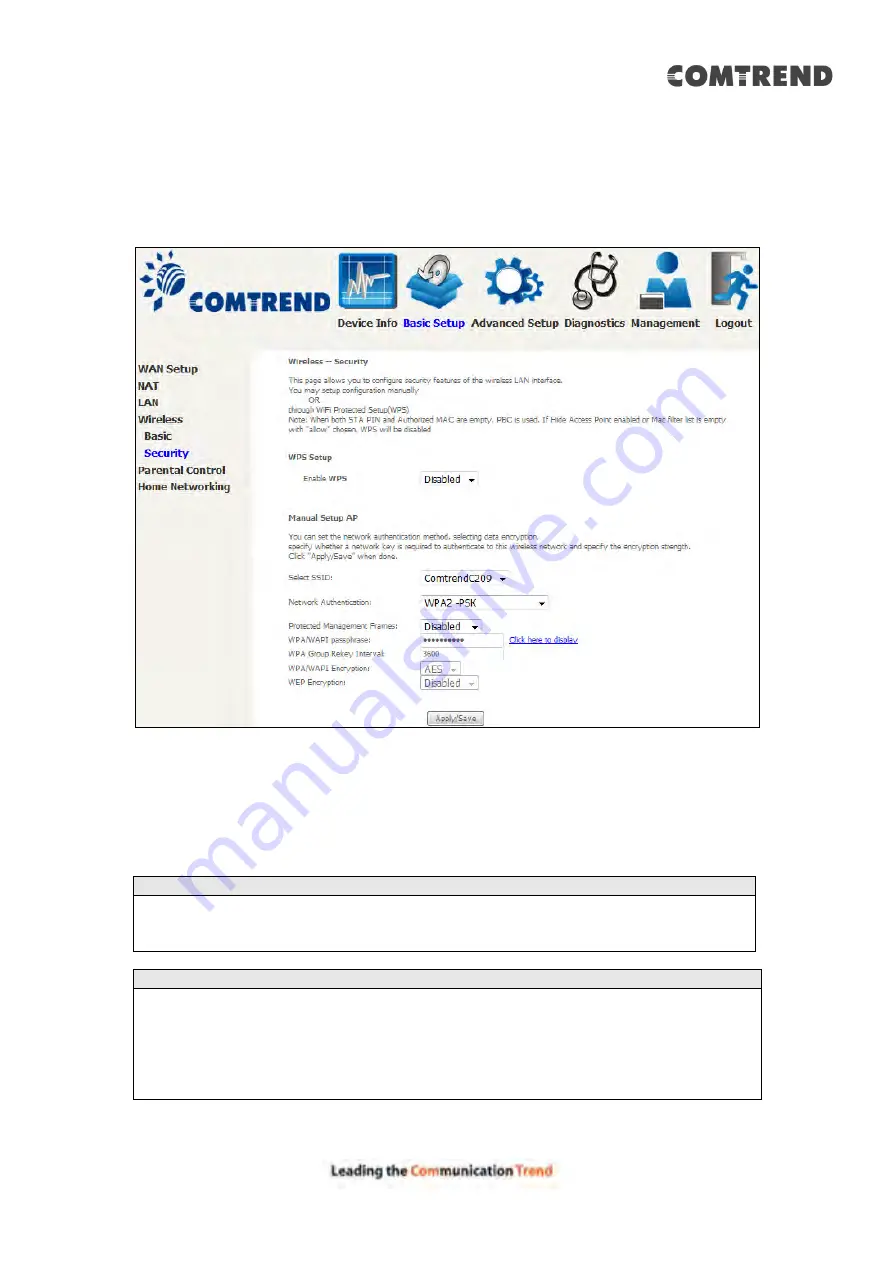
5.4.2 Security
The following screen appears when Wireless Security is selected. The options shown
here allow you to configure security features of the wireless LAN interface.
Click
Apply/Save
to implement new configuration settings.
WIRELESS SECURITY
Setup requires that the user configure these settings using the Web User Interface
(see the table below).
Select SSID
Select the wireless network name from the drop-down box. SSID stands for Service
Set Identifier. All stations must be configured with the correct SSID to access the
WLAN. If the SSID does not match, that client will not be granted access.
Network Authentication
This option specifies whether a network key is used for authentication to the
wireless network. If network authentication is set to Open, then no authentication
is provided. Despite this, the identity of the client is still verified.
Each authentication type has its own settings. For example, selecting 802.1X
authentication will reveal the RADIUS Server IP address, Port and Key fields. WEP
Encryption will also be enabled as shown below.
Summary of Contents for AR-5319
Page 1: ...AR 5319 ADSL2 WLAN Router User Manual 261056 079 Version A1 1 March 6 2017...
Page 40: ...39 4 11 2 Site Survey The graph displays wireless APs found in your neighborhood by channel...
Page 56: ...55 5 3 3 UPnP Select the checkbox provided and click Apply Save to enable UPnP protocol...
Page 67: ...66 Enter the PPP username password given by your service provider for PPP service detection...
Page 111: ...110 Enter the MAC address in the box provided and click Apply Save...
Page 149: ...148 To add a WAN connection go to E2 WAN Connections...
Page 185: ...184 Click Next to continue or click Back to return to the previous step...
Page 203: ...202 STEP 2 Click the Windows start button Then select Control Panel...
Page 204: ...203 STEP 3 Select Devices and Printers STEP 4 Select Add a printer...


