


18
Chapter 4 Device Information
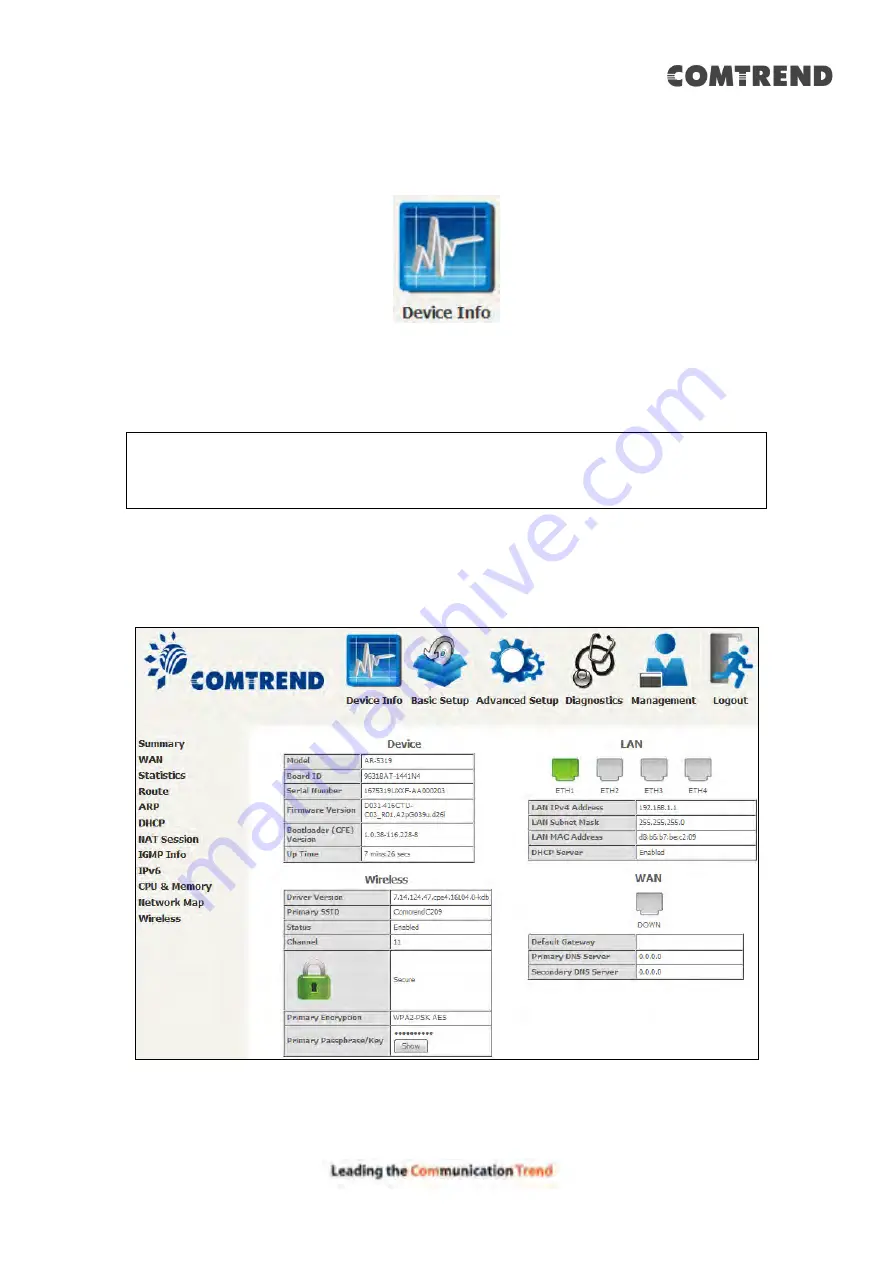
You can reach this page by clicking on the following icon located at the top of the
screen.
The web user interface window is divided into two frames, the main menu (at left)
and the display screen (on the right). The main menu has several options and
selecting each of these options opens a submenu with more selections.
NOTE:
The menu items shown are based upon the configured connection(s) and
user account privileges. For example, if NAT and Firewall are enabled, the
main menu will display the NAT and Security submenus. If either is
disabled, their corresponding menu(s) will also be disabled.
Device Info is the first selection on the main menu so it will be discussed first.
Subsequent chapters will introduce the other main menu options in sequence.
The Device Info Summary screen displays at startup.
This screen shows hardware, software, IP settings and other related information.
Summary of Contents for AR-5319
Page 1: ...AR 5319 ADSL2 WLAN Router User Manual 261056 079 Version A1 1 March 6 2017...
Page 40: ...39 4 11 2 Site Survey The graph displays wireless APs found in your neighborhood by channel...
Page 56: ...55 5 3 3 UPnP Select the checkbox provided and click Apply Save to enable UPnP protocol...
Page 67: ...66 Enter the PPP username password given by your service provider for PPP service detection...
Page 111: ...110 Enter the MAC address in the box provided and click Apply Save...
Page 149: ...148 To add a WAN connection go to E2 WAN Connections...
Page 185: ...184 Click Next to continue or click Back to return to the previous step...
Page 203: ...202 STEP 2 Click the Windows start button Then select Control Panel...
Page 204: ...203 STEP 3 Select Devices and Printers STEP 4 Select Add a printer...


