


135
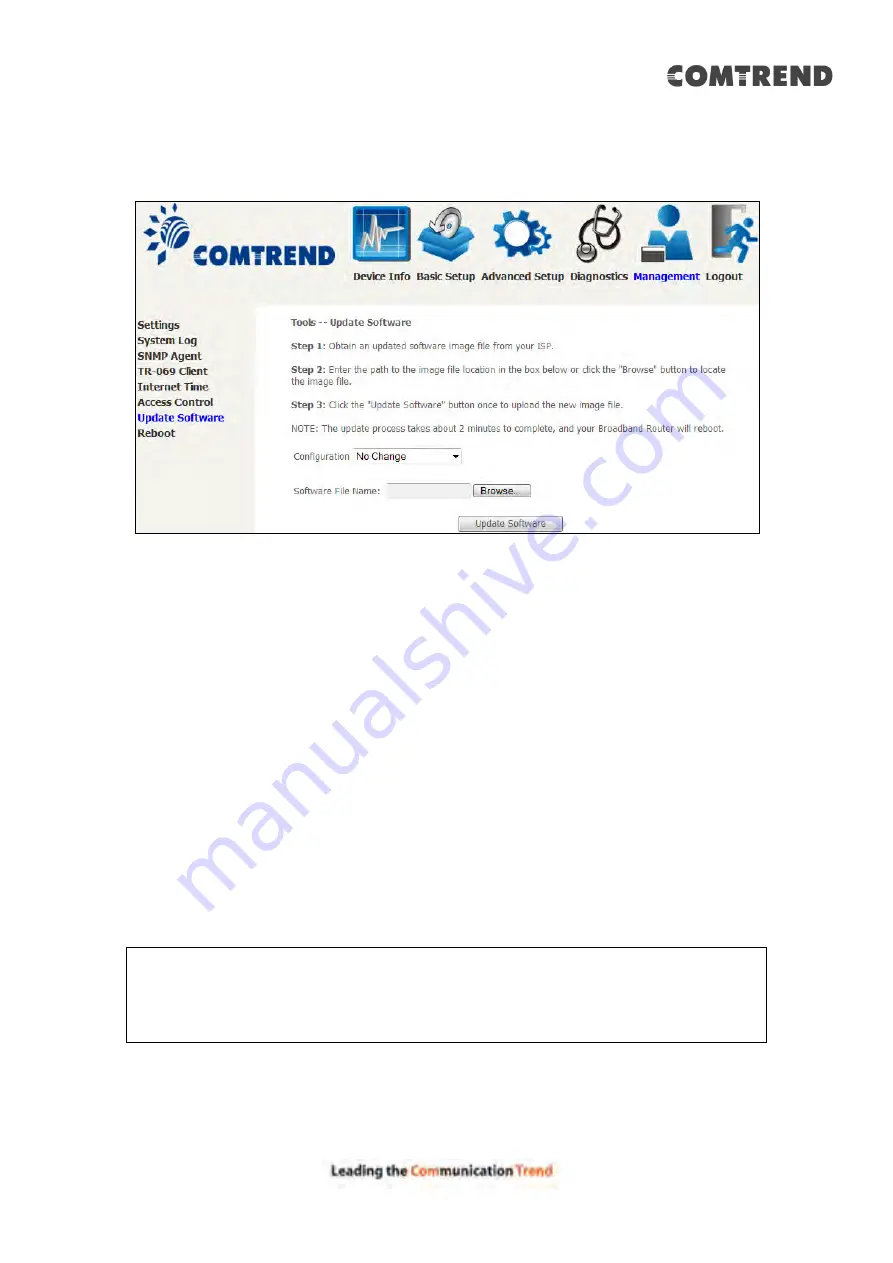
8.8 Update Software
This option allows for firmware upgrades from a locally stored file.
STEP 1:
Obtain an updated software image file from your ISP.
STEP 2
: Select the configuration from the drop-down menu.
Configuration options:
No change
– upgrade software directly.
Erase current config
– If the router has save_default configuration, this option will
erase the current configuration and restore to save_default configuration after
software upgrade.
Erase All
– Router will be restored to factory default configuration after software
upgrade.
STEP 3
: Enter the path and filename of the firmware image file in the
Software
File Name
field or click the Browse button to locate the image file.
STEP 4
: Click the
Update Software
button once to upload and install the file.
NOTE
: The update process will take about 2 minutes to complete. The device
will reboot and the browser window will refresh to the default screen upon
successful installation. It is recommended that you compare the
Software Version
version installed, to confirm the installation was successful.
Summary of Contents for AR-5319
Page 1: ...AR 5319 ADSL2 WLAN Router User Manual 261056 079 Version A1 1 March 6 2017...
Page 40: ...39 4 11 2 Site Survey The graph displays wireless APs found in your neighborhood by channel...
Page 56: ...55 5 3 3 UPnP Select the checkbox provided and click Apply Save to enable UPnP protocol...
Page 67: ...66 Enter the PPP username password given by your service provider for PPP service detection...
Page 111: ...110 Enter the MAC address in the box provided and click Apply Save...
Page 149: ...148 To add a WAN connection go to E2 WAN Connections...
Page 185: ...184 Click Next to continue or click Back to return to the previous step...
Page 203: ...202 STEP 2 Click the Windows start button Then select Control Panel...
Page 204: ...203 STEP 3 Select Devices and Printers STEP 4 Select Add a printer...


