


4–14
SAN Switch Integrated/32 and Integrated/64 Installation and Hardware Guide
4–14
SAN Switch Integrated/32 and Integrated/64 Installation and Hardware Guide
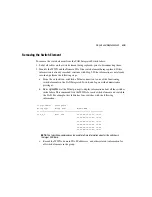
6. Provide the WWN of the new switch element to each of the existing switch elements in
the group.
a. Log on to one of the other switch elements in the group with administrative
privileges, using a Telnet connection.
b. To determine the current group information, at the prompt enter the
sgroupShow
command.
c. Enter the
sgroupSet
command.
d. Enter the requested information at the prompts. See Table 4–1, Page 4-13.
e. Continue until all six switch elements are added to the group.
f. A prompt confirms that you want to overwrite the existing group definition. Enter
Y
at the prompt.
g. Repeat steps a through e for each of the remaining switch elements in the group.
NOTE:
Once the group has been set up on all six switch elements, the group members are
identified by WWN, and changes in the domain IDs do not affect the group definition.
7. Check the Fabric and Switch Element for Port or ISL issues.
■
See Checking the Fabric for Port or ISL Issues, page 3-9
■
See Checking Each Switch Element for Port or ISL Issues, page 3-10
Replacing ISL Cables
Replacing the ISL cable involves the following:
■
Disconnecting the Faulty Fiber-Optic Cable, page 4-15
■
Connecting the New ISL Cable to the Appropriate Ports, page 4-15
■
Checking the Switch Element and Fabric for Port or ISL Issues, page 4-15
Items Required
The following items are required to replace an ISL cable:
■
The new ISL cable
■
A workstation computer with access to switch elements in the SAN Integrated Switch
■
The color-coded ISL cabling diagram (located inside the SAN Integrated Switch)