


3.
Double click the highlight list and enter the Server’s administrator
(default: admin) and password (default: admin).
4.
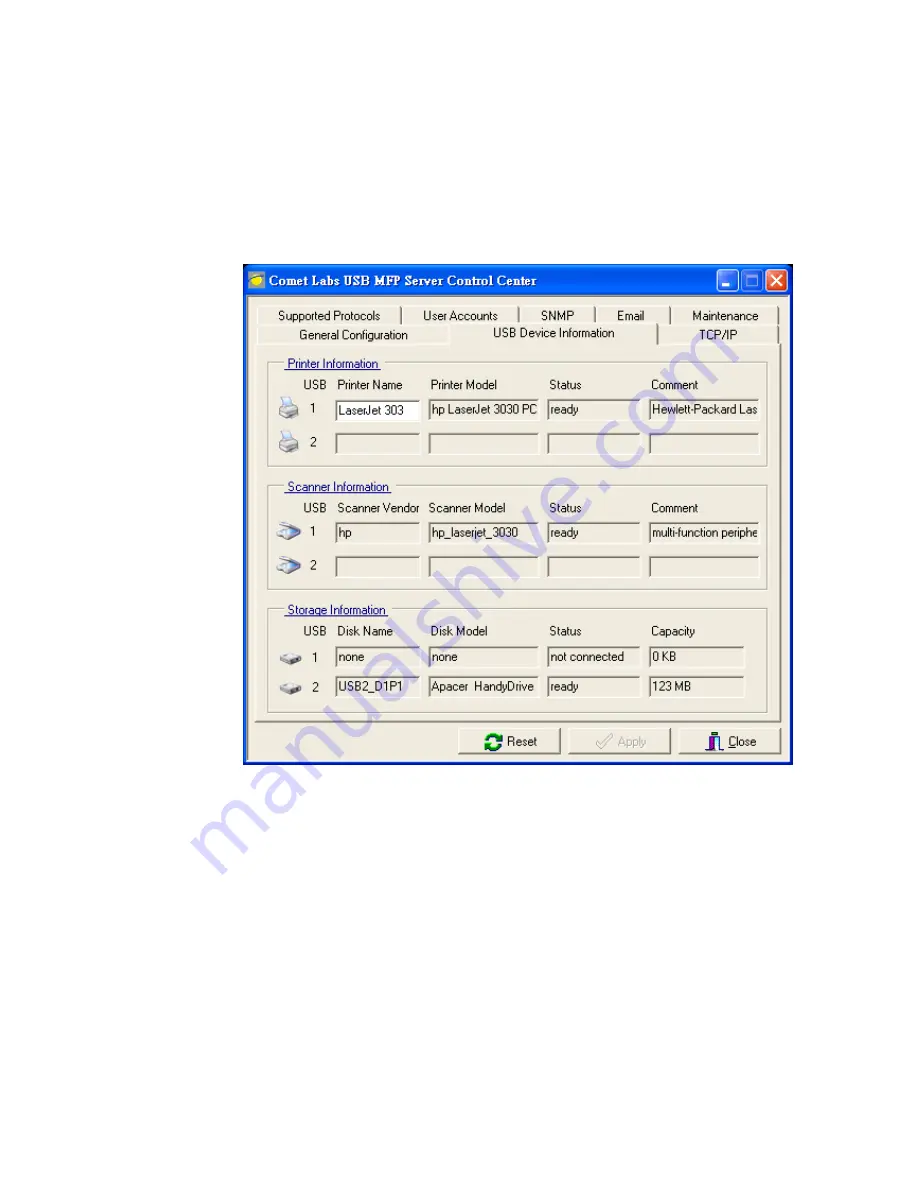
After you have logged in successfully, select USB Device
Information from the Server menu. The Set USB Device
Information dialog appears.
5.
Set your printer names in Printer Name box and then click Apply.
B.
Using the Server’s Web Pages
1.
Go to the web page and click CONFIG icon.
2.
Enter administrator (default: admin) and password (default:
admin).
3.
Click USB Device Information
23
Summary of Contents for NFPS2
Page 1: ...Comet Labs NFPS2 WFPS2 2 USB 2 0 Hi Speed Port MFP Server User s Manual Version 1 21 1...
Page 12: ...8 If the wireless network is secured by WPA PSK TKIP the shared key must be set correctly 12...
Page 16: ...7 If the wireless network is secured by WPA PSK TKIP the shared key must be set correctly 16...
Page 30: ...9 Click Finish 30...
Page 33: ...9 Click Finish 33...
Page 40: ...5 Click Next and then continue Windows Add Printer Wizard 40...
Page 48: ...8 Click Finish button 48...
Page 63: ...63...
Page 70: ...70...


