


62
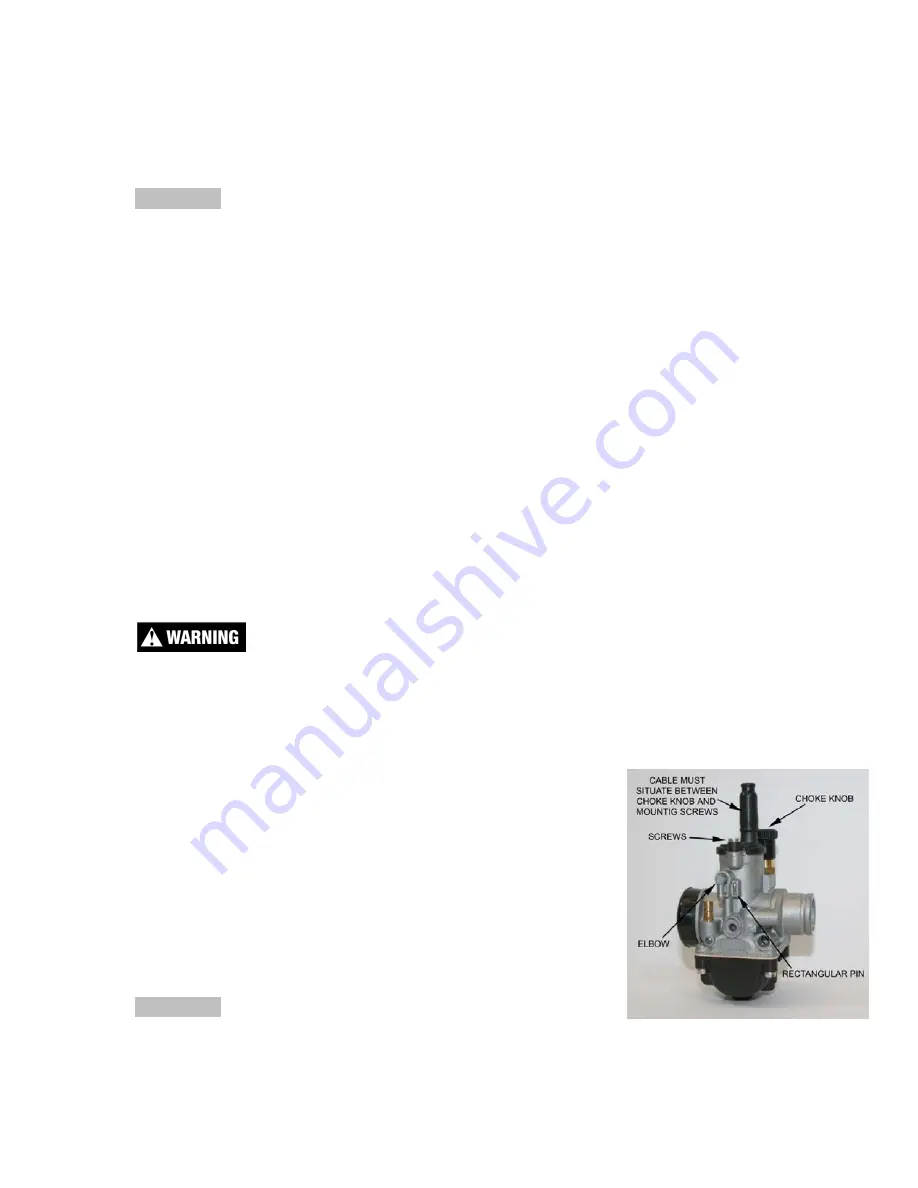
Figure 45
Proper carburetor top
installation And location of
rectangular slide indexing pin and
Indications that the engine is running too lean are:
Engine cutting out on top end.
Engine overheating and ultimately seizure.
White spark plug
CAUTION:
It is much safer to operate the engine slightly rich as opposed to slightly lean.
This is because an overly rich engine will just run poorly while an overly lean
engine will seize, potentially causing an expensive top end rebuild and a DNF.
To richen the carburetor:
1. Change the main jet one number at a time (larger).
2. Lower the needle clip (raising the jet needle) one notch at a time until the
engine starts to blubber on the top end, then move the clip back up one notch
or until you get the blubber out.
FUEL MIXTURE SCREW
The smaller brass screw that is towards the front of the engine is a fuel mixture
screw. This screw will also richen and lean your engine more on the bottom and
mid-range. In warmer conditions, turn the screw in. In colder conditions, turn the
screw out. Be sure to keep the carburetor very clean and make sure you don't
have water or dirt in the carburetor bowl. Use automotive carburetor cleaner or
WD-40 to clean the carburetor inside and out.
Cleaning the carburetor:
Clean the carburetor in a well-ventilated area, and take care that there is no
spark or flame anywhere near the working area; this includes any appliance with
a pilot light. Because of the danger of highly flammable liquids, do not use
gasoline or low flash-point solvent to clean the carburetor.
1. Make sure the fuel is shut off and remove the carburetor
2. Remove the carburetor.
3. Drain the fuel from the carburetor.
4. Disassemble the carburetor.
5. Immerse all the metal parts in a carburetor cleaning
solution.
6. After the parts are cleaned, dry them with compressed
air.
7. Blow out the fuel passages with compressed air.
8. Assemble the carburetor
9. Install the carburetor onto the motorcycle.
CAUTION:
The motorcycle will only operate properly if the carburetor
top is installed properly with the mounting screws, cable
and choke knob oriented as shown in figure 45.
Summary of Contents for CX50P3
Page 23: ...23 This Page Intentionally Left Blank...
Page 24: ...24 Parts Engine Bottom End and Transmission...
Page 26: ...26 Parts Engine Clutch and Kick Lever...
Page 31: ...31 This page left intentionally blank...
Page 32: ...32 Parts Forks Triple Clamps...
Page 34: ...34 Parts Forks Leg Assembly...