


12
CAUTION:
Use only DOT 4 brake fluid
Setting rear brake pedal position (see figure 2b):
1. Loosen the lock nut (10mm wrench).
2. Adjust the brake lever stop (10mm wrench) so that the lever is comfortably
reachable in both:
a. Standing riding
position, and
b. Sitting riding position.
3. Tighten the lock nut (10 mm
wrench).
CAUTION:
Adequate pedal free play is required
so that the brake pads do not drag
on the rotor. 1” MINIMUM.
Make sure that the free play locking
clip is installed such that one must
push forward, toward the front of the
bike, to remove. Otherwise the clip is
apt to come undone while riding.
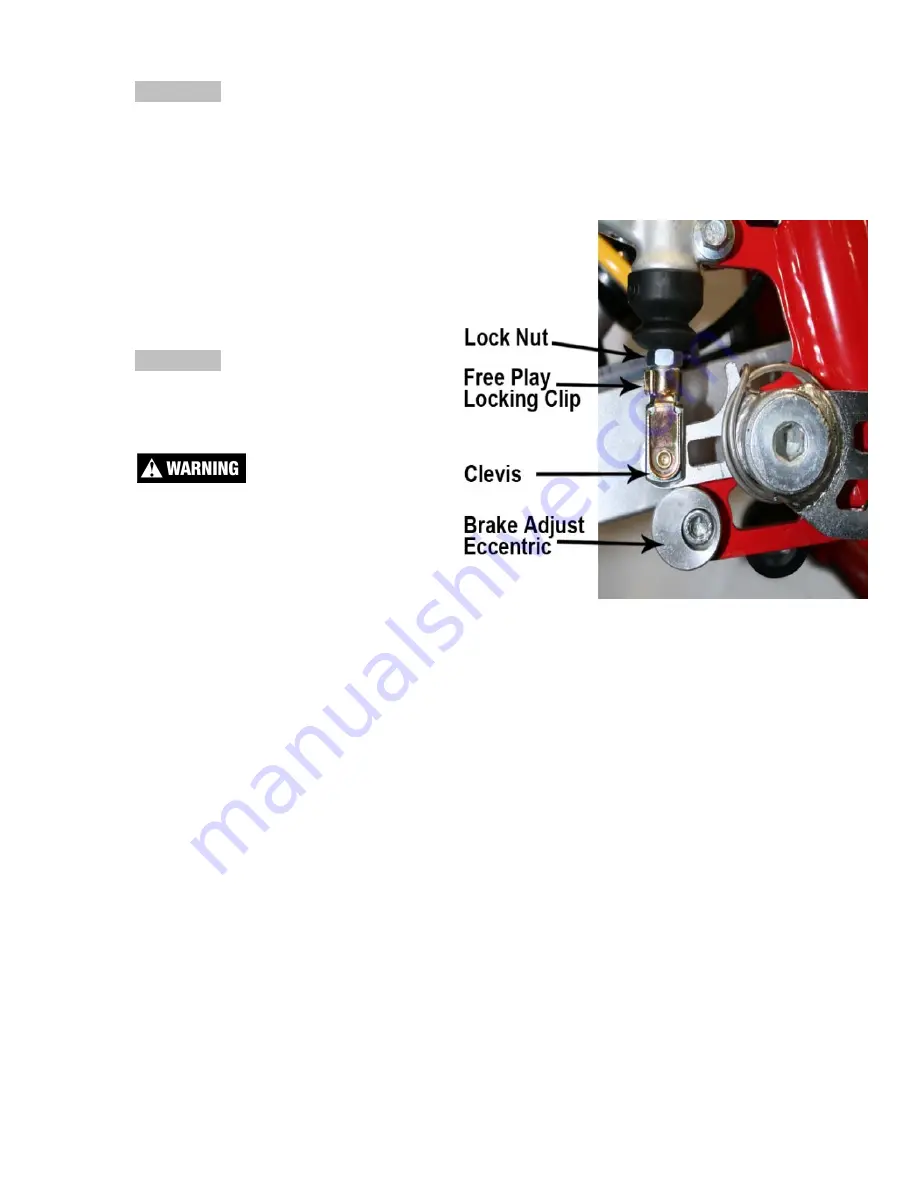
To adjust (see figure 2b):
1. Loosen the lock nut (10mm).
2. Undo the free play locking clip from around the brake adjustor (plunger),
with your hand by pushing it forward.
3. Slide the pin of the locking free play locking clip from the brake lever
4. Adjust as needed by rotating the clevis on the end of the adjustor
(plunger).
NOTE:
Turning the clevis Clockwise will lengthen the adjustor (plunger),
removing free play from the system, and turning the clevis Counter-Clockwise will
shorten the adjustor (plunger) adding free play to the system.
Brake Bleeding Procedure
Tools Required:
Front: T10 Torx bit/driver, Cobra bleed kit (BCKG0031)
Rear: 3mm hex key (Allen wrench, T10 Torx bit/driver, Cobra bleed
kit(BCKG0031)
Procedure:
Remove the brake fluid reservoir cover.
Figure 2b
Summary of Contents for CX50P3
Page 23: ...23 This Page Intentionally Left Blank...
Page 24: ...24 Parts Engine Bottom End and Transmission...
Page 26: ...26 Parts Engine Clutch and Kick Lever...
Page 31: ...31 This page left intentionally blank...
Page 32: ...32 Parts Forks Triple Clamps...
Page 34: ...34 Parts Forks Leg Assembly...