O P E R A T I N G M A N U A L
8 0 0 . 7 4 9 . 2 7 6 1
w w w . c o a c h c o m m . c o m
1 3
Control Unit (XCU-44)
The X-System Control Unit (CU) is located in the main rack unit in the press box. It serves as the foundation of the wireless
communication system.
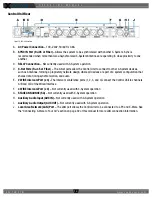
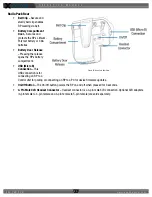
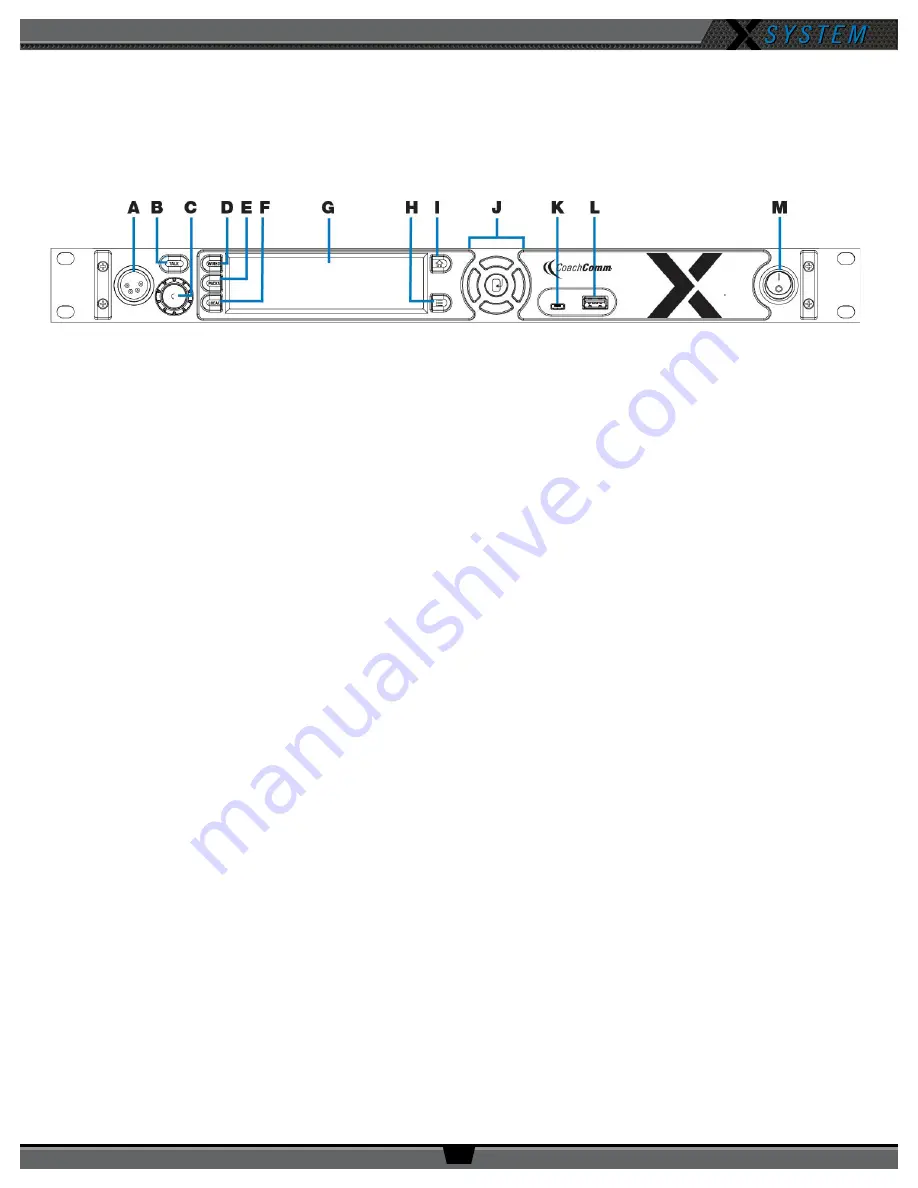
Control Unit Front
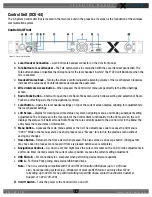
A.
Local Headset Connection
–
4-pin XLR male headset connector on the CU’s front panel.
B.
Talk Button for Local Headset
–
The Talk button works in conjunction with the Local Headset Connection. The
Talk button enables or disables the microphone for the local headset. A white “TALK” LED will illuminate when the
mic is enabled.
C.
Headset Volume Knob
–
Turning the Volume control adjusts the listening volume of the local headset. Clockwise
increases the audio level; Counterclockwise decreases the audio level.
D.
Wired Intercom Access Button
–
When pressed, the Control Unit menu jumps directly to the Wired Settings
screen.
E.
Radio Packs Button
–
Shortcut to open the CU’s Radio Packs menu, which allows sorting and selection of Radio
Packs to edit settings (via the CU navigational controls).
F.
Local Button
–
Opens the local headset settings on top of the current screen display, allowing for adjustments to
the local headset settings.
G.
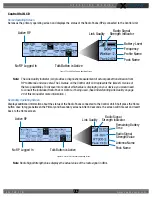
LCD Screen
–
Display for viewing real-time status of system, navigating menus, and making subsequent setting
adjustments. The LCD screen is the focal point of the Control Unit’s functionality. On the Home screen, the LCD
displays the status of all Normal mode Radio Packs that are currently paired to the Control Unit. In the Menu, the
LCD shows the menu items or information.
H.
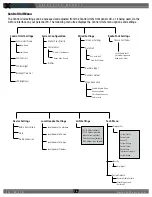
Menu Button
–
Accesses the main menu system of the CU. The default pass code to access the CU menu is
“0000.” While in the menu system, one short press acts as “Escape” to return to the previous menu without
saving any changes.
I.
Home Button
–
Returns to the Home view when pressed. This also serves as an escape button. (Changes that
may have been in process are not saved if Home is pressed before save is complete.)
J.
Navigational Controls
–
Up, Down, Left, and Right move the cursor or marker on the LCD to make adjustments in
edit mode. Enter (Center) selects the current cursor position or saves the current setting adjustment.
K.
USB Micro B
–
For connectivity to a computer when performing device firmware updates.
L.
USB A
–
For Radio Pack pairing and external USB flash drives.
Note:
The CU is currently compatible with FAT and FAT32 formatted USB drives (up to 16 TB drive
size). Some operating systems (e.g., Windows 10) promote NTFS format, but only allow FAT32
formatting up to 32 GB. For hep with formatting larger USB drives, contact CoachComm Customer
Support at 1-800-729-2761.
M.
On/Off Switch
–
Turns the power to the Control Unit on and off.
Figure 15: Control Unit Front View


