TEL-14 TWO-CHANNEL TE LEPHONE INTERFACE
3-1
3
MAINTENANCE
INTRODUCTION
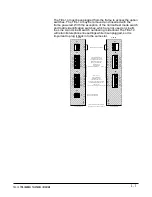
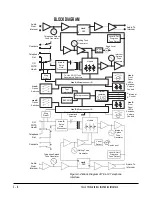
This chapter provides a block diagram and a troubleshooting guide for the
TEL-14 two-channel auto-nulling telephone interface. To view the
diagram refer to the end of this chapter.
TROUBLESHOOTING
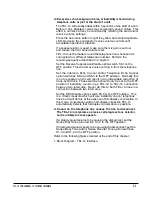
To help isolate any problems you may encounter, a list of possible
symptoms and possible solutions is provided. Note that the most
common option switch setting is with all switches in the ON position.
This is also the factory default setting.
1.
No front panel LEDs are lit.
•
Press the Auto Gain or Auto Answer buttons.
•
Check that the card is properly seated in the interface frame.
Remove and reseat it.
•
Check that the power cable from the interface frame is securely connected.
•
Check mains AC power to the matrix.
2.
The TEL-14 will not answer the telephone line. The red Ring/Off
Hook LED does not light when the line is called.
•
Check that the telephone line is connected to the TEL-14. As a
test, unplug the modular cable from the RJ-11 to DB-9F adaptor
and plug it into a standard telephone set. Make sure the
telephone set can make calls and rings when a call is received on
this line. Plug the modular cable back into the RJ-11 to DB-9F
adaptor.
•
Set the Ring Jumper J6 to the 60V position if the ring voltage is low.
3.
The TEL-14 will not automatically answer the telephone line.
The red Ring/Off Hook LED lights when the line is called.
•
Press the Auto Answer button. Make sure the green Auto Answer
LED is lit to allow calls to automatically be answered.
•
Make sure the Auto Answer Ring Count option switch S1-1 is set
to the ON position to answer after the first ring. (This switch
should be set to the OFF position to answer after the fourth ring.)
Summary of Contents for ECLIPSE TEL-14
Page 6: ......

