E-30
Cisco UCS S3260 Storage Server Chassis Installation and Service Guide
Appendix E Upgrading to Cisco UCS S3260 System With S3260 M5 Server Nodes
Older Migration and Upgrade Procedures
•
To remove a drive expander module, see
Replacing a Disk Expansion Tray, page 3-27
.
•
To remove an I/O expander, you must remove the server node and then detach the I/O expander from
it. See
Replacing an I/O Expander (C3X60 M4 or S3260 M5 Server Nodes Only), page 3-37
b.
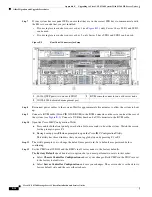
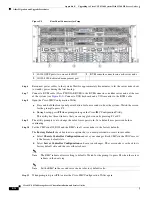
With the two ejector levers open, align the new server node with the empty bay.
c.
Push the server node into the bay until it engages with the midplane connectors and is flush with the
chassis surface.
d.
Rotate both ejector levers toward the center until they lay flat and their latches lock into the rear of
the server node.
Step 3
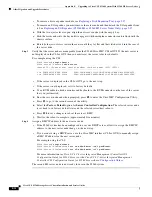
Verify that the server node is manageable from the S3260 Cisco IMC CLI or GUI. If the new server is
not displayed in the CLI or GUI, then you must reset the server to factory defaults.
For example using the CLI:
S3260-Server#
scope chassis
S3260-Server /chassis#
show server
<Server ID> <Power state> <Serial number> <Product name> <PID> <UUID>
------------------------------------------------------
1 on FCH1848793G UCS S3260 UCSC-C3K-M4SRB 36399C1B-6E9A-4E95-BEAC-B9003DCA6C7F
2 on FCH18407MY2 UCS S3260 UCSC-C3K-M4SRB C00E5CEO-A596-45E0-82CD-0B2F0A395FAC
•
If the server is displayed in the CLI or GUI, go to the next step.
•
If the server is not displayed, set it to factory defaults:
a.
Use a KVM cable to attach a monitor and keyboard to the KVM connector on the rear of the server
that you just inserted.
b.
Boot the server node and when prompted, press
F8
to enter the Cisco IMC Configuration Utility.
c.
Press
F1
to go to the second screen of the utility.
d.
Select the
Factory Default
option for
Server Controller Configuration
. The selected server node
is set back to its factory default state and the selected server/host reboots.
e.
Press
F10
to save changes to reboot the server’s BMC.
f.
Wait for the reboot to complete (approximately five minutes).
Step 4
Assign a BMC IP address to the new server node:
•
If the S3260 system has been configured to use your DHCP server, allow it to assign the BMC IP
address to the new server node then go to the next step.
•
If you are not using a DHCP server, use the Cisco IMC interface (CLI or GUI) to manually assign
a BMC IP address for the new server node.
For example using the CLI:
S3260-Server#
scope network
S3260-Server /cimc/network#
set v4-addr-bmc<
n
>
<v4 ip-address>
S3260-Server /cimc/network#
set v6-addr-bmc<
n
>
<v6 ip-address>
For more information see
Cisco UCS C-Series Integrated Management Controller GUI
Configuration Guide for S3260 Servers
or the
Cisco UCS C-Series Integrated Management
Controller CLI Configuration Guide for S3260 Servers
here:
The second M4 server node is now ready for use in the S3260 system.


