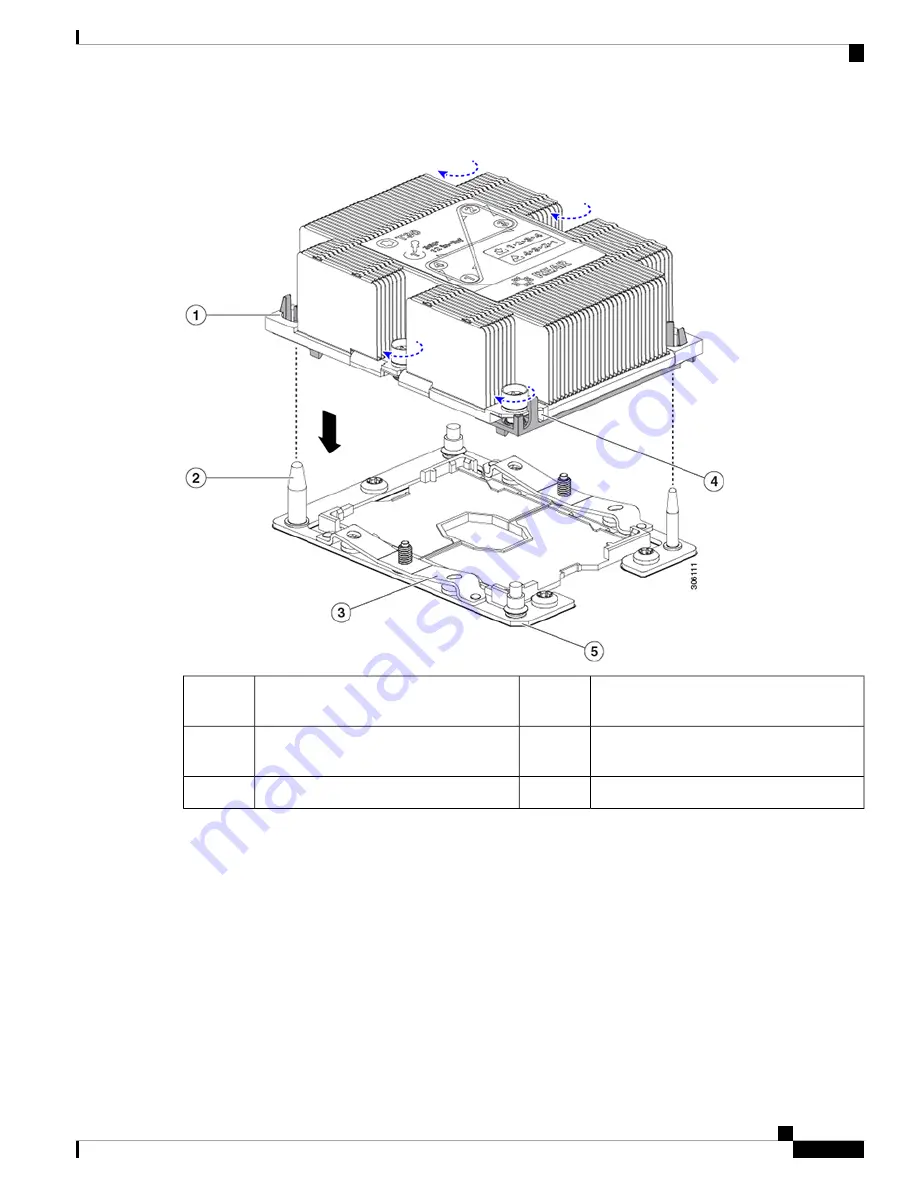
Figure 38: Installing the Heatsink/CPU Assembly to the CPU Socket
Angled corner on heatsink (pin 1 alignment
feature)
4
Guide hole in assembly (two)
1
Angled corner on socket (pin 1 alignment
feature)
5
CPU socket alignment post (two)
2
-
CPU socket leaf spring
3
c) Set the heatsink with CPU assembly down onto the CPU socket.
d) Use the T-30 Torx driver that is supplied with the replacement CPU to tighten the four captive nuts that secure the
heatsink to the motherboard standoffs.
Alternate tightening the heatsink nuts evenly so that the heatsink remains level while it is lowered. Tighten
the heatsink nuts in the order shown on the heatsink label: 1, 2, 3, 4. The captive nuts must be fully
tightened so that the leaf springs on the CPU socket lie flat.
Note
Step 9
Return the CPU module to the chassis:
a) With the two ejector levers open, align the CPU module with an empty bay.
b) Push the module into the bay until it engages with the midplane connectors and is flush with the chassis front.
c) Rotate both ejector levers toward the center until they lay flat and their latches lock into the front of the module.
Maintaining the Server
75
Maintaining the Server
Replacing a CPU and Heatsink


