4-12
Cisco Customer Response Solutions Servicing and Troubleshooting Guide, Release 5.0(1)
Chapter 4 Trace
The CRS Log Files
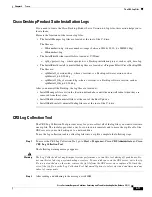
The CRS Log Collection Tool dialog box appears.
Step 3
Enter the path and name of the zip file you want to create and click
Save
. This collects all the log files
on the system into the zip file. If you want to limit the number of files by date, time, and component, and
if you want to select another location for the zip file, check the
Advanced Options
check box, and the
dialog box appears with more options.
Step 4
Enter the information to limit the collection of log files by date and time. Check the check boxes of the
components for which you want to collect log files, and then browse to a location where you want to
move the zip file, by clicking the
...
button next to the Source Drive field. Select the location for the zip
file; it then appears in the Source Drive field. Then click
Save
.
If you choose a location on the CRS system instead of on a network drive, a warning message appears
asking if you want to continue.
Step 5
Click
Yes
to save the file to the CRS system, or click
No
to go back and select another location on a
network drive.
When you click
Yes
, the tool displays a dialog box with the estimated disk space to be used by the zip
file before actually writing the zip file.
Step 6
Click
Yes
to continue, or click
No
if you want to stop the collection of log files into the zip file.
While the tool is collecting the log files, a Progress dialog box appears.
Summary of Contents for Cisco Unified Queue Manager
Page 21: ...P A R T I Serviceability ...
Page 22: ......
Page 61: ...P A R T I I Troubleshooting ...
Page 62: ......

