C
Vertical lock screw (Lock C)
D
Vertical boresight screw
E
Horizontal boresight screw
F
Manual focus knob
G
Cover flap
3. Open the shutter on the projector.
4. In the right toolbar, select Test Patterns
.
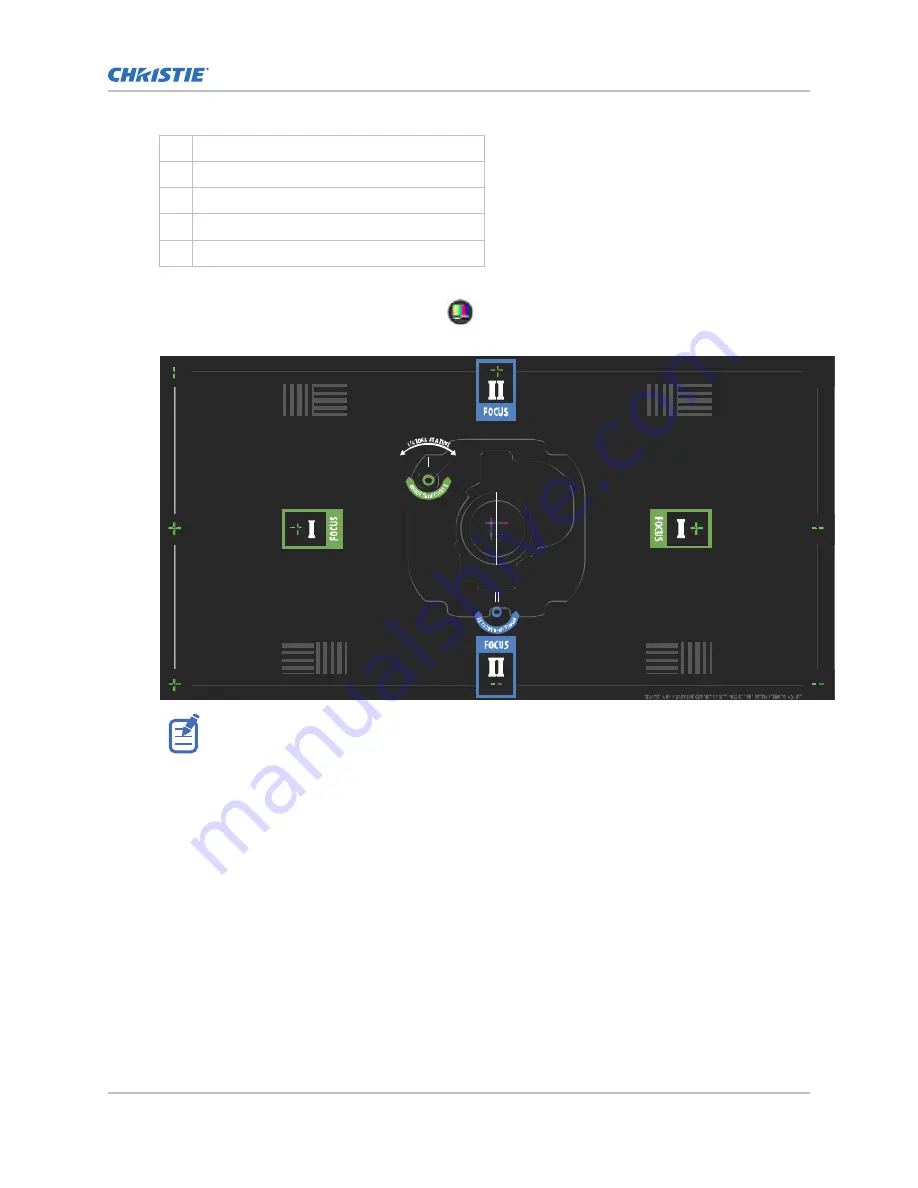
5. Select the RGB-4K-Boresight pattern and display it full screen.
When adjusting the boresight screws, ensure that the shutter is closed to avoid accidental
exposure to the projection beam when operating in close proximity to the projection lens. Open
the shutter only to view the test pattern.
6. Start with the horizontal boresight adjustment. Use the ILS controls to move the projection
lens into the projector, or turn the manual focus knob (F) counterclockwise to slightly defocus
the green cross-hair patterns (+) at the right and left edges of the test pattern.
7. Use the ILS controls or turn the focus knob (F) clockwise to begin focusing the image. Watch
for either the left or right cross-hair patterns (+) to come into focus.
8. If the left side comes into focus first, use a 5 mm driver to turn the horizontal boresight
adjustment screw (E) clockwise until the left and right are equally out of focus.
If the right side comes into focus first, turn the horizontal boresight screw counterclockwise.
9. Repeat steps 6 to 8 as required to obtain an even focus at the right and left edges of the
screen.
10. Next perform the vertical boresight adjustment. Use the ILS controls to move the projection
lens into the projector, or turn the focus knob (F) counterclockwise to slightly defocus the
green cross-hair patterns (+) at the top and bottom of the screen.
11. Use the ILS controls or turn the focus knob (F) clockwise to begin focusing the image. Watch
for either the top or bottom cross-hair patterns (+) to come into focus.
Adjusting the image
Cinema 4K-RGB User Guide–CP4315-RGB, CP4320-RGB, CP4325-RGB, CP4330-RGB
63
020-102712-06 Rev. 1 (03-2021)
Copyright
©
2021 Christie Digital Systems USA, Inc. All rights reserved.


