


Determining the projector IP address
Before accessing the projector user interface remotely, determine the IP address of the projector. Use
the following method to determine the projector IP address when no touch panel is installed.
1. Connect the projector to the theater network using an Ethernet cable.
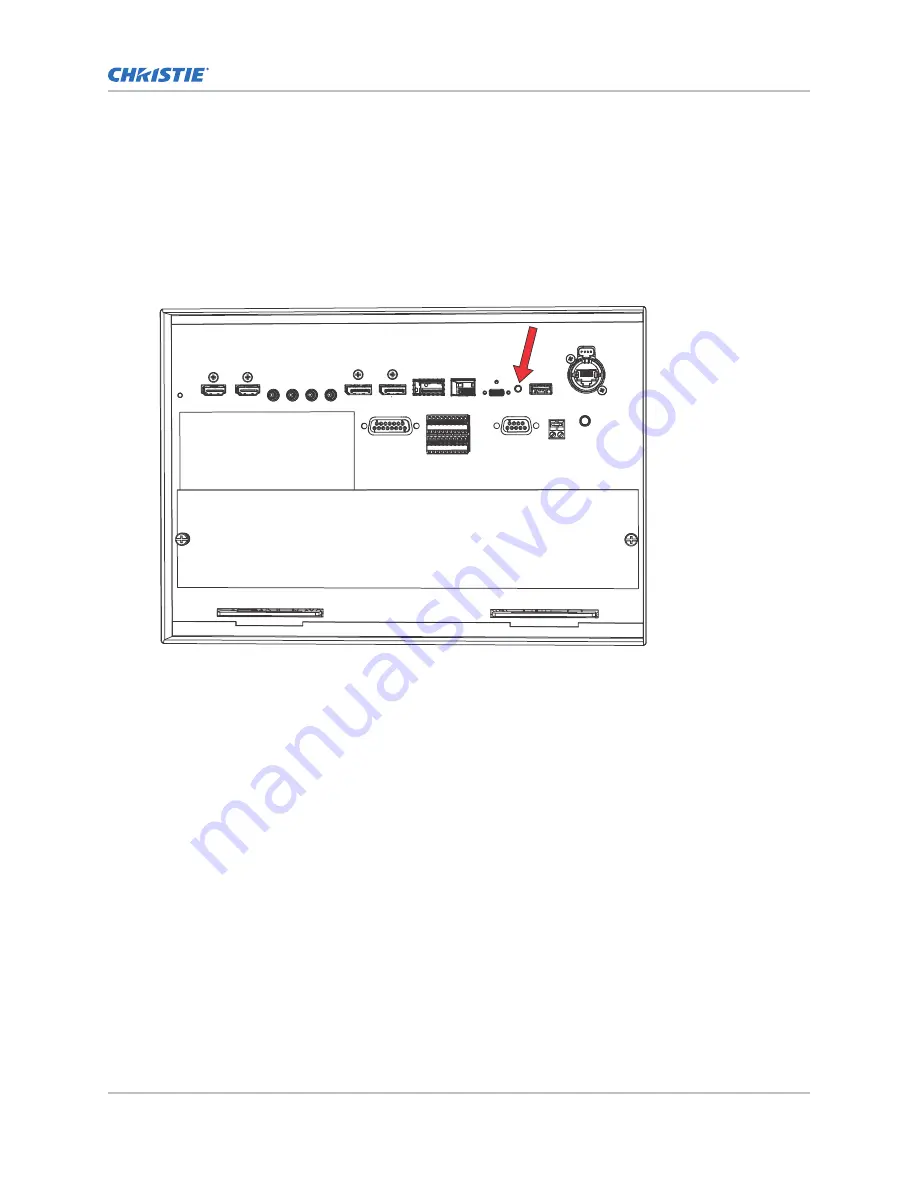
2. Ensure projector is not in Standby mode by pressing the recessed button between the USB-C
port and the USB port on the Video Input panel.
Pressing the recessed button transitions the projector from Standby to powered on.
3. Once the unit is powered on, press and hold the marriage button on the projector for 5 to 25
seconds.
The projector turns on the light source and displays a test pattern with the projector's IP
address and any currently active alarms.
Resetting the projector IP address to the default
Use the following method to reset the projector IP address to the default value when no touch panel is
installed.
1. Connect the projector to the theater network using an Ethernet cable.
2. Ensure projector is not in Standby mode by pressing the recessed button between the USB-C
port and the USB port on the Video Input panel.
Pressing the recessed button transitions the projector from Standby to powered on.
Operating the projector
C User Guide–CP4415-RGB, CP4420-RGB, CP4435-RGB, CP4440-RGB, CP4450-RGB, CP2420-Xe, CP4420-Xe
16
020-103073-06 Rev. 1 (03-2022)
Copyright
©
2022 Christie Digital Systems USA, Inc. All rights reserved.
Summary of Contents for CineLife+
Page 112: ......


