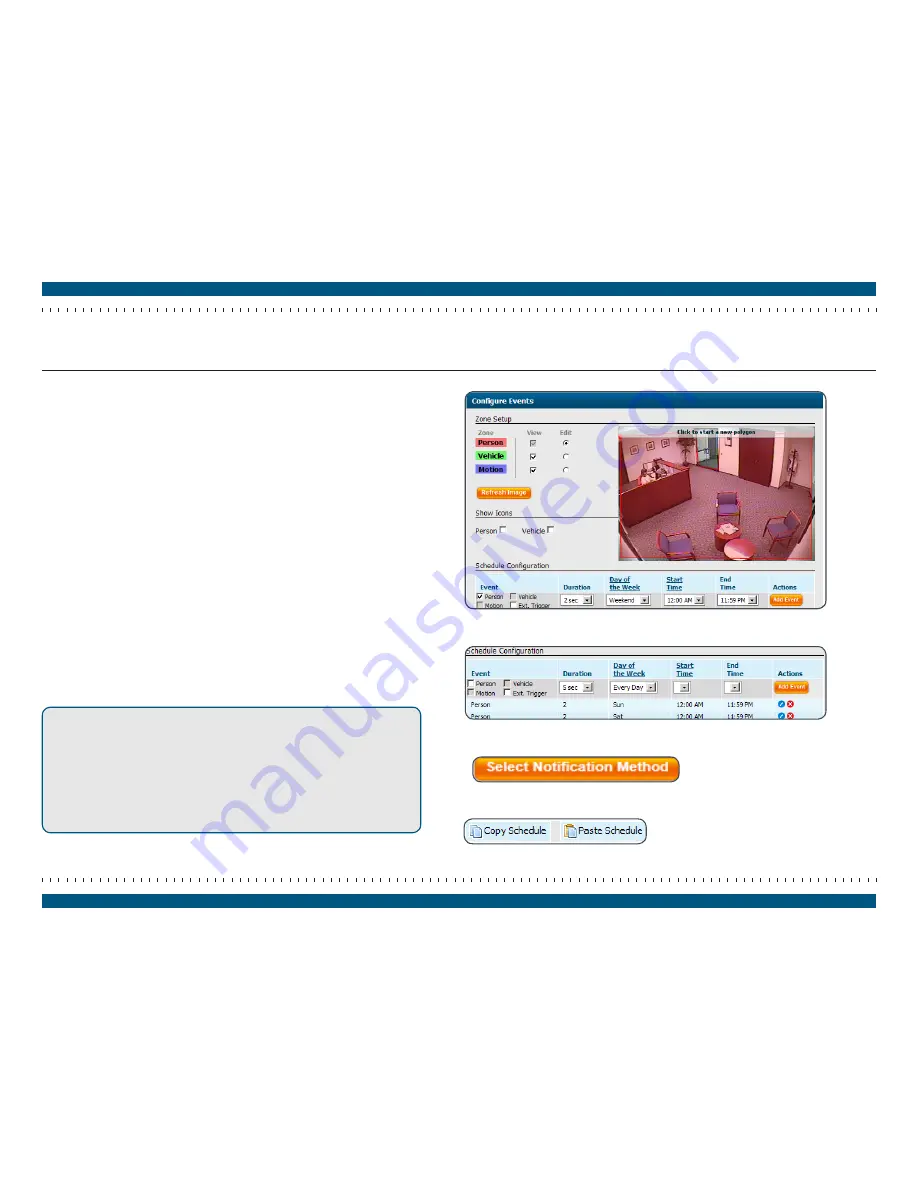
Once you have set up your zone, use the Schedule Configuration section to
determine when and under what conditions the system reports events.
First, select the Event type (Person, Vehicle, or Motion). A zone must have been
created before that type of event can be detected. Select External Trigger if you
want the CheckVideo device to generate an event when an external sensor is
triggered (see the Online Help for more information on External Triggers).
Then, select the Day of Week [day], Start [time] and End [time] that an event would
occur. If you are monitoring for the same type of event on multiple days of the
week, you can select Every Day, Weekdays, or Weekend. In the example in Figure 32,
the user wants to monitor for people at any time of day (12:00 AM to 11:59 PM) on
weekends.
Duration: Select the amount of time that an object must remain in the selected
zone before CheckVideo creates an event and notifies you. In the example in Figure
34, the user wants to be notified on Sunday if a person has been in the zone for at
least 2 seconds.
Once the event is scheduled, click the Add Event button. The event appears in a
table below the wizard (Figure 33).
You can schedule additional events as needed.
Click the Select User Notification Method button to proceed to the next step (Figure
34).
Note:
If you have multiple cameras that share the same event schedule,
you can easily transfer the same settings to each camera. To do this,
click the Copy Schedule button for the camera’s configuration you
wish to copy, open the Configure Event section for the target
camera, and click Paste Schedule (Figure 35).
Note:
The Show Icons feature lets you see at-a-glance the size of the
smallest objects that can be detected in the camera view. For more
information on this feature, refer to the Online Help.
Step 7-3
Configure Events (Schedule Configuration)
page 18
CheckVideo Gateway for Mobile Broadband Networks Installation Guide
Figure 33
Scheduled events
Figure 32
Configure Device page, Configure Events section
Figure 34
Installation Wizard button that will direct you to the next step
Figure 35
Copy Schedule and Paste Schedule buttons


