background image

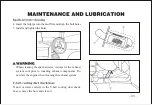
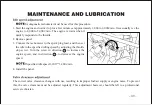
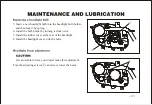
After riding in water deep enough to allow it to enter the 
V-belt case, remove this bolt to drain the water from the 
case.

 If water drains from the V-belt case after 

removing the bolt, have your dealer inspect 
the ATV as the water may affect other engine 
parts.

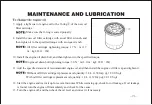
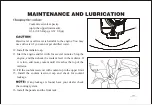
The carburetor is a vital part of the engine and requires very sophisticated adjustment. Most adjusting should be 
left to your dealer who has the professional knowledge and experience to do so. However, the idling speed may 
be performed by the owner as a part of the usual maintenance routine.

The carburetor was set at the factory after many tests. If the settings are disturbed by someone without 
sufficient technical knowledge, poor engine performance and damage may result.

Summary of Contents for CF500-A

Page 1: ...READ THIS MANUAL CAREFULLY...

Page 2: ......

Page 3: ......

Page 4: ......

Page 5: ......

Page 6: ......

Page 7: ......

Page 8: ......

Page 9: ...and all warnings before operating an ATV This vehicle is an ADULT VEHICLE ONLY Operation is prohibited for anyone under the age of 16 As the operator of the vehicle you are responsible for your perso...

Page 10: ...our owner s manual This preventive maintenance program is designed to ensure that all critical components on your vehicle are thoroughly inspected at specific intervals The following signal words and...

Page 11: ...icates a potential hazard that may result in minor personal injury or damage to the vehicle A caution indicates a situation that may result in damage to the vehicle A note will alert you to important...

Page 12: ...nd has completed a certified safety training course Never operate an ATV without wearing an approved helmet that fits properly Always wear eye protection goggles or face shield gloves boots a long sle...

Page 13: ...ng larger hills Always follow proper procedures for climbing hills Check the terrain carefully before ascending a hill Never climb hills with excessively slippery or loose surfaces Shift your weight f...

Page 14: ...over large obstacles such as rocks or fallen trees Always follow proper procedures when operating over obstacles as described in this manual Always be careful of skidding or sliding On slippery surfac...

Page 15: ...ed the stated load capacity for your ATV Cargo must be properly distributed and securely attached Reduce speed and follow the instructions in this manual for carrying cargo or towing Allow a greater d...

Page 16: ...of the vehicle create a substantial safety hazard and increase the risk of body injury The warranty on your ATV is terminated if any equipment has been added to the vehicle or if any modifications hav...

Page 17: ......

Page 18: ......

Page 19: ......

Page 20: ......

Page 21: ......

Page 22: ......

Page 23: ......

Page 24: ......

Page 25: ......

Page 26: ......

Page 27: ......

Page 28: ......

Page 29: ......

Page 30: ......

Page 31: ......

Page 32: ......

Page 33: ......

Page 34: ......

Page 35: ......

Page 36: ......

Page 37: ......

Page 38: ......

Page 39: ...ing decals have been placed on the ATV for your protection Read and follow the instructions on each decal carefully If a decal becomes illegible or comes off contact your dealer to purchase a replacem...

Page 40: ......

Page 41: ......

Page 42: ......

Page 43: ...nce of injury Your helmet is the most important piece of protective gear for safe riding An approved helmet can prevent a severe head injury Do not depend on sunglasses for proper eye protection A pai...

Page 44: ...ort and protection The best footwear is a pair of strong over the calf boots with heels like moto cross boots Always wear long sleeves and long pants to protect arms and legs Riding pants with kneepad...

Page 45: ...on See page 49 52 for a detailed explanation about the front gear lock switch and its function Releasing the switch restores the speed limiting function While this switch is pushed the override indica...

Page 46: ...eft turning light are on Press the switch to the right turning indicator and right turning light are on Press the button the horn will sound Press button the high beam is on Press button the low beam...

Page 47: ...r Pull it toward the handlebar to apply the front brake The brake pedal is located on the right side of the machine and the brake lever is located on the left handlebar Push down on the pedal or pull...

Page 48: ...en fluid lever is lower the lower line refill with the same type of brake fluid Operating the ATV with a spongy brake lever can result in loss of braking which could cause an accident Never operate th...

Page 49: ...with the handlebars straight If the fluid level is low add DOT3 brake fluid only Never store or use a partial bottle of brake fluid Brake fluid is hygroscopic meaning it rapidly absorbs moisture from...

Page 50: ...death Always check to be sure the parking brake is disengaged before operating The parking brake may relax if left on for a long period of time Always block the wheels to prevent rolling Never depend...

Page 51: ...rting procedure on page 60 for correct choke and throttle settings during starting The fuel tank filler cap is located directly below the handlebar Remove the fuel tank filler cap by turning it counte...

Page 52: ...arks in or near the area where refueling is performed or where gasoline is stored Do not overfill the tank Do not fill the tank neck If gasoline spills on your skin or clothing immediately wash it off...

Page 53: ...er or pedal Shifting gears with the engine speed above idle or while the vehicle is moving could cause transmission damage To change gears stop the vehicle and with the engine idling move the lever to...

Page 54: ...e operation until repairs can be made The recoil starter is located on the left side of the machine The engine is equipped with automatic decompressor This makes recoil starting possible by allowing c...

Page 55: ...in wet areas This ATV is equipped with an on command four wheel drive switch 2WD 4WD and a front gear lock switch LOCK 4WD Select the appropriate drive according to terrain and the conditions Two whe...

Page 56: ...position and then set the switch to 2WD To lock the front gear in 4WD make sure the on command four wheel drive switch is set to 4WD stop the ATV move the lever to position and then set the switch to...

Page 57: ...peed is limited to 35 km h 22 mph However if conditions require full engine power to be available push and hold the override switch to disable the 4WD LOCK speed limiter Once the engine is running mov...

Page 58: ...or solve the problem yourself The speed limiter keeps the throttle from fully opening even when the throttle lever is pushed to the maximum Turning in the adjusting screw limits the maximum engine po...

Page 59: ...llows ON The engine can be started only at this position and the headlights and taillight come on when the light switch is on The key can not be removed in this position OFF All electrical circuits ar...

Page 60: ...to the synchronizing mechanism in the front gear case the four wheel drive indicator may not come on until the ATV starts moving This indicator light comes on when press the turning switch to This in...

Page 61: ...rk position This indicator light comes on when press the turning switch to This indicator light comes on when press the override switch This indicator light comes on when press the headlight illuminat...

Page 62: ...If this happens reduce the load to specification After restarting make sure that the temperature indicator is in the white area of side C Continuous use while the temperature indicator is in the red...

Page 63: ...ate at full throttle or high speeds for extended periods during the first three hours of use Use of any oils other than those recommended may cause serious engine damage We recommend the use of 4 Synt...

Page 64: ...n period change both the oil and the filter at 25 hours or one month If a proper inspection is not done before each use severe injury or death could result Always inspect the vehicle before each use t...

Page 65: ......

Page 66: ...3 Shift the gear selector into the neutral or park position When the gear selector is in the neutral or park position if either indicator light does not come on ask your dealer to inspect its electri...

Page 67: ...rt as possible to preserve battery energy Do not crank the engine more than 10 seconds on each attempt If the battery is discharged pull the recoil starter to start the engine 6 If the engine is start...

Page 68: ...ly Before shifting you must stop the machine and return the throttle lever to the closed position Otherwise the transmission may be damaged Shifting Neutral to High and High to Low 1 Bring the machine...

Page 69: ...he gear selector along the shift guide When in reverse the reverse indicator light should be on If the light does not come on ask your dealer to inspect the reverse indicator light electrical circuit...

Page 70: ...n the rear rack should be as far forward and as low as possible Carrying a high load raises the center of gravity and creates a less stable operating condition Reduce load weight when cargo is high Wh...

Page 71: ...Use extreme caution when applying brakes with a loaded vehicle Avoid terrain or situations that may require backing down hill Always attach the tow load to the hitch point The vehicle should never exc...

Page 72: ...ed the specified weights Cargo weight should be mounted as low as possible When operating over rough or hilly terrain reduce speed and cargo to maintain stable driving conditions 1 Always load the car...

Page 73: ...then shift the transmission into gear 3 Check your surroundings and determine your path of travel 4 Release the brakes 5 Slowly depress the throttle with your right thumb and begin driving Vehicle spe...

Page 74: ...e of traction between the wheels allowing the turn to be made smoothly The same leaning technique should be used for turning in reverse Practice making turns at slow speeds before attempting to turn a...

Page 75: ...g your body weight forward 4 Driving with AWD engaged can assist in controlling the vehicle in slippery areas Severe damage to drive train may occur if the AWD is engaged while the wheels are spinning...

Page 76: ...speed is lost Keep your weight uphill Apply the front brake When fully stopped apply rear brake as well then shift gear selector into park position If the ATV begins rolling backwards Keep your weight...

Page 77: ...ating procedures outlined in the owner s manual Improperly crossing hills or turning on hills can result in loss of control or vehicle overturn resulting in severe injury or death Avoid crossing the s...

Page 78: ...hill if possible or dismount on the uphill side immediately Whenever descending a hill follow these precautions 1 Proceed directly downhill 2 Shift your weight to the rear of the vehicle 3 Slow down 4...

Page 79: ...the K turn 1 Stop and shift the gear selector lever to the parking position while keeping body weight uphill 2 Shut off the engine 3 Dismount on the uphill side of the vehicle or on the left if the ve...

Page 80: ...V can operate through water with a maximum recommended depth equal to the bottom of the footrests Follow these procedures when operating through water 1 Determine water depths and current before cross...

Page 81: ...ntion engine oil transmission oil front and rear gear cases and all grease fittings If water has been ingested into the CVT follow the procedure on page 104 for drying out the CVT If your vehicle beco...

Page 82: ...Be constantly alert for hazards such as logs rocks and low hanging branches Severe injury or death can result if your vehicle comes in contact with a hidden obstacle Not all obstacles are immediately...

Page 83: ...d the vehicle When it s safe to proceed back slowly Do not use the override switch unless additional power is required for vehicle movement Use with caution Avoid backing on inclines and avoid turning...

Page 84: ...king on an incline if possible If its unavoidable follow these precautions 1 Turn the engine off 2 Place the gear selector to parking position 3 Always block the rear wheels on the downhill side as il...

Page 85: ...s follow proper procedures for turning as described in this Owner s Manual Practice turning at low speeds before attempting to turn at faster speeds Do not turn at speeds too fast for your skills or t...

Page 86: ...you have learned this technique you should be able to perform it at higher speeds or in tighter curves Improper riding procedures such as abrupt throttle changes excessive braking incorrect body movem...

Page 87: ...lubricate adjust and replace parts as necessary When inspection reveals the need for replacement parts use genuine parts available from your dealer Service and adjustments are critical If you re not...

Page 88: ...the oil sump or crankcase Change oil immediately if the oil level begins to rise Monitor the oil level and if it continues to rise discontinue use and determine the cause or see your dealer Perform th...

Page 89: ...ke lever pedal travel Brake systems Wheels fasteners Frame fasteners Engine oil level Air filter pre filter Air box sediment tube Pre Ride Pre Ride Pre Ride Pre Ride Pre Ride Pre Ride Pre Ride Pre Rid...

Page 90: ...155 250 Check level daily change coolant every 2 years Check operation apply dielectric grease if replacing Inspect replace as needed Inspect periodically Check terminals clean test Inspect level cha...

Page 91: ...Lubricate Carburetor float bowl Throttle Cable ETC Switch Choke cable Carburetor air intake ducts flange Drive belt Cooling system Engine oil change Drain bowl periodically and prior to storage Inspe...

Page 92: ...620 1000 620 1000 620 1000 620 1000 620 1000 620 1000 620 1000 620 1000 620 1000 620 1000 Replace with oil change Inspect routing condition Inspect adjust Replace yearly Inspect clean external surfac...

Page 93: ...ke Headlight aim 12 M 12 M 24 M 36 M 100H 100 H 200 H 300 H 620 1000 1000 1600 1240 2000 1860 3000 Inspect clean replace worn parts Inspect replace as needed Change every two years Clean out Adjust as...

Page 94: ...ditions All Season Grease Use U Joint Lube every 500 miles before long periods of storage or after pressure washing or submerging Engine Brakes Front Gear case Rear Gear case Ball Joint SAE15W 40 SF D...

Page 95: ...n 2 Position the ATV on a level surface 3 Start the engine and let it idle for 20 30 seconds Stop the engine 4 Wait a few minutes until the oil settles 5 Remove the engine oil filler cap and wipe off...

Page 96: ...the oil filler cap 9 Install the panel 1 Start the engine warm it up for several minutes and then turn it off 2 Place an oil pan under the engine to collect the used oil and then remove the engine oil...

Page 97: ...Engine oil drain bolt tightening torque 30 N m 3 0 m kgf 22 ft lbf 11 Add the specified amount of recommended engine oil and then install the engine oil filler cap and tighten it Without oil filter c...

Page 98: ...the rear gear case to collect the used oil 3 Remove the oil filler bolt and the drain bolt to drain the oil 4 Install the drain bolt and tighten it to the specified torque Drain bolt rear gear case ti...

Page 99: ...ne on a level place 2 Remove the oil filler bolt and check the oil level It should be up to the brim of the hole If the level is low add sufficient oil to raise it to the specified level 3 Install the...

Page 100: ...0 33 L 0 29 Imp qt 0 35 US qt 6 Install the filler bolt and tighten it to the specified torque 7 Check for oil leakage If oil leakage is found check for the cause Be sure no foreign material enters th...

Page 101: ...f you can not get distilled water If water is added have your dealer check the antifreeze content of the coolant as soon as possible The radiator fan operation is completely automatic It is switched o...

Page 102: ...is damaged and then tighten the coolant drain bolt to the specified torque Coolant drain bolt tightening torque 10 N m 1 0 m kgf 7 ft lbf 10 Install the coolant reservoir hose 11 Fill the recommended...

Page 103: ...rt the engine and let it idle for several minutes Stop the engine and then check the coolant level in the radiator If it is low add more coolant until it reaches the top of the radiator 14 Fill the co...

Page 104: ...tive boots for holes or tears If any damage is found have them replaced by your dealer Removal 1 Remove panel 2 Remove the spark plug cap 3 Use the spark plug wrench in the tool kit to remove the spar...

Page 105: ...e ATV to your dealer You should periodically remove and inspect the spark plug because heat and deposits will cause the spark plug to slowly break down and erode If electrode erosion becomes excessive...

Page 106: ...ing a spark plug a good estimate of the correct torque is 1 4 to 1 2 turn past finger tight Have the spark plug tightened to the specified torque as soon as possible 4 Install the spark plug cap 5 Ins...

Page 107: ...d let it dry Do not twist the air filter element when squeezing it 7 Inspect the air filter element and replace it if damaged 8 Apply foam air filter oil or other quality foam air filter oil to the ai...

Page 108: ...ossibility of unfiltered air entering the engine Never operate the engine with the air filter element removed This will allow unfiltered air to enter causing rapid engine wear and possible engine dama...

Page 109: ...nd tighten the bolts When cleaning the spark arrester Always let the exhaust system cool prior to touching exhaust components Do not start the engine when cleaning the exhaust system If dust or water...

Page 110: ...rburetor is a vital part of the engine and requires very sophisticated adjustment Most adjusting should be left to your dealer who has the professional knowledge and experience to do so However the id...

Page 111: ...rk plug lead and then set the idle to the specified idling speed by adjusting the throttle stop screw Turn the screw in direction to increase the engine speed and in direction to decrease the engine s...

Page 112: ...t 2 Turn the adjusting bolt until the throttle lever free play is 3 5 mm 0 12 0 20 in 3 Tighten the locknut Check the brake pads for damage and wear If a brake pad thickness is less than 2 mm 0 08 in...

Page 113: ...d may let air enter the brake system possibly causing the brakes to become ineffective Before riding check that the brake fluid is above the lower level and replenish when necessary The front brake fl...

Page 114: ...DOT3 or DOT 4 3 Refill with the same type of brake fluid Mixing fluids may result in a harmful chemical reaction and lead to poor brake performance 4 Be careful that water does not enter the master c...

Page 115: ...four years The front brake lever should have a free play of zero mm zero in at the lever end If not have your dealer check the brake system After servicing Make sure the brakes operate smoothly and t...

Page 116: ...e play and in direction to decrease free play 3 Tighten the locknut If correct free play cannot be obtained ask your dealer to make that adjustment When adjusting the rear brake lever free play Be sur...

Page 117: ...Make sure the brakes do not drag All air must be bled from the brake system Replacement of brake components requires professional knowledge These procedures should be performed by your dealer The rea...

Page 118: ...come on later turn the adjusting nut in direction Inspect cables frequently Replace damaged cables Lubricate the inner cables and the cable ends If the cables do not operate smoothly ask your dealer...

Page 119: ...me 3 Remove the nuts from the wheel 4 Remove the wheel 1 Install the wheel and the nuts Tapered nuts are used for both the front and rear wheels Install the nut with its tapered side towards the wheel...

Page 120: ...dealer Do not try to remove the sealing caps of the battery cells You may damage the battery Avoid contact with skin eyes or clothing Always shield eyes when working near batteries Keep out of reach o...

Page 121: ...a conventional battery charger may shorten the battery life 2 Always make sure the connections are correct when putting the battery back in the machine 1 The main fuse case and the fuse box are locate...

Page 122: ...t bulb burns out replace it as follows 1 Remove the bolts and pulling headlight cover off 2 Remove the rubber cover at the rear of the headlight by pulling it off 3 Remove the headlight lock spring 4...

Page 123: ...it by spring 6 Install the bulb holder by turning it clock wise 7 Install the rubber cover at the rear of the headlight 8 Install the headlight cover with the bolts It is advisable to have your dealer...

Page 124: ...e the screws and then pull tail brake light cover out 2 Remove the tail brake light bulb by pushing it in and turning it counter clockwise 3 Insert a new tail brake light bulb push it in and the turni...

Page 125: ...e spring preload as follows To increase the spring preload turn the adjusting ring in direction To decrease the spring preload turn the ad justing ring in direction A special wrench can be obtained at...

Page 126: ...Remove the spark plug 3 Check the air box and drain if water is present 4 Loosen the carburetor drain screw 5 Turn the engine over several times using the electric start 6 Dry the spark plug and rein...

Page 127: ...replacement Your ATV does not recommend the use of a high pressure type car wash system for washing the ATV If a high pressure system is used exercise extreme care to avoid water damage to the wheel b...

Page 128: ...s Some detergents deteriorate rubber parts Use dish soap type cleaners only High pressure washers may force water past seals Fill the fuel tank Add Carbon Clean Fuel Treatment or Fuel Stabilizer Follo...

Page 129: ...nd add 2 3 tablespoons of 4 Synthetic 0W40 engine oil To access the plug hole use a section of clear 1 4 hose and a small plastic squeeze bottle filled with the pre measured amount of oil Do this care...

Page 130: ...urn the engine over several times to ensure coverage of piston rings cylinder walls and crankshaft bearings 5 Treat the fuel system with Carbon Clean 6 If fuel system additive is not used fuel tank fu...

Page 131: ...well ventilated and cover the machine with a ATV cover Do not use plastic or coated materials They do not allow enough ventilation to prevent condensation and may promote corrosion and oxidation Follo...

Page 132: ...y a weather resistant wax to each polished chrome wheel Choose a product suitable for chrome finishes Read and follow the product labels and instructions 4 Chrome wheels exposed to road salt or salt i...

Page 133: ...g When starting out on an incline use low range or dismount the ATV after first applying the park brake and perform the K turn as described on page 73 Drive at a higher speed or use low range more fre...

Page 134: ...cation to engage clutch Excessive throttle may cause loss of control and vehicle overturn Shift the transmission to park Using the throttle vary the engine RPM from idle to full throttle Repeat severa...

Page 135: ...to 12 5 VDC Check all connections and tighten Check all connections and tighten Out of fuel Clogged fuel valve or filter Water is present in fuel Fuel valve is out of use Old or non recommended fuel F...

Page 136: ...Immediately see your dealer Inspect clean and or replace spark plugs Replace the filter Recharge battery to 12 5 VDC See your dealer Poor quality or low octane fuel Incorrect ignition timing Incorrec...

Page 137: ...or replace plugs Replace with new fuel See your dealer See your dealer See your dealer Fouled or defective spark plugs Worn or defective spark plug wires Incorrect spark plug gap or heat range Loose i...

Page 138: ...ged fuel filter Incorrect jetting Overuse of choke Fuel is very high octane Incorrect jetting Inspect and replace Replace with recommended fuel Inspect and clean or replace See your dealer See your de...

Page 139: ...air filter Reverse speed limiter malfunction Electronic throttle control malfunction Other mechanical failure refuel Inspect and replace Replace with new fuel Inspect clean and or replace spark plugs...

Page 140: ...Overheated engine Clean radiator screen and core if equipped Clean engine exterior See your dealer...

Page 141: ......

Page 142: ......

Page 143: ......

Page 144: ......

Page 145: ......

Page 146: ......

Reviews: