


14
Equipment Touch Usage
The Equipment Touch 2 features intuitive operation to make con
-
trol navigation easy. See Fig. 6. See Table 6 for some tips on using
and navigating through screens with the Equipment Touch. More
information can be found in the EQT2 TruVu™ ET Display in
-
stallation and start-up guide.
Access Control
When accessing a screen or trying to edit a setting or set point that
may impact unit operation, the keypad will appear, and the user
will be required to enter a password to indicate their access level.
There are three user levels for accessing the Equipment Touch
screens and changing information:
User
— requires no password. Has access to only some screens
and is not able to change or edit any critical information.
Admin
— requires password 1111. Has access to most screens
and can change and edit most information. Admin access should
allow full start-up and operation of the equipment.
Factory
— requires factory password. Has access to all screens
and can change and edit all information. Contact Carrier technical
support if factory password is needed.
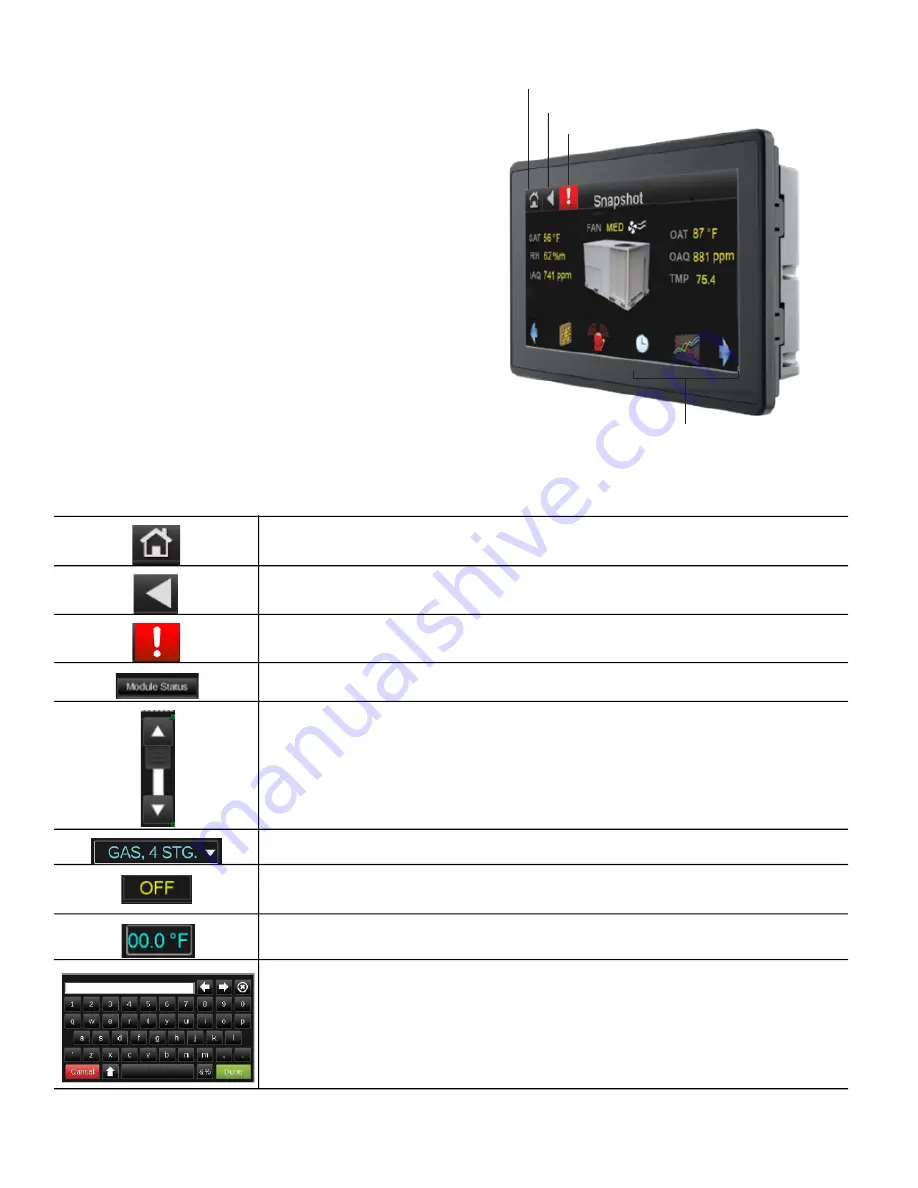
Fig. 6 — Equipment Touch 2
Touch to display:
Home screen
Previous screen
Alarms screen
Touch a button to
display that screen
Table 6 — Navigation Buttons
Home Button
- Press the home button from any screen to be taken back to the home screen.
Back Button
- Press the back button to be taken to the previous screen
Alarm Button
– Press the alarm button to be taken to the alarm screen. If the alarm button is shown in
black, no alarms are active. If the alarm button is red, there is an active alarm.
Link Button
- Press the link button to be taken to the screen indicated by the link
Slider
- A slider indicates that more information is available on a screen. Use the up or down arrows or
drag the location button in the middle to scroll through the screen.
Drop Down Menu
- A box with a white border and arrow on the right side indicates that more op
-
tions are available. Press on the button to see the full option list
Non-Editable Field
- A box with a gray or no border and yellow texts indicates a non-editable field.
This value may be a sensor reading or a set point on a status screen. This information may be editable
on a different screen or with a different level of access.
Editable Field
- A box with white border indicates an editable field. Press inside the box to edit the
values in the field.
Keypad
- when it's necessary to enter information, such as the login screen or an editable box, the key
-
pad will be displayed. The text shown in white box at the top of the keypad will be entered into the
screen. Use the cancel or done buttons on the bottom to exit out of the keypad and delete (cancel) or
save (done) the entered value.


