Recording Audio
89
Low Cut Filter (MIC Terminal)
When you are recording using a microphone connected to the MIC terminal, you can activate the low
cut filter to reduce the sound of blowing wind, a car’s engine and similar ambient sounds.
1 Open the [MIC Low Cut] screen.
[FUNC.]
>
[MENU]
>
p
>
[MIC Low Cut]
2 Touch [
i
On] and then touch [
X
].
Using Line Input or an External Microphone Connected to an INPUT
Terminal
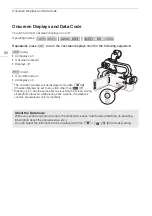
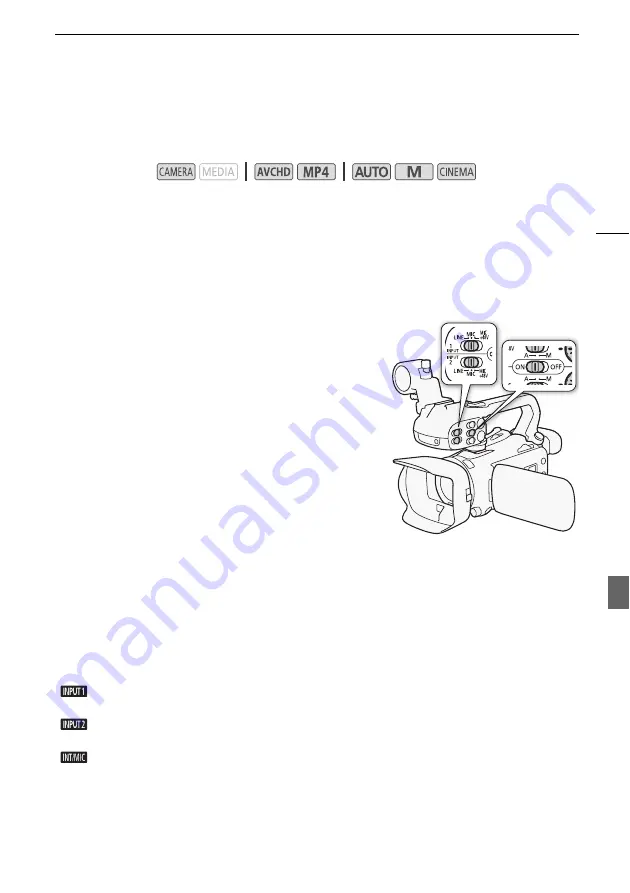
Follow the steps below to use an external microphone
connected to an INPUT terminal.
1 Set the INPUT terminal ON/OFF switch to ON.
2 Set the sensitivity switches for INPUT 1/INPUT 2 to LINE
or MIC.
• To supply a microphone with phantom power, set the
switch to MIC+48V instead. Make sure to connect the
microphone first, before turning the phantom power on.
Keep the microphone connected when turning off the
phantom power.
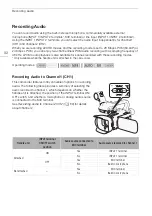
Recording Audio to Channel 2 (CH2)
You can select the audio source that will be recorded to channel 2.
1 Open the [CH2 Input] screen.
[FUNC.]
>
[MENU]
>
p
>
[CH2 Input]
2 Touch the desired option and then touch [
X
].
Options
(
Default value)
Operating modes:
[
INPUT 1]
The audio signal input through the INPUT 1 terminal will be recorded to channel 1
and channel 2. You can use this setting when recording audio for backup purposes.
[
INPUT 2]
The audio signal input through the INPUT 2 terminal will be recorded to channel 2
while the audio signal input through the INPUT 1 terminal will be recorded to channel 1.
[
Built-in Mic/MIC]
The audio captured by the built-in microphone or audio signal input through
the MIC terminal will be recorded to channel 2 while the audio signal input through the INPUT 1
terminal will be recorded to channel 1. You can use this setting when recording audio for backup
purposes.


