


45
Configuring EOS Utility Communication Settings
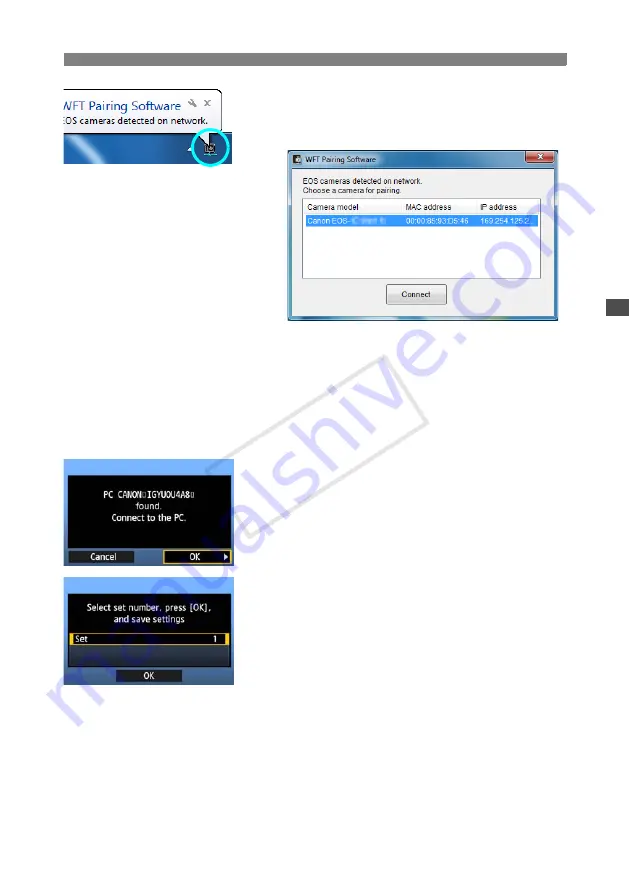
3
Double-click the pairing software icon.
X
Detected cameras are listed. Cameras that have
already been connected are not included in the
list.
Click [
Connect
].
If multiple cameras are displayed, identify the
camera to connect to by its [
MAC address
] or [
IP
address
].
You can check the [
MAC address
] and [
IP
address
] by accessing [
Confirm settings
] in the
menu (p.80).
4
When the camera detects the computer on which
you clicked [
Connect
] in step 3, the message on
the left is displayed.
Turn the <
5
> dial to select [
OK
], and then press
<
0
>.
5
Press <
0
>. Turn the <
5
> dial to select the set
number, and then press <
0
>.
After you turn the <
5
> dial to select [
OK
] and
press <
0
>, the connection wizard is closed and
EOS Utility starts up.
X
The <
Y
> lamp on the camera is lit in green.
Settings information is stored on the camera. It is
not stored on the transmitter.
The EOS Utility network settings are now complete.
COP
Y
Summary of Contents for WFT-E6
Page 12: ...12 COPY ...
Page 26: ...26 COPY ...
Page 48: ...48 COPY ...
Page 64: ...64 COPY ...
Page 79: ...79 Managing Settings Information COPY ...
Page 88: ...88 COPY ...
Page 92: ...92 COPY ...
Page 113: ...113 Reference COPY ...
Page 117: ...117 MEMO COPY ...
Page 118: ...118 MEMO COPY ...
Page 119: ...119 MEMO COPY ...
Page 120: ...120 MEMO COPY ...
Page 121: ...121 MEMO COPY ...
Page 122: ...122 MEMO COPY ...
Page 123: ...123 MEMO COPY ...


