


[Upload]
S
etting HTTP/FTP Upload and E-mail Notification
67
S
et
ting Page
4
• Reduce the uploading frequency:
– Reduce the value in [Pre-event Buffer] or [Post-event Buffer]
– If [Volume Detection Event] is enabled, disabled [ON Event
Operation], [OFF Event Operation], or [Ongoing ON Event
Operation] (p. 71).
– From the Intelligent Function Setting Tool [Event] tab >
disable [ON Event Operation], [OFF Event Operation] or
[Detected mode Operation] (p. 120).
– If [External Device Input Event] is enabled, disable [Active
Event Operation], [Inactive Event Operation], or [Ongoing
Active Event Operation] (p. 72).
– If [Timer Event] is enabled, increase the value in [Repeat
Interval] (p. 73).
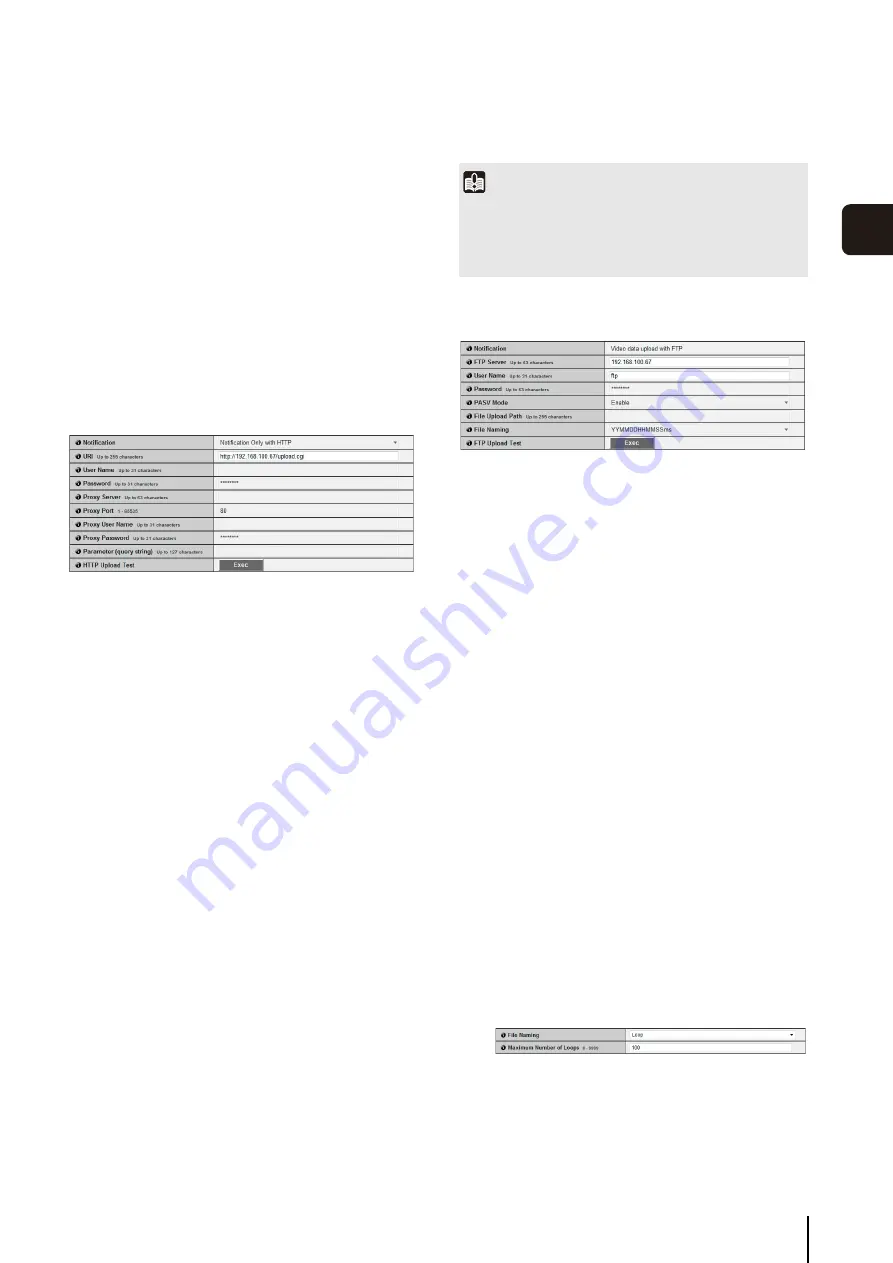
HTTP Upload
The HTTP upload function sends notifications via HTTP or
via HTTP with attached video, depending on the network
camera event.
(1) [Notification]
Select [Notification Only with HTTP] or [Video
attached Notification with HTTP] as the content of
notification.
(2) [URI]
Enter the URI to be uploaded to (using up to 255
characters).
(3) [User Name], [Password]
Enter the user name and password required for
authentication.
Digest authentication is not supported.
(4) [Proxy
S
erver]
Enter the host name or IP address of the proxy server
(using up to 63 characters).
(5) [Proxy Port]
Enter the port number of the proxy server (factory
default setting is [80]).
(6) [Proxy User Name], [Proxy Password]
Enter the user name and password of the proxy
server.
Digest authentication is not supported.
(7) [Parameter (query string)]
Enter the parameter (using up to 127 characters).
Parameters can be specified using the “%” character
(8) [HTTP Upload Test]
Clicking [Exec] initiates an upload test based on the
settings currently entered. Only one JPEG image is
uploaded. It is not necessary to click [Apply].
After entering a password, first click [Exec], then
[Apply] the password.
FTP Upload
(1) [Notification]
The content of notification is set to [Video data upload
with FTP].
(2) [FTP
S
erver]
Enter the host name or IP address of the FTP server
(using up to 63 characters).
(3) [User Name], [Password]
Enter the user name and password required for
authentication.
(4) [PA
S
V Mode]
Select [Disable] or [Enable] for the PASV mode when
uploading via FTP.
(5) [File Upload Path]
Enter the path to the folder where the image file is to
be uploaded to (using up to 255 characters).
(6) [File Naming]
Set a desired file naming rule.
[YYYYMMDDHHMMSSms]
Images are uploaded according to the file name
format of
“{year}{month}{day}{hour}{minute}{second}{ms}.jpg”.
(Example: 20150123112122000.jpg)
[YYYYMMDD Directory/HHMMSSms]
A subdirectory named “{year}{month}{day}” is
created first, and then the image is uploaded using
the file name “{hour}{minute}{second}{ms}.jpg”.
(Example: 20150123/112122000.jpg)
[Loop]
Images are loaded with a file name numbered up to
the value set in [Maximum Number of Loops].
(Example: 0000.jpg, 0001.jpg)
The number will return to 0000 when the maximum
number of loops is reached.
Important
• Enter [Proxy Server], [Proxy Port], [Proxy User Name] and
[Proxy Password] if connecting via a proxy.
• For information about the HTTP upload function and settings,
contact your nearest Canon Customer Service Center.
Summary of Contents for VB-H43
Page 22: ...22 ...
Page 33: ...Access the Top Page of the Camera to Check Video 33 2 Initial Settings ...
Page 34: ...34 ...
Page 90: ...90 ...
Page 134: ...134 ...
Page 160: ...160 ...
Page 195: ...BIE 7032 002 CANON INC 2015 ...


