When you want to
Filter option
Show only jobs that use a certain output tray.
[Output tray]
Show only jobs that use media that are in paper trays.
[Loaded media]
Show only jobs that use a certain job label.
[Job label]
Remove the filter and show all jobs.
[None]
Select function
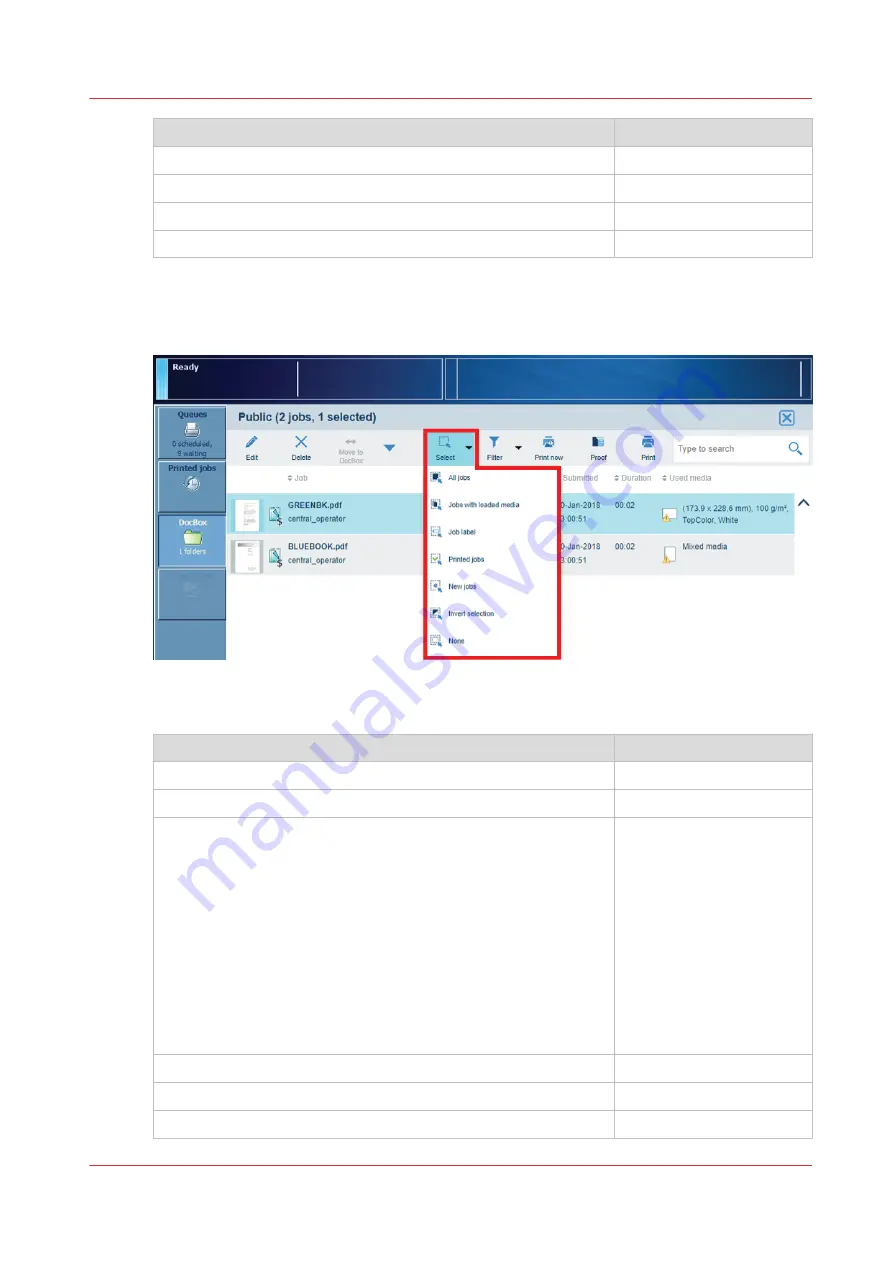
The select function enables you to perform an operation on all selected jobs in one go.
[47] The select options in the DoxBox
The select function offers the following possibilities:
When you want to
Selection option
Select all jobs
[All jobs]
Select the jobs that use media that are in the paper trays.
[Jobs with loaded media]
Select jobs that are submitted with a certain automated workflow.
The job label refers to the name of the automated workflow.
A label is a name or tag that helps you to identify certain jobs on
the control panel. When a job is sent to the printer, the person
who submits the job can add a label to that job. The label can be
any name that helps to identify certain jobs. The label can be de-
fined in the printer driver, in a job ticket or via an automated work-
flow. When the label in the printer driver is identical to a defined
automated workflow, then the print job will be printed with the
settings of this automated workflow. For example, the label ‘Cus-
tomer XYZ’ can be added to jobs. Then you can select and print all
the jobs for 'Customer XYZ' at once.
[Job label]
Select printed jobs in DocBox folders.
[Printed jobs]
Select new jobs in DocBox folders.
[New jobs]
Unselect all jobs.
[None]
4
Search, filter and select jobs
Chapter 8 - Plan the jobs
121
VarioPrint 6000 line
Summary of Contents for VarioPrint 6000 Series
Page 8: ...Contents 8 VarioPrint 6000 line ...
Page 9: ...Chapter 1 Introduction ...
Page 14: ...Information in this operation guide 14 Chapter 1 Introduction VarioPrint 6000 line ...
Page 15: ...Chapter 2 Explore the print system ...
Page 31: ...Chapter 3 Explore the ease of operation ...
Page 46: ...Transaction printing workflow 46 Chapter 3 Explore the ease of operation VarioPrint 6000 line ...
Page 47: ...Chapter 4 Start the print system ...
Page 56: ...Log in to the printer 56 Chapter 4 Start the print system VarioPrint 6000 line ...
Page 63: ...Chapter 5 Prepare the print system ...
Page 101: ...Chapter 6 Prepare the print jobs ...
Page 110: ...Print a page number via PRISMAsync 110 Chapter 6 Prepare the print jobs VarioPrint 6000 line ...
Page 111: ...Chapter 7 Plan the workload remotely ...
Page 115: ...Chapter 8 Plan the jobs ...
Page 127: ...6 Touch OK Move jobs to another destination Chapter 8 Plan the jobs 127 VarioPrint 6000 line ...
Page 139: ...5 Touch OK Create a note for the operator Chapter 8 Plan the jobs 139 VarioPrint 6000 line ...
Page 165: ...Chapter 9 Carry out print jobs ...
Page 232: ...Make an intermediate check print 232 Chapter 9 Carry out print jobs VarioPrint 6000 line ...
Page 233: ...Chapter 10 Keep the system printing ...
Page 246: ...Status indicators 246 Chapter 10 Keep the system printing VarioPrint 6000 line ...
Page 247: ...Chapter 11 Media handling ...
Page 289: ...Chapter 12 Maintain the print system ...
Page 316: ...Close the doors and covers 316 Chapter 12 Maintain the print system VarioPrint 6000 line ...
Page 317: ...Chapter 13 PRISMAlytics Dashboard ...
Page 319: ...Chapter 14 Troubleshooting ...
Page 334: ...Create and download a log file 334 Chapter 14 Troubleshooting VarioPrint 6000 line ...
Page 335: ...Chapter 15 Specifications ...
Page 353: ......


