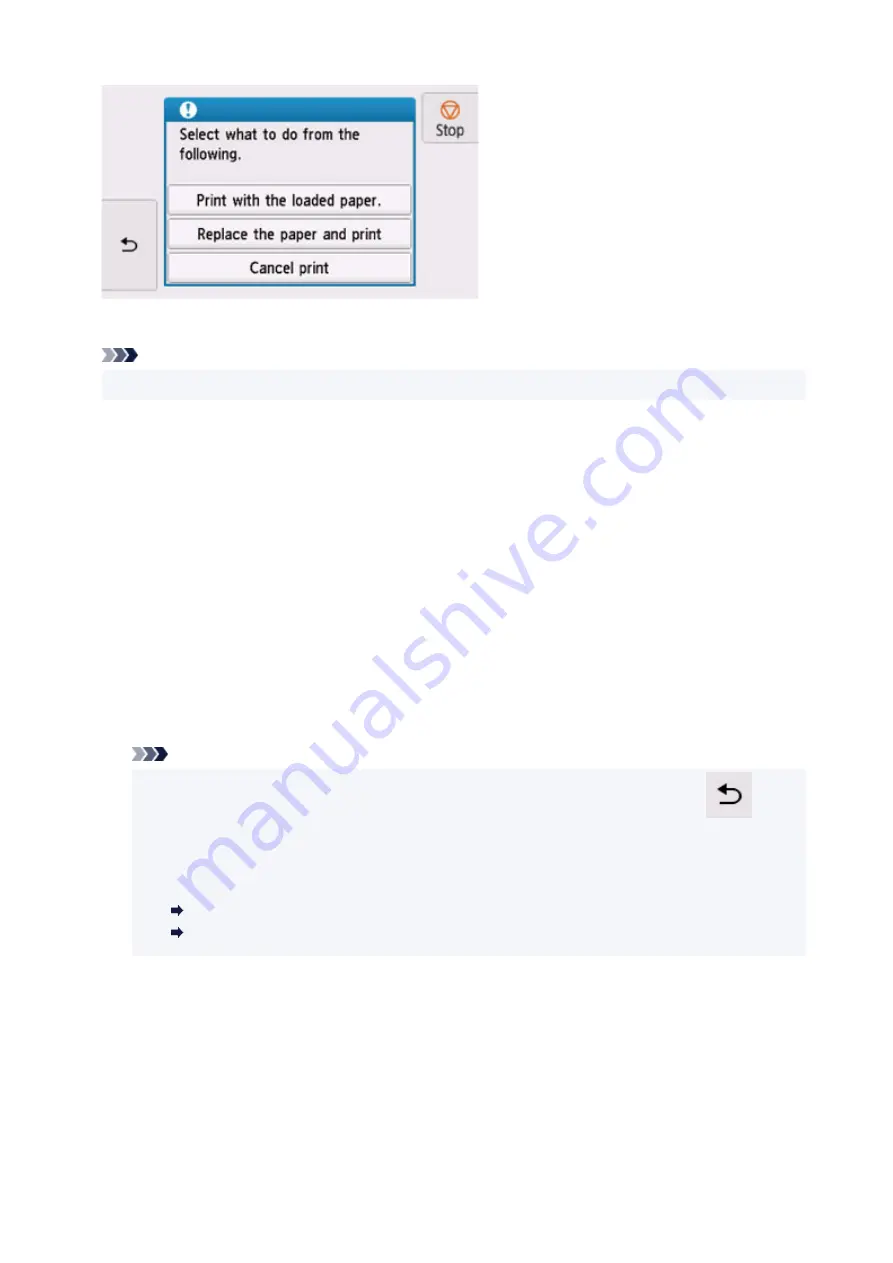
Select the appropriate action.
Note
• Depending on the settings, some of the options below may not be displayed.
Print with the loaded paper.
Select this option to print/copy on the loaded paper with the paper settings specified when printing/
copying.
For example, when the paper size specified when printing is A5 and the paper information for the
cassette is registered as A4, select this option to print on an A4 paper loaded in the cassette with the
A5 setting.
Replace the paper and print
Select this option to print/copy after changing the paper in the cassette.
For example, when the paper size specified when printing is A5 and the paper information for the
cassette is registered as A4, select this option to print after changing the paper in the cassette with an
A5 paper.
After changing the paper and inserting the cassette, the paper information registration screen for the
cassette appears. Register the paper information on the printer according to the loaded paper.
Note
• If you do not know the paper size and media type to be loaded in the cassette, tap
(
Back
)
on the printer's touch screen. The paper size and media type are displayed.
• For the appropriate combination of the paper settings specified on the printer driver and the
paper information registered on the printer, refer to the following.
Paper Settings on the Printer Driver and the Printer (Media Type) (Windows)
Paper Settings on the Printer Driver and the Printer (Paper Size) (Windows)
Cancel print
Cancels printing/copying.
Select this option when you want to change the paper settings specified when printing/copying.
Change the paper settings and try printing/copying again.
458
Summary of Contents for TR8600 Series
Page 1: ...TR8600 series Online Manual English ...
Page 92: ...Replacing Ink Tanks Replacing Ink Tanks Checking Ink Status on the Touch Screen Ink Tips 92 ...
Page 103: ...Adjusting Print Head Position 103 ...
Page 127: ...Safety Safety Precautions Regulatory Information WEEE EU EEA 127 ...
Page 141: ...Main Components and Their Use Main Components Power Supply Using Touch Screen 141 ...
Page 142: ...Main Components Front View Rear View Inside View Operation Panel 142 ...
Page 159: ...159 ...
Page 166: ...For more on setting items on the operation panel Setting Items on Operation Panel 166 ...
Page 220: ...Printing Using Canon Application Software Easy PhotoPrint Editor Guide 220 ...
Page 245: ...Note To set the applications to integrate with see Settings Dialog 245 ...
Page 247: ...Scanning Multiple Documents at One Time from the ADF Auto Document Feeder 247 ...
Page 249: ...Scanning Tips Positioning Originals Scanning from Computer 249 ...
Page 316: ...6 Enter fax telephone numbers in To 316 ...
Page 319: ...Receiving Faxes Receiving Faxes Changing Paper Settings Memory Reception 319 ...
Page 329: ...Other Useful Fax Functions Document Stored in Printer s Memory 329 ...
Page 337: ...For details on how to set the date and time Setting Date and Time 337 ...
Page 364: ...Other Network Problems Checking Network Information Restoring to Factory Defaults 364 ...
Page 395: ...Scanning Problems macOS Scanning Problems 395 ...
Page 396: ...Scanning Problems Scanner Does Not Work Scanner Driver Does Not Start 396 ...
Page 400: ...Problems Sending Faxes Cannot Send a Fax Errors Often Occur When Send a Fax 400 ...
Page 404: ...Problems Receiving Faxes Cannot Print a Fax Fax received Saved in memory Appears 404 ...
Page 406: ...Telephone Problems Cannot Dial Telephone Disconnects During a Call 406 ...
Page 420: ...Errors and Messages When Error Occurred Message Support Code Appears 420 ...


