


the selected paper size. You can drag the cropping frame to enlarge/reduce it while maintaining
the aspect ratio.
Monitor Size (1024 x 768 pixels, etc.)
Select an output size in pixels.
A cropping frame of the selected monitor size will be displayed and the portion within the
cropping frame will be scanned. You can drag the cropping frame to enlarge/reduce it while
maintaining the aspect ratio.
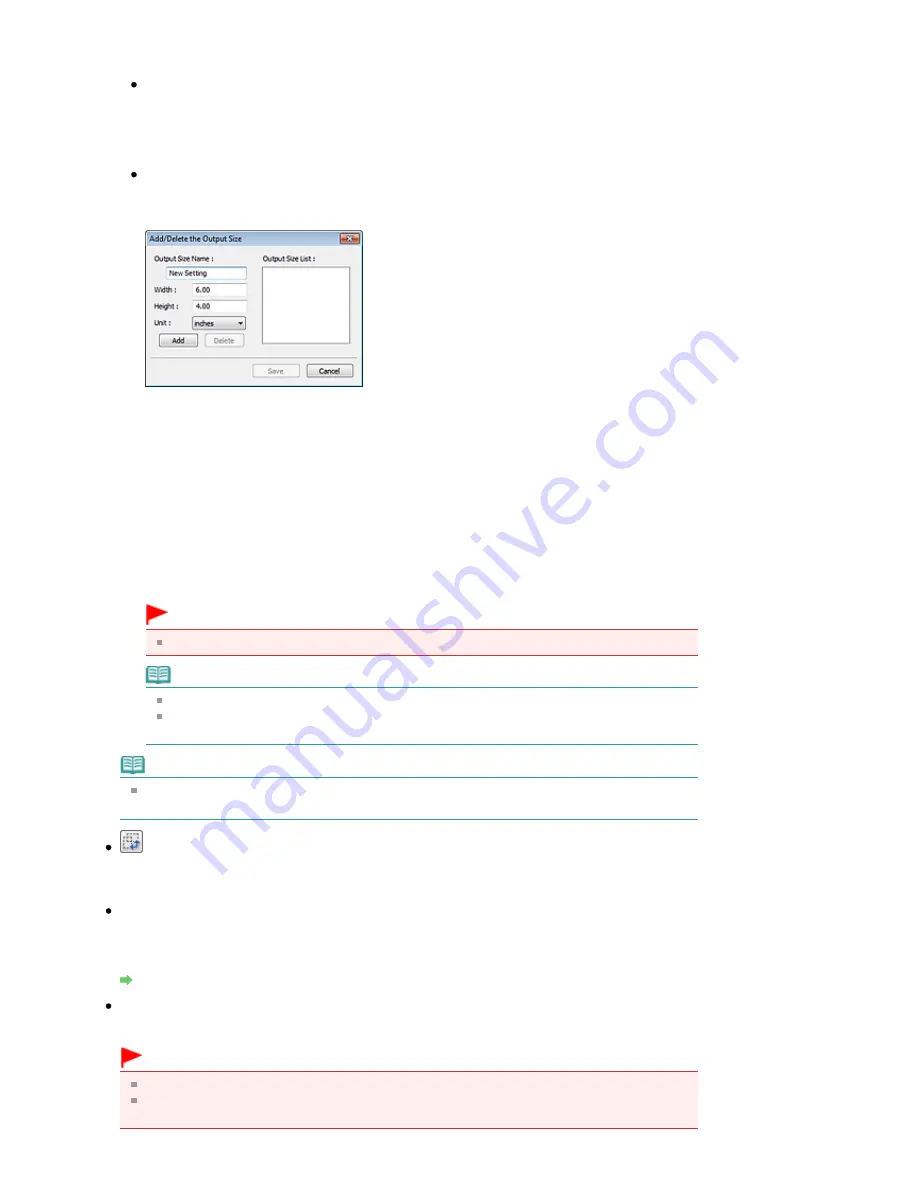
Add/Delete...
Opens the Add/Delete the Output Size dialog box, in which you can specify custom output sizes.
You can select this option when Destination is Print or Image display.
In the Add/Delete the Output Size dialog box, you can specify multiple output sizes and save
them at one time. Saved items will be registered to the Output Size list and can be selected,
along with the predefined items.
Add
To add a size, enter Output Size Name, Width, and Height, then click Add. For Unit, you can
select inches or mm when Destination is Print but you can only select pixels when Destination
is Image display. The name of the added size appears in Output Size List. Click Save to save
the items listed in Output Size List.
Delete
To delete an item, select it in Output Size List and click Delete. Click Save to save the items
listed in Output Size List.
Important
You cannot delete predefined output sizes such as A4 and 1024 x 768 pixels.
Note
Save up to 10 items.
An error message appears when you enter a value outside the setting range. Enter a value
within the setting range.
Note
For details on whether or how the cropping frame is initially displayed on a preview image, see
Cropping Frame on Previewed Images in "
Preview Tab
" (Preferences dialog box).
Invert aspect ratio
This button is available when Output Size is set to anything but Flexible.
Click this button to rotate the cropping frame. Click again to return it to the original orientation.
Adjust cropping frames
You can adjust the scan area within the Preview area.
If an area is not specified, the document will be scanned at the document size (Auto Crop). If an area
is specified, only the portion in the cropping frame will be scanned.
Adjusting Cropping Frames
Image corrections
Allows you to apply corrections to images.
Important
Available functions vary by the document type selected in Select Source.
Auto Document Fix, Fading correction and Backlight correction are available when
Recommended is selected on the Color Settings tab of the Preferences dialog box.
Seite 576 von 922 Seiten
Basic Mode Tab
Summary of Contents for MX360 Seires
Page 89: ...Page top Seite 89 von 922 Seiten Loading Originals on the Platen Glass ...
Page 92: ...Page top Seite 92 von 922 Seiten How to Load Originals for Each Function ...
Page 94: ...Page top Seite 94 von 922 Seiten Loading Originals in the ADF ...
Page 118: ...Page top Seite 118 von 922 Seiten Tips on How to Use Your Machine ...
Page 147: ...Page top Seite 147 von 922 Seiten Printing Photos ...
Page 164: ...See Help for details on the Print Settings screen Page top Seite 164 von 922 Seiten Printing ...
Page 169: ...Page top Seite 169 von 922 Seiten Selecting the Paper and Layout ...
Page 171: ...Page top Seite 171 von 922 Seiten Selecting a Photo ...
Page 173: ...Page top Seite 173 von 922 Seiten Editing ...
Page 175: ...Page top Seite 175 von 922 Seiten Printing ...
Page 180: ...Page top Seite 180 von 922 Seiten Selecting a Photo ...
Page 183: ...Page top Seite 183 von 922 Seiten Printing ...
Page 188: ...Page top Seite 188 von 922 Seiten Selecting a Photo ...
Page 191: ...See Help for details on the Print Settings screen Page top Seite 191 von 922 Seiten Printing ...
Page 243: ...Page top Seite 243 von 922 Seiten Printing ID Photos ID Photo Print ...
Page 311: ...Page top Seite 311 von 922 Seiten Printing a Color Document in Monochrome ...
Page 320: ...Adjusting Contrast Page top Seite 320 von 922 Seiten Printing with ICC Profiles ...
Page 331: ...Page top Seite 331 von 922 Seiten Representing Image Data with a Single Color ...
Page 341: ...Page top Seite 341 von 922 Seiten Canon IJ Printer Driver ...
Page 349: ...Page top Seite 349 von 922 Seiten Making Copies ...
Page 360: ...Page top Seite 360 von 922 Seiten Making Multiple Copies of an Entire Document Collated copy ...
Page 371: ...Page top Seite 371 von 922 Seiten Placing Documents ...
Page 391: ...Page top Seite 391 von 922 Seiten Easy Scanning with Auto Scan ...
Page 456: ...Page top Seite 456 von 922 Seiten Auto Scan Screen Scan Import Window ...
Page 550: ...Auto Scan Mode Tab Page top Seite 550 von 922 Seiten Scanning in Auto Scan Mode ...
Page 571: ...Page top Seite 571 von 922 Seiten Adjusting Tone Curve ...
Page 590: ...Page top Seite 590 von 922 Seiten Output Settings ...
Page 637: ...Page top Seite 637 von 922 Seiten Using the Hook Button ...
Page 689: ...Page top Seite 689 von 922 Seiten Saving a Document in Machine s Memory to USB Flash Drive ...
Page 767: ...Graphic LCD Text LCD Page top Seite 767 von 922 Seiten Bluetooth settings Screen ...
Page 816: ...Page top Seite 816 von 922 Seiten Print Results Not Satisfactory ...
Page 913: ...Page top Seite 913 von 922 Seiten Notice for Unplugging the Power Cord ...


