Advanced Guide
>
Printing from a Computer
>
Printing with the Bundled Application Software
>
Correcting and
Enhancing Photos
> Using the Auto Photo Fix Function
A066
Using the Auto Photo Fix Function
This function will automatically analyze the captured scene and apply suitable corrections.
Important
The Auto Photo Fix function is not available for Photo Print. Photo Print allows you to automatically
apply suitable corrections to all photos when printing, by selecting Enable Auto Photo Fix in Color
correction for printing on the Advanced tab of the Preferences dialog box.
To display the Preferences dialog box, click
(Settings) in the Layout/Print screen or select
Preferences... from the File menu.
Once image is corrected with Auto Photo Fix and saved, it cannot be corrected again with Auto
Photo Fix.
Also, Auto Photo Fix may not be available for images edited using an application, digital camera,
etc. manufactured by other companies.
1.
Select photos in the Select Images screen, then click
(Correct/Enhance
Images).
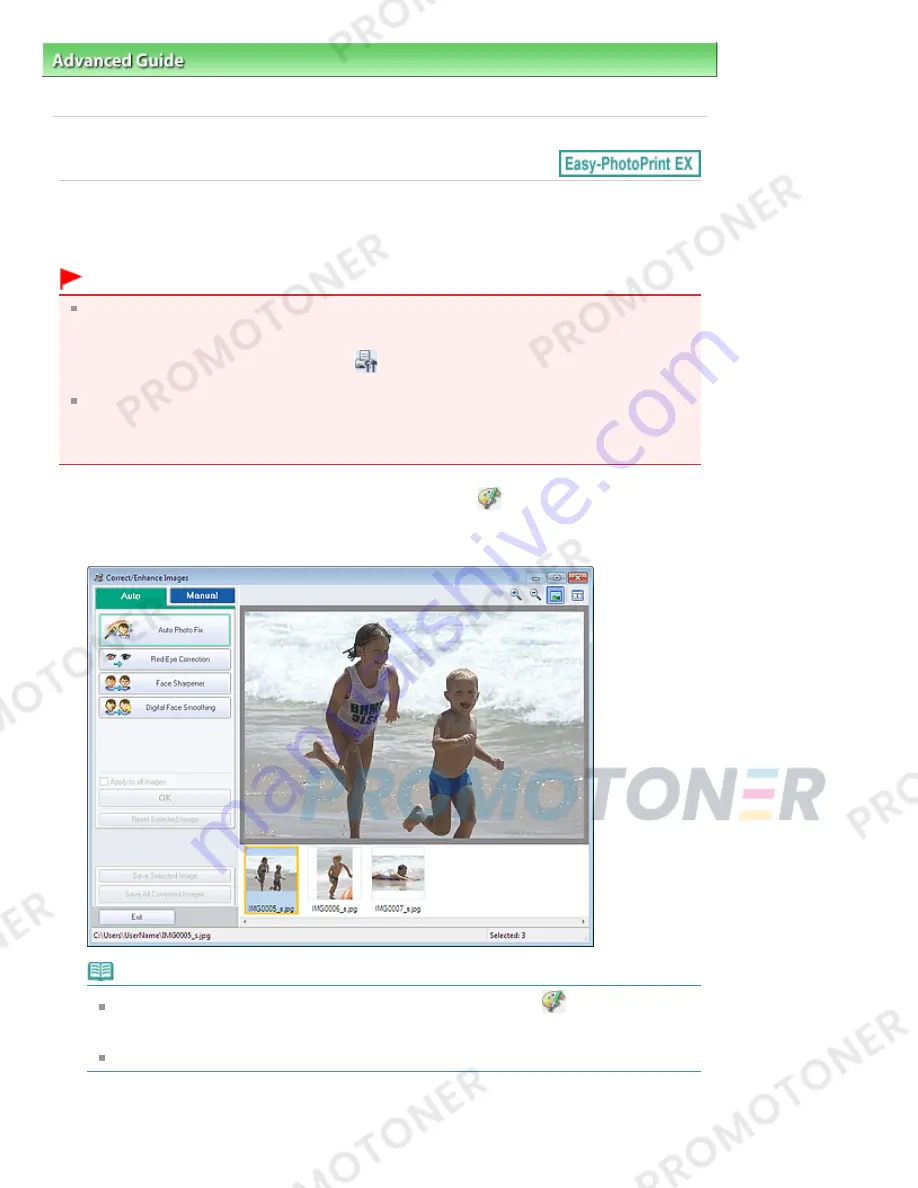
The Correct/Enhance Images window appears.
Note
You can also display the Correct/Enhance Images window by clicking
(Correct/Enhance
Images) in the Layout/Print or Edit screen. In that case, only the image displayed in Preview
can be corrected/enhanced.
See "
Correct/Enhance Images Window
" for details on the Correct/Enhance Images window.
2.
Select the image you want to correct from the thumbnail list in the Correct/Enhance
Images window.
Page 156 of 707 pages
Using the Auto Photo Fix Function
Summary of Contents for MP282
Page 19: ...Page top Page 19 of 707 pages Fit to Page Copying...
Page 32: ...Page top Page 32 of 707 pages Printing Web Pages Easy WebPrint EX...
Page 46: ...Page top Page 46 of 707 pages Media Types You Can Use...
Page 131: ...See Help for details on the Edit screen Page top Page 131 of 707 pages Editing...
Page 135: ...Page top Page 135 of 707 pages Printing Stickers...
Page 142: ...See Help for details on the Print Settings screen Page top Page 142 of 707 pages Printing...
Page 144: ...How Can I Move or Copy the Saved File Page top Page 144 of 707 pages Printing Layout...
Page 147: ...Page top Page 147 of 707 pages Selecting the Paper and Layout...
Page 151: ...Page top Page 151 of 707 pages Editing...
Page 203: ...Page top Page 203 of 707 pages Cropping Photos Photo Print...
Page 207: ...Page top Page 207 of 707 pages Printing an Index...
Page 213: ...Page top Page 213 of 707 pages Opening Saved Files...
Page 217: ...Page top Page 217 of 707 pages Changing Layout...
Page 222: ...Page top Page 222 of 707 pages Adding Photos...
Page 230: ...Page top Page 230 of 707 pages Printing Dates on Photos...
Page 244: ...Page top Page 244 of 707 pages Setting a Page Size and Orientation...
Page 251: ...border before printing Page top Page 251 of 707 pages Execute Borderless Printing...
Page 380: ...View Use Window Page top Page 380 of 707 pages Classifying Images into Categories...
Page 406: ...Page top Page 406 of 707 pages Navigation Mode Screen...
Page 442: ...Page top Page 442 of 707 pages Send via E mail Dialog Box...
Page 449: ...Page top Page 449 of 707 pages Correct Enhance Images Window...
Page 462: ...Page top Page 462 of 707 pages Scan Settings Dialog Box One click Mode Screen...
Page 502: ...Related Topic Auto Scan Mode Tab Page top Page 502 of 707 pages Scanning in Auto Scan Mode...
Page 531: ...Related Topic Scanning in Basic Mode Page top Page 531 of 707 pages Basic Mode Tab...
Page 554: ...Page top Page 554 of 707 pages Scanner Tab...
Page 692: ...Page top Page 692 of 707 pages Installing the MP Drivers...
Page 702: ...Page top Page 702 of 707 pages Restrictions on Printer Sharing...
Page 705: ...Page top Page 705 of 707 pages Using Easy PhotoPrint EX...


