Chapter 4
4-51
4.3.17 Opening the Cap/Moving the Wiper Unit
0020-5706
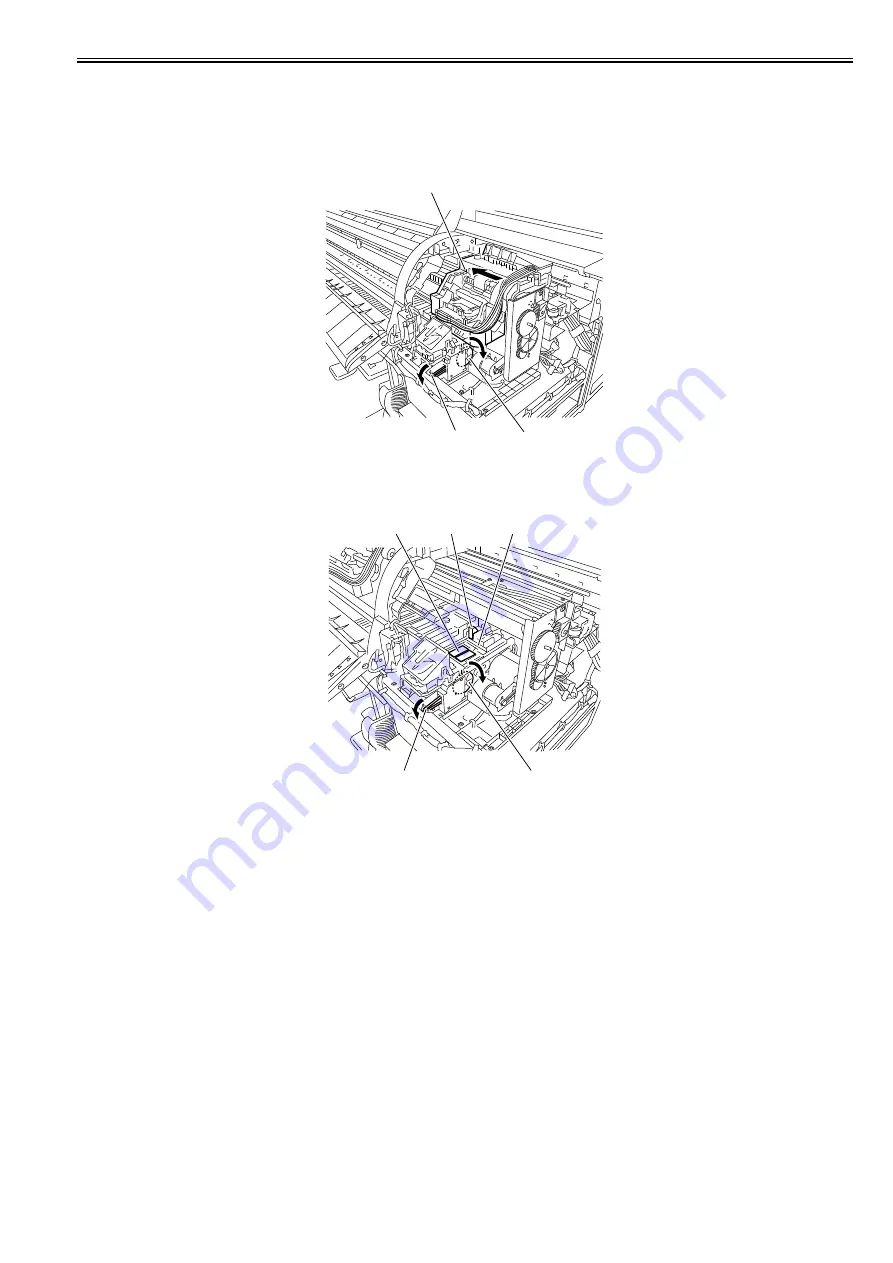
This section explains how to move the cap, carriage lock pin and wiper unit manually.
Moving carriage when the power of the printer is off, releasing carriage lock pin and uncapping must be done manually.
1. Uncapping, releasing the carriage lock pin
1) Open the upper cover and remove the right circle cover (L), right circle cover (S), right side cover, rear right cover and upper right cover.
2) Turn the gear [1] or motor pulley [2] of the purge unit toward the direction of the arrow. This will lower cap and lock pin, allowing the carriage [3] to be moved.
F-4-112
2. Moving the wiper unit
1) Open the upper cover and remove the right circle cover (L), right circle cover (S), right side cover, rear right cover and upper right cover.
2) To move the cap [3], lock pin [4] and wiper unit [5], turn the gear [1] or motor pulley [2] of the purge unit toward the direction of the arrow.
F-4-113
[2]
[3]
[1]
[4]
[3]
[5]
[1]
[2]
Summary of Contents for iPF825
Page 2: ......
Page 6: ......
Page 11: ...Chapter 1 PRODUCT DESCRIPTION...
Page 12: ......
Page 14: ......
Page 67: ...Chapter 2 TECHNICAL REFERENCE...
Page 68: ......
Page 78: ...Chapter 2 2 8 Printing Modes...
Page 79: ...Chapter 2 2 9...
Page 121: ...Chapter 3 INSTALLATION...
Page 122: ......
Page 124: ......
Page 138: ...Chapter 3 3 14...
Page 139: ...Chapter 4 DISASSEMBLY REASSEMBLY...
Page 140: ......
Page 142: ......
Page 200: ......
Page 201: ...Chapter 5 MAINTENANCE...
Page 202: ......
Page 204: ......
Page 208: ...Chapter 5 5 4 5 Close upper cover 1 F 5 6 1...
Page 209: ...Chapter 5 5 5...
Page 210: ......
Page 211: ...Chapter 6 TROUBLESHOOTING...
Page 212: ......
Page 214: ......
Page 241: ...Chapter 7 SERVICE MODE...
Page 242: ......
Page 244: ......
Page 265: ...Chapter 7 7 21...
Page 266: ......
Page 267: ...Chapter 8 ERROR CODE...
Page 268: ......
Page 270: ......
Page 305: ...Appendix...
Page 306: ......
Page 314: ......
Page 315: ...Feb 27 2017...
Page 316: ......


