background image

Loading the Tray

21

2-21

Important

Note

z

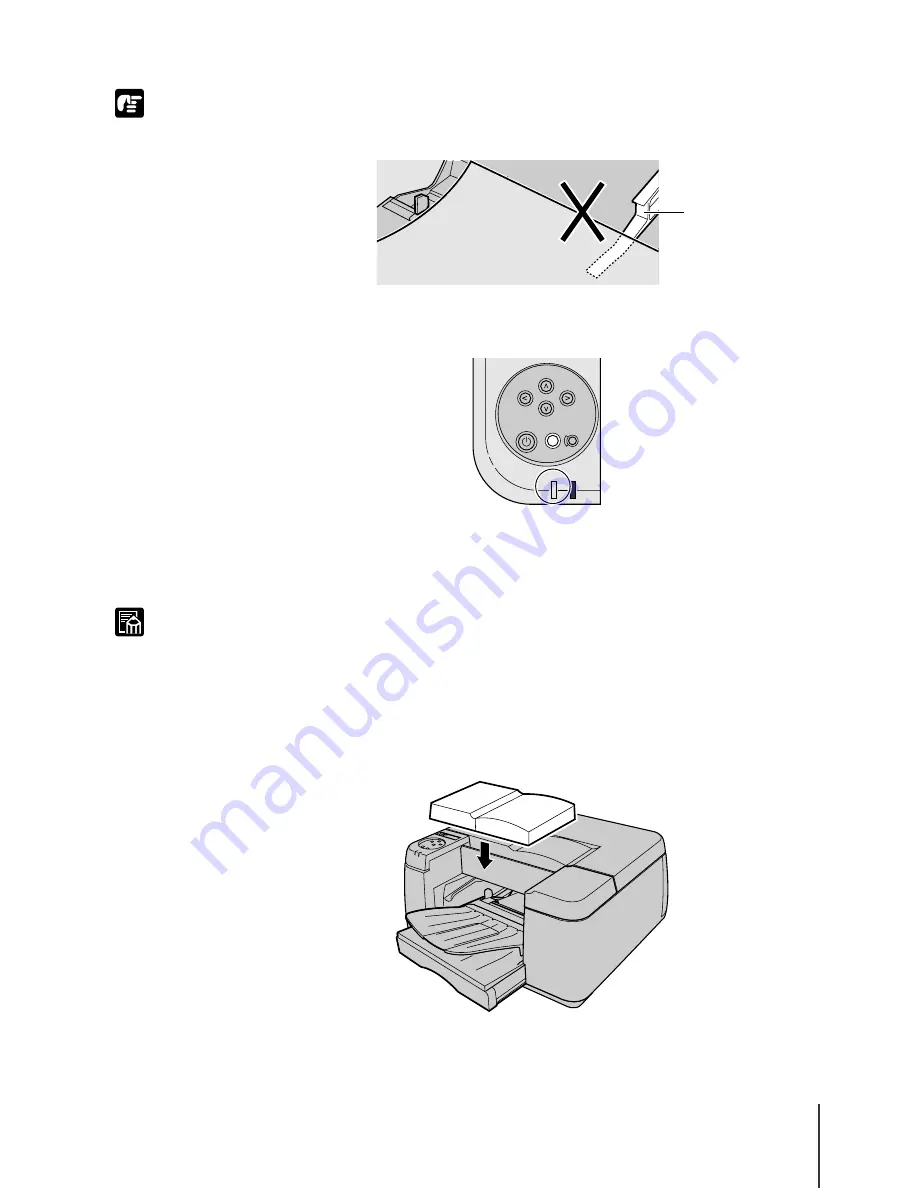
To prevent incorrect feeding, the sheets must be set to pass below the exit guide 
(a).

8

Press the Online button.

The print job starts.

To print more than one sheet, repeat the Step 1 to Step 8 to print each sheet 
one by one.

z

If you press the Online button before you load the next sheet, the next sheet will 
feed from Cassette 1.

9

Remove any media remaining in Tray, move the slide lever to the 
center, then re-attach the front upper cover.

a

Set Media

Reset/Enter

Power

Online Message

Ink Replace

Online

Setup

Cancel Job/

Utility

Summary of Contents for imagePROGRAF W2200

Page 1: ...Graphic Color Printer ...

Page 2: ...ising from or related to the use of this printer Trademarks Canon the Canon logo and BJ are registered trademarks of Canon Inc Microsoft Windows Windows NT and MS DOS are registered trademarks of Microsoft Corporation in the United States and or other countries NetWare and Novell are registered trademarks of Novell Inc in the United States and other countries NDS NDPS NLM and Novell Client are tra...

Page 3: ...round the printer z Failure to follow these instructions could lead to mistakes in the use of printer and result in minor injury or serious damage to the printer Always remember and follow the guidelines and advice described under this heading to ensure safe use of the printer z Instructions and guidelines for operation of the printer provided under this heading describe restrictions and other imp...

Page 4: ... is an acronym for Graphic Arts Language with Raster Operations a printer language of creating raster images Legal Notice It is illegal to reproduce currency bills negotiable securities and other documents prohibited by law Reproduction of such items may be subject to criminal prosecution It is illegal to reproduce legal certificates licenses travel tickets and certain public and private documents...

Page 5: ...his printer and do not use this power cord with any other electrical device z To avoid a fire or serious electrical shock caused by a short circuit avoid damaging the AC adapter cord or the power cord Never attempt to modify the power cord in any way Never apply force to the cord by pulling on it and never place a heavy object on the power cord z To avoid a fire or serious electrical shock connect...

Page 6: ...table surface that is safe from sudden shocks or strong vibrations to ensure that it will not fall z To avoid damage to the printer which could result in a fire or electrical shock place the printer in a location where it is not exposed dust direct sunlight high temperature or high humidity Use the printer location in an environment where temperature and humidity are within the ranges of 5oC 35oC ...

Page 7: ...ging the power plug which could cause a short circuit and cause a fire or electrical shock never pull on the power cord to unplug the cord from the power supply Always grip the plug to remove it from the power supply z To avoid a fire or electrical shock do not use an extension cord z To prevent fire or electrical shock never use a power supply source other than the one rated for the printer in th...

Page 8: ...rating z To avoid a fire electrical shock or damage to the printer never place anything on the printer such as small metal objects like staples paper clips or any type of liquid container especially containers of flammable liquids which could fall accidentally into the printer z To prevent a fire hazard or dangerous electrical shock if a foreign object falls or a liquid spills into the printer pre...

Page 9: ...inter Online 1 9 Setting the Printer Offline 1 10 Chapter 2 Print Media You Can Use Print Media That Can Be Used 2 2 Types of Print Media 2 2 Paper Sizes 2 5 Maximum Stack Size 2 6 Printing Area 2 7 Handling Print Media 2 7 Loading Paper Cassettes 2 8 Loading the Paper Cassette 2 8 Selecting the Print Media Size and Type 2 13 Loading the Tray 2 17 Chapter 3 Printing from Windows Printing 3 2 Print...

Page 10: ...ngs 5 10 Menu Settings Summary Tables 5 12 Setup Menu 5 12 Utility Menu 5 14 Media Set Menu 5 15 Chapter 6 Maintenance Replacing Ink Tanks 6 2 When to Replace an Ink Tank 6 2 Handling Ink Tank Precautions 6 3 Replacing an Ink Tank 6 4 Caution About Using Refilled Ink Tanks for This Printer 6 8 Switching Off Ink Level Detection 6 8 Executing Print Job 6 8 Cleaning the Printer 6 9 Replacing the Prin...

Page 11: ...ng 7 34 Adjusting the Amount of Line Feed 7 37 Adjusting the Amount of Line Feed for Each Media 7 40 Chapter 8 Other Important Information Options 8 2 Paper Feed Units 8 2 Universal Cassettes 8 2 Uninstalling the Software 8 4 Deleting Old USB IEEE 1394 Printer Drivers 8 4 Uninstalling the Printer Driver 8 6 Uninstalling GARO Status Monitor 8 7 Uninstalling the LPR Port 8 7 Uninstalling the GARO De...

Page 12: ...x ...

Page 13: ...1 Before Using the Printer This section describes printer parts and procedures you should know before you use the printer ...

Page 14: ...ront upper cover Remove to load paper in the tray or to remove jammed paper ÆP 2 18 P 7 20 d Right cover Open to replace ink tanks This cover is normally locked To unlock this cover for removal in order to replace ink tanks press the Ink Replace button on the operation panel ÆP 6 4 e Manual feed lever Releases the paper feed roller to allow manual paper feed Raise this lever to feed paper manually...

Page 15: ...riety paper sizes and types plain paper coated paper transparencies OHP film etc ÆP 2 8 k Lift handles Grasp these handles provided on the left and right side to lift or move the printer TBack View a Connector cover Protects the expansion slot The printer is provided with one slot for a network interface board NB 11FB ÆSetup Guide b USB port Provides a connection point for a USB cable connected to...

Page 16: ...Locks the printhead lock cover Pull down to open then install the printhead ÆSetup Guide b Printhead lock cover Protects the printhead Raise to open and install the printhead ÆSetup Guide c Printhead Equipped with the nozzles that supply the inks for printing This important part is not installed before shipping so you must install it before you can use the printer ÆSetup Guide d Carriage Holds the...

Page 17: ...hem in place To replace an ink tank press the Ink Replace button on the operation panel to release the right cover Open the right cover then raise the ink tank cover g Y ink tank h M ink tank i PM ink tank j C ink tank k PC ink tank l Bk ink tank These tanks hold the ink The ink tanks are not installed before shipping so you must install all the ink tanks before you can use the printer a b c d g h...

Page 18: ...Cassette 2 Paper Cassette 2 d Paper feed unit connector This important connector connects the paper feed unit Avoid hitting or applying great force to this connector e Back cover f Back inner covers Open these covers to remove jammed paper from Cassette 2 g Guide pins These 2 pins located at the back of the paper feed unit align the paper feed unit correctly for installation h Lift handles Grasp t...

Page 19: ...om the computer 1 Press the Power button The Online lamp and Message lamp flash for a few seconds while the printer warms up After the printer has warmed up the Online lamp lights and remains on and Ready is displayed The Message lamp flashes when a message is displayed Read the message and perform the required procedure Æ Error Messages P 7 16 If the display or Online lamp do not light check the ...

Page 20: ...m and make sure the print job has completed If a print job is in progress wait for the print job to complete before switching off the printer 2 Hold down the Power button for more than 2 seconds until the Online lamp starts flashing then release it Please wait is displayed for few seconds then the printer goes off Set Media Reset Enter Power Online Message Ink Replace Online Setup Cancel Job Utili...

Page 21: ...ections The printer enters the offline mode automatically when an error message alerts you about a problem so you can perform the procedure to correct the problem When you are finished performing settings with the operation panel and display or after you have corrected an error press the Online button to set the printer online again for printing Setting the Printer Online Follow this procedure to ...

Page 22: ...rinter offline 1 Press the Online button to switch the Online lamp off When the Online lamp off the printer is offline z Pressing the Online button repeatedly switches the printer between the online and offline modes Set Media Reset Enter Power Online Message Ink Replace Online Setup Cancel Job Utility ...

Page 23: ...2 Print Media You Can Use This chapter describes the types of print media that can be used and how to load each type ...

Page 24: ...on plain paper that resist fading due to exposure to light Canon product Bubble Jet Paper LC 301 z The water resistance of Color Bubble Jet Paper LC 301 is improved z You can also use plain copy paper 64 105 g m2 intended for use on copy machines TCoated Paper Specially coated for use with BJ printers coated paper reproduces brilliant colors without blurring This media is ideal for printing materi...

Page 25: ...surface much shinier than Glossy Paper an excellent choice to achieve the best reproduction of photographic images z In order to achieve the best results when printing high quality photographic images set the top margin larger than 20 mm 0 8 in TTransparencies OHP Film Highly transparent film used to produce printed color presentations with an overhead projector at conferences and presentations Pr...

Page 26: ...rint on the correct print side the rough side of this film and load the edge of each sheet marked with the white tape into the printer first z To prevent a jam do not remove the white tape from the sheet before printing The tape can be removed after printing TProofing Paper Excellent at printing in brilliant color Ideal for simulative printing of offset and photogravure printings Canon product BJ ...

Page 27: ... 0 mm 11 69 x16 54in Yes Yes No Yes B4 JIS 257 0 x364 0 mm 10 12 x14 33 in Yes Yes No Yes A4 210 0 x297 0 mm 8 27 x 11 69 in Yes 1 1 A4 and Letter size paper must be loaded vertically for short edge feed Yes 1 No Yes 1 B5 JIS 182 0 x257 0 mm 7 17 x 10 12in Yes Yes No Yes B5 ISO 176 0 x250 0 mm 6 93 x 9 84 in No No No Yes Ledger 279 4 x431 8 mm 11 00 x17 00in Yes Yes No Yes Legal 215 9 x355 6 mm 8 ...

Page 28: ...less Once you load the media in the cassette it is recommended to use up the whole package Media type W2200 Sheets Cassette 1 Cassette 2 Option 13x22 in Cassette Option Tray PlainPaper 250 250 1 Coated Paper HR 101S A3 50 50 1 A3 100 100 1 B4 JIS 100 100 1 A4 150 150 1 B5 JIS 150 150 1 Ledger 100 100 1 Letter 150 150 1 High Gloss Photo Film 1 PhotoPaperPro PR 101 1 MattePhotoPaper MP 101 50 50 1 G...

Page 29: ...commend printing within area b Please note this correction Handling Print Media Observe the following points regarding loading and handling paper and other print media z Print media that cannot be used Folded Curled Wrinkled Looseleaf pads or any type of sheets with holes z For details about handling and storing print media please refer to the instructions provided with each package 46 2mm 1 8in 3...

Page 30: ...aper and other media in its original package Store the package in a cool dry location that is not exposed to the sunlight z To prevent jamming never remove the paper cassette during printing Loading the Paper Cassette Follow the procedure below to load the paper cassette The procedure is the same for loading optional paper cassettes z The paper cassette holds approximately 250 sheets of standard w...

Page 31: ...or the size of the paper Marks for standard paper sizes are provided on the length guide Move the guide to the desired mark 4 Pinch the lever on the width guide so it moves freely and move the guide to the paper size mark The width guide can be set and locked in every 0 5 mm 0 02 in Set the width guide slightly larger than the desired paper size ...

Page 32: ...assette can cause paper jams Never load paper higher than the load limit mark a and never load more than the number of sheets recommended for special print media Æ Maximum Stack Size P 2 6 z A large gap at the side of the stack c or incorrect alignment of the stack here may cause poor print results due to paper skew during feeding Make sure that the side is aligned correctly and that the stack is ...

Page 33: ...h guide until it rests lightly against the side of the stack z To ensure smooth paper feed from the cassette make sure that the width guide is snug and not too tight against the side of the stack If the width guide is too tight or if there is a gap between the paper and the guide this may cause paper to feed incorrectly 8 Install the cassette cover Align the four pegs on bottom of the cassette cov...

Page 34: ...ide lever to the center position to enable paper feed from the cassette z The out put extension should be used to prevent large size media from falling off the tray after it is ejected from the printer Always attach the out put extension before starting the print job ...

Page 35: ...a loaded in the cassette In that case just select the type of the media When you print the 13x22 in media install the 13x22 in cassette option before you print When B5 JIS is loaded in the cassette the printer does not set the size automatically Select the size and type of the media on the operation panel z Adjust the line feed setting in the LF Adjust menu on the operation panel before you execut...

Page 36: ... content of the image z Proof C and Proof D are displayed as media type items on the operation panel but these items are not currently available for selection These are preliminary settings for selection to be added in the future z To achieve better quality printing perform the Paper Adjust setting on the operation panel Æ Adjusting the Amount of Line Feed for Each Media P 7 40 1 Press the Online ...

Page 37: ... operation panel then press z If the optional cassette is installed Press or to select the cassette then press 4 Press or to display Media Size and press 5 Press or to display the media size and press An equals sign displayed to the left of the setting indicates the current Media Size selection 6 Press or to display Media Type and press M e d i a S e t M e n u C a s s e t t e 1 M e d i a S e t M e...

Page 38: ...etting indicates the current Media Type selection 8 When you are finished press the Online button to light the Online lamp The operation panel displays Ready and the printer is ready for the next print job M e d i a T y p e P l a i n P a p e r Set Media Reset Enter Power Online Message Ink Replace Online Setup Cancel Job Utility ...

Page 39: ... dry location that is not exposed to sunlight z Some types of media may not feed smoothly z Skew may occur when feeding paper manually from the tray If this occurs remove all of the paper from the paper cassette and print 1 From the computer select Manual for Media Source As the operation panel displays Load Media enters the standby mode and waits for you to load the media z If you press the Onlin...

Page 40: ...he manual feed lever pull Cassette 1 to the marked position Align the mark a of the cassette cover with the position of the printer front z If there is paper in the cassette make sure that the paper is below the load limit mark b If the stack is higher than this mark remove some paper a b ...

Page 41: ...at the trailing edge of the media is located at the correct size mark on the tray z To prevent misfeeds make sure that the paper is not over the right guide a z When loading the media that is wider than the media loaded in the cassette 1 you must remove the previous media in the cassette and move the width guide Move the width guide to the A3 size position Not moving the guide may result in poor m...

Page 42: ...20 z To prevent the ejected media falling from the tray use the output tray extension 6 Move the slide lever until it lightly touches the media 7 While raising the manual feed lever push Cassette 1 completely into the printer a ...

Page 43: ...ore than one sheet repeat the Step 1 to Step 8 to print each sheet one by one z If you press the Online button before you load the next sheet the next sheet will feed from Cassette 1 9 Remove any media remaining in Tray move the slide lever to the center then re attach the front upper cover a Set Media Reset Enter Power Online Message Ink Replace Online Setup Cancel Job Utility ...

Page 44: ...a from the cassettes make sure that the slide lever is always as close as possible to the center position within its range z If you moved the width guide of Cassette 1 at Step 4 after moving the width guide back to its original position feed paper from the cassette ...

Page 45: ...3 Printing from Windows This chapter describes the basic procedure for printing from Windows ...

Page 46: ...ware functions refer to the Setup Guide Print Procedure 1 If the software application select Print from the File menu The Print window opens 2 Make sure the name of the printer is displayed in the Name box perform the settings for the Print range and Copies group then click the OK button The print job starts z Click the Properties button if you want to select the print media type paper feed method...

Page 47: ...ity button for 3 seconds until you see Job Cancel is displayed then release the button The print job in progress is canceled 4 If the Online lamp goes off and you cannot cancel the print job then use GARO Status Monitor to cancel the print job 5 If the GARO Status Monitor is not installed hold down the button for more than 1 second release it when the Message lamp starts to flash then do a soft re...

Page 48: ...is available to explain the functions and items of the printer driver Opening Online Help 1 In the Printer Properties window click the Help button The Help window opens z For more details about how to use the Help window please refer to your operating system manual ...

Page 49: ...4 Printing from a Macintosh This chapter describes the basic procedures for printing from a Macintosh ...

Page 50: ...f you selected another printer previously reselect this printer before printing Selecting the Printer TMac OS 8 6 9 x With Mac OS 8 6 9 x use the Chooser to select the printer However if the printer is switched off or if the cable is disconnected the name of the printer will not appear in the list Be sure to check the status of the printer before starting a print job z Occasionally you may not be ...

Page 51: ...n select the connection method then select this printer from the list on the right If the printer is connected to a network make sure that the Active button for AppleTalk is clicked on 3 Close the Chooser window and click the OK button in the message window This completes the selection of the printer ...

Page 52: ...ed the name of the printer will not appear in the list Be sure to check the status of the printer before starting a print job An example using Mac OS X Ver 10 2 is described here The appearance and name of the icon is slightly different using Ver 10 1 1 Select the Finder then select Applications from the Go menu 2 Open the Utilities folder and open Print Center ...

Page 53: ... the printer from the list then click the Add button z If the name of the printer is not displayed in the list check the printer cable connections and make sure that the printer and the computer connected to the network are switched on 5 If you want to set the printer as the default select the name of the printer in the Printer List then select Make Default from the Printers menu z The printer can...

Page 54: ...pens 2 Check the Printer box and make sure that the name of the printer is displayed On the Main panel select the settings for the pages number of copies Media Type Media Source Print Quality and other settings If you are using Mac OS X set the Copies Pages panel and the Main panel 3 Click the Print button The print job starts ...

Page 55: ... can check their status or cancel them at any time Follow the procedures below to cancel a print job TMac OS 8 6 9 x 1 In the GARO Printer Extra folder installed on the hard disk click the GARO Printmonitor icon 2 Click the print job to cancel then click the Printing Paused button The print queue halts and shifts from the Sending status to the Send status A red mark is displayed on the right while...

Page 56: ... Paused button again The print job is deleted 4 Select Resume Printing from the File menu The printer re enters print mode and is ready for operation z After canceling a print job you should always select Resume Printing With the print queue halted the red mark will be displayed you cannot print ...

Page 57: ...print job press and hold down for 1 second until the Message lamp lights and perform either a soft reset or a hard reset If you perform a soft or hard reset all the print jobs received by the printer and currently in progress are erased completely and must be restarted TMac OS X An example using Mac OS X Ver 10 2 is described here The appearance and name of the icon is slightly different using Ver...

Page 58: ...Print Center 3 Select the name of the printer from the Printer List then select Show Jobs from the Printers menu The queue list for the printer is displayed 4 Select the print job to cancel then select Delete Job from the Jobs menu The print job in progress is canceled ...

Page 59: ...ter operation panel is flashing indicating that the print job is still processing press and hold down the Cancel Job Utility button for 3 seconds until Job Cancel is displayed then release the button The print job in progress is canceled 6 If the Online lamp goes off and you cannot cancel the print job press and hold down for 1 second until the Message lamp lights and perform either a soft reset o...

Page 60: ...dicating that the print job is still processing press and hold down the Cancel Job Utility button for 3 seconds until Job Cancel is displayed then release the button The print job in progress is canceled 3 If the Online lamp goes off and you cannot cancel the print job press and hold down for 1 second until the Message lamp lights and perform either a soft reset or a hard reset If you perform a so...

Page 61: ...PDF icon in the folder For Mac OS 8 x 9 x open the W2200DRV89_En file in the OS 89 folder For Mac OS X open the W2200DRVx_En file in the OS X folder z Adobe Acrobat Reader is required to view the Help file z For details about how to use Adobe Acrobat Reader please refer to the Adobe Acrobat Reader manual z You can copy the Help file to the hard disk This will allow you to view the Help at any time...

Page 62: ...Printing from a Macintosh 4 14 ...

Page 63: ...5 Using the Operation Panel This chapter describes how to use the printer operation panel buttons and functions ...

Page 64: ...ings and to perform menu settings Reading the Display The display indicates the current status of the printer TStandby Line 1 The first line of the display indicates the current status of the printer TPrint Job Processing Line 1 The name of the document and the name of the user are displayed for a print job in progress Set Media Reset Enter Power Online Message Ink Replace Online Setup Cancel Job ...

Page 65: ...h an equals sign indicates the current selection A right arrow Æ indicates that items are available for selection on the same level TError Message Display Line 1 Line 2 Displays an error message if the printer requires attention and the printer stops printing After correcting the problem press the Online button Line 2 only Displays an error message but the print job can continue In the Setup Menu ...

Page 66: ... item for selection at the same level b Set Media button Offline When the printer is offline press this button to open the Media Set Menu Menu display In the menu display press this button to return one level up c Cancel Job Utility button During a print job To cancel a print job in progress press and hold down for 3 seconds Offline When the printer is offline press this button to open the Utility...

Page 67: ...ey to execute or set the selected function or value e Power button Press this button to switch the printer on and off Printer off Press to switch the printer on Printer on Press and hold for 2 seconds to switch the printer off f Online button Press the button to set the printer offline and online To use the menus you must first press the Online button to set the printer offline Printer online Pres...

Page 68: ... replacement and to unlock the right cover Reading Operation Panel Lamps The lamps on the operation panel indicate the following states a Online lamp On Printer is online and ready for operation Flashing Printer is warming up or busy Off Printer is offline or power is switched off b Message lamp On A warning is displayed Flashing An error has occurred Off Printer is ready for normal operation or p...

Page 69: ...to perform important tasks like printing a nozzle check cleaning the printhead performing the ink remains display etc TMedia Set Menu Provides selections for the size and type of paper or other print media loaded in the paper cassettes Printer Function Priorities Here are some important points to remember about identical features of the operational panel menus and the GARO printer driver In cases ...

Page 70: ...enus are summarized in the flowcharts below Use the arrow buttons to display the items on the menus TSetup Menu Flow TUtility Menu Flow or Press or to move the previous or next item on the same level Press to move to the next level below Press to return to the previous level above ...

Page 71: ...Function Menus 5 9 TSet Media Menu Flow Set Media 1 Displayed when this option is installed 1 ...

Page 72: ...n it is set offline the printer cannot receive a print job from the computer the offline state is for using the operation panel menus If a problem is detected an error message is displayed an the printer is set offline automatically Performing Settings The example procedure below describes how to select the media type for Cassette 1 1 Press and hold the Power button e to switch the printer on The ...

Page 73: ...lection is displayed 6 Press or to display the desired selection then press The current selection is prefixed with an equals sign After pressing to change the selection the menu display returns to the previous level above 7 Press the Online button f to switch the Online lamp on The printer is set online and is ready for operation M e d i a S e t M e n u C a s s e t t e 1 C a s s e t t e 1 M e d i ...

Page 74: ... 3 5 10 min Sets the job time out time Ink Check Off Bk ink tank C ink tank M ink tank Y ink tank PC ink tank PM ink tank Turns off ink level detection function Adjust Printer Adj Printhead Position Adjust Print Pattern Adj Setting A Adj Setting B Adj Setting C Adj Setting D Adj Setting E Adj Setting F Adjusts the position of the printhead First the pattern is printed then the adjustments for A to...

Page 75: ...k Init Settings Executes the initial settings for the Ext Network menu Set TCP IP Frame Type Disable Ethernet II IP Mode Manual Automatic Protocol DHCP On Off BOOTP On Off RARP On Off IP Setting IP Address Subnet Mask Default G W Allows selections to set up the TCP IP network information for the network interface board After selecting a setting for each TCP IP item execute Regis Settings to enable...

Page 76: ...nts a list of all the current settings on the network interface board Head Cleaning A Cleans the printhead nozzles Head Cleaning B Allows ink to flow to the printhead nozzles Head Cleaning C Initializes ink flow to the printhead after printhead installation Move Printer Drains ink from the printhead to prepare the printer for moving Replace Head Performs processing required for replacing the print...

Page 77: ...ossy Paper 2 Matte Photo Glossy Film Photo Pro Transparency Quick Dry Tran Special 1 Special 5 Proof A Proof D Selects media type for Cassette 1 Cassette 2 Media Size B5 JIS Selects the media size for Cassette 2 A4 A3 B4 Letter Legal Ledger A3 are set automatically Media Type Plain Paper Coated Paper Glossy Paper Glossy Paper 2 Matte Photo Glossy Film Photo Pro Transparency Quick Dry Tran Special ...

Page 78: ...Using the Operation Panel 5 16 ...

Page 79: ...6 Maintenance This chapter describes how to replace consumables and maintain the printer ...

Page 80: ...ppears you should have extra ink tanks on hand ready for replacement TWhen the Ink Check Message is Displayed When the ink level in a tank is very low the ink check message is displayed but printing continues When this message is displayed this means that the ink tank will run out of ink very soon The capital letter s in the message indicate the ink tank color Y Yellow M Magenta PM Photo Magenta C...

Page 81: ...e reach of small children If a child accidentally ingests ink from an ink tank contact a physician immediately z To avoid spilling and damage from stains never drop or shake an ink tank z There may be some ink on or around the ink port of an ink removed from the printer so always handle a removed ink tank carefully to avoid staining your clothing or the work area z Do not break the seal of the pro...

Page 82: ...ff The printer is set offline 2 Press the Ink Replace button The right cover unlocks 3 Open the right cover z You must follow Step 1 Step 2 to unlock the right cover To avoid damaging the printer never try to force the right cover open Set Media Reset Enter Power Online Message Ink Replace Online Setup Cancel Job Utility Set Media Reset Enter Power Online Message Ink Replace Online Setup Cancel Jo...

Page 83: ...k tank to replace and open the ink tank cover 5 Holding the ink tank by the grips on both sides remove the ink tank z Place the removed ink tank in a plastic bag and seal the bag 6 Remove the new ink tank from its package z Always hold the ink tank by the grips c on both sides of the tank ...

Page 84: ... up 7 With the ink supply ports facing down and the label facing in the direction as shown below insert the ink tank into the holder z Always match the color of the ink with the correct holder before inserting it The ink tank cannot be installed if you try to install it in the wrong holder or position it incorrectly 8 Close the ink tank cover Press down on the cover until you hear it click and loc...

Page 85: ...ress down on the right cover until you hear it click and lock The Online lamp lights and the printer is ready to print If printing was paused the interrupted print job continues z If any ink tank is not installed a message will appear No X Ink Tank where X is the color symbol Press the Ink Replace button open the right cover and install all of the color ink tanks ...

Page 86: ...u want to display the ink level detection information you must switch the ink level detection function on and then install new ink tanks specified for use with this printer z Repeatedly removing the same ink tanks from the printer could cause ink to leak from the tank and damage the printer Switching Off Ink Level Detection 1 On the printer operation panel press the Online button to set the printe...

Page 87: ...er cord from the power supply and allow the electrical contacts inside the printer to cool z Use only a damp clean cloth to clean the surfaces of the printer The electrical contacts inside the printer become hot during normal operation To avoid a fire or serious electrical shock never use alcohol benzene thinner or any other type of flammable liquid cleaner to clean the printer 1 Press the Power b...

Page 88: ...hly then use it to wipe and clean the printer exterior and tray the paper output tray and the area around the power connector to remove all dust and paper dust Use a clean dry cloth to wipe and dry the cleaned surfaces 4 Plug the power cord into the power source ...

Page 89: ...d accidentally ingests ink from an ink tank contact a physician immediately z To avoid personal injury from a minor burn never touch the printhead immediately after printing has stopped The printhead becomes extremely hot during printing z To avoid spilling and damage from stains never drop or shake the printhead z There may be some ink on or around the ink port of a printhead removed from the pri...

Page 90: ... then remove the printhead Install the new printhead Install all ink tanks When ink filling processing is completed press the Online button 1 Press the Power button to set the printer on After a few seconds Ready is displayed in the operation panel and the Online lamp lights 2 Press the Online button to switch the Online lamp off The printer is set offline Set Media Reset Enter Power Online Messag...

Page 91: ...s in the display 4 Press or to display Replace Head then press When the message Remove Ink Tank is displayed the right cover is unlocked 5 Open the right cover Set Media Reset Enter Power Online Message Ink Replace Online Setup Cancel Job Utility U t i l i t y M e n u R e p l a c e H e a d ...

Page 92: ...k covers and remove all the ink tanks 7 Close all the ink tank covers then close the right cover When the display reads Ink Draining this means the ink has started to drain z About 3 minutes is required for the ink to drain from the printhead ...

Page 93: ... display reads Open Cover Back Upper Cover open and remove the back upper cover After removing the cover the display reads Rep P Head OK 9 Pull the printhead lock lever out and lower it completely 10 Raise the printhead lock cover completely ...

Page 94: ... in a plastic bag and seal the bag 12 Hold the new printhead by its grips a and remove it from its case then remove the first orange protective cap b While pressing inward on the tabs d of the second protective cap c as shown in the illustration pull down to remove z The nozzles under protective cap 2 c are covered with ink Handle the printhead carefully to avoid touching these nozzles or dropping...

Page 95: ...r packing material removed from the printhead Discard these items immediately in compliance with local regulations regarding the disposal of such items 13 With the nozzles facing down and the electrical contacts facing in insert the printhead gently into the carriage below Make sure that the nozzles are not touching the carriage and the printhead is inserted completely 14 Pull the printhead lock c...

Page 96: ...e attach the back upper cover On the operation panel Ins Ink Tank OK is displayed and the right cover lock is released Go on to the next step to install the ink tanks 17 Open the right cover z Make sure that the right cover was unlocked at Step 16 To avoid damaging the printer never force the right cover to open ...

Page 97: ...acing in the direction shown in the illustration below insert the ink tank into the holder z Always match the color of the ink with the correct holder before inserting it The ink tank cannot be installed if you try to install it in the wrong holder or position it incorrectly 20 Close the ink tank cover Press down on the cover until you hear it click and lock ...

Page 98: ...thout the ink tanks if the ink tanks are installed after the printer is switched on again the initial ink filling will not execute automatically If you make a mistake and switch the power off before installing the ink tanks switch the power on again press the Online button to set the printer offline then execute Head Cleaning C with the printer operation panel Æ Cleaning the Printhead P 7 28 23 Wh...

Page 99: ...7 Troubleshooting This chapter describes how to solve problems with the printer ...

Page 100: ...er through the list below select the heading that best describes your problem then go to the referenced page Cannot print Æ Printer not Operating Correctly Æ P 7 3 Prints but displays error message Æ Error Messages Æ P 7 16 Paper jam Æ Removing Paper Jams Æ P 7 20 Print job completes with unexpected results Æ Print Job Results Abnormal Æ P 7 9 ...

Page 101: ...ing power If not supplying power check the breaker switches for the power line If you are on a power strip determine if there is a switch between the plug receptacle and the main power line Problem 4 Power cord broken Solution Call for service and request a new power cord Printer is on but not online Problem 1 Printhead is not installed Solution Install the printhead ÆSetup Guide Problem 2 Ink tan...

Page 102: ...blem with the system and try to install again Problem 4 Installation does not complete successfully Solution Open the Printer folder remove the printer icon then try again ÆSetup Guide Cannot Install Macintosh Driver Problem 1 Incorrect installer CD ROM mounted Solution Mount the User Software CD ROM provided with the printer Problem 2 Provided User Software CD ROM is damaged Solution Call for ser...

Page 103: ...Hardware Wizard opens follow the instructions on the screen Select only Specify a location then click the Browse button If you are using Windows Me Windows 98 open the CD ROM Drive open the appropriate language folder open the Drivers folder open the WinMe_9X folder open the Driver folder then click the OK button For Windows XP Windows 2000 open the CD ROM open the appropriate language folder open...

Page 104: ...that the correct name of the printer is selected in the name box of the Print dialog box then try again Solution If you are using Mac OS 8 9 make sure that the correct name of the printer is selected with the Chooser Problem 2 Print queue is halted Solution With Windows open the Printer window and click the printer icon Open the File menu and click Pause Printing to release the print job from paus...

Page 105: ... paper cassette Solution Use the printer operation panel to select the correct settings for the Media Size and Media Type for the paper cassette ÆP 2 13 Solution If the Media Type selection is incorrect cancel the print job open the printer driver and select the correct setting for the print media loaded in the paper cassette ÆP 3 3 Problem 5 An ink tank has run out of ink or the nozzles of the pr...

Page 106: ...nected via the parallel port Solution Open the Setup Menu on the printer operation panel select Set Centronics Interactive then select None ÆP 5 13 Blank paper ejected from the printer Problem 1 A blank page is ejected from the previous print job Solution The print job starts after the blank page is ejected Problem 2 Printhead nozzles are clogged Solution Print a nozzle check pattern check the con...

Page 107: ...on If you can see bubbles in the ink hoses perform Head Cleaning B ÆP 7 28 Solution If you do not see any ink in the ink hose check the ink left in the ink tanks to make sure that more than 40 of the ink is left and then perform Head Cleaning C ÆP 7 28 When there is little ink remaining replace the ink tank with a new tank and then perform a printhead cleaning ÆP 6 2 Ink smeared Problem 1 Printing...

Page 108: ...d adjustment with the Band Adjust item ÆP 7 34 Problem 2 The amount of paper feed from the paper cassette is incorrect Solution If the media loaded in the cassette is plain paper follow the procedure below 1 On the operation panel perform LF Adjust to print the line feed setting pattern ÆP 7 37 2 If the line feed setting pattern is printed with streaks perform Paper Adjust for each type of the med...

Page 109: ...up Guide Problem 3 The computer cannot communicate with the printer by bi directional data transfer when connected via the parallel port Solution Open the Setup Menu on the printer operation panel select Set Centronics Interactive then select None ÆP 5 13 Problem 4 Font selected for printing not supported Solution Make sure that the font used in the text of the software application has been instal...

Page 110: ...ings of the Color Mode ÆPrinter Driver Help Problem 2 Colors in the printout do not match the colors on the screen Solution Perform monitor color correction ÆMonitor Instructions Solution The color management setting in the software application is not set correctly For details see your software application manuals Problem 3 The printer does not supply the printhead with ink properly Solution On th...

Page 111: ...wer cord is being frequently removed and re inserted into the power supply Solution On the operation panel set Cleaning at ON as Off ÆP 5 13 If Off is selected clean the printhead regularly by every 1 to 2 months Problem 3 Printing a color image over a large printing area Solution Printing a photograph or other large image normally consumes a large amount of ink This is not abnormal The printer do...

Page 112: ...w to remove the right cover manually and remove the ink tank 1 Insert and slide the thin pin into the groove of the right cover Insert a thin pin into the gap between the right cover and printer just before the lock release lever a visible in the gap then slide the pin toward the back upper cover The right cover unlocks 2 Open the right cover a a ...

Page 113: ...normal 7 15 Important 3 Push up the lever of the ink tank to replace then open the cover 4 Holding the ink tank by the grips on both sides remove the ink tank z Place the removed ink tank in a plastic bag and seal the bag ...

Page 114: ...k tank of the displayed color x Y M PM C PC Bk has run out Solution Replace the color ink tank with a new one ÆP 6 2 x Ink Tank NG Problem 1 The installed ink tank does not match the color displayed in the message x Y M PM C PC Bk and cannot be used in this printer or an empty ink tank was loaded in the slot Solution Read the message and select the correct color ink tank for replacement Make sure ...

Page 115: ... printer Ext I F Error Problem 1 An error occurred during data transfer at the network interface board Solution Press the Online button However the print job data stream cannot be printed Cover Open Problem 1 The cover named in the second line of the printer operation panel display is open Solution Close the appropriate cover Media Misfeed Problem 1 Paper or other print media did not feed Solution...

Page 116: ...e in the lower line of the display switch the printer off and call for service Rep Waste Ink Problem 1 The waste ink tank is nearly full and requires replacing very soon Solution Call for service Install P head Press Online Key Problem 1 The printhead is not installed Solution Install the printhead correctly ÆSetup Guide Printhead NG Press Online Key Problem 1 The installed printhead cannot be use...

Page 117: ...se the error and continue with the next print job The print job cannot be cancelled with the printer operation panel No Media Manual Problem 1 Paper could not feed from the tray Solution Load the media in the tray and press the Online button ÆP 2 17 Media Jam Problem 1 Paper has jammed in the printer Solution Remove the jammed media and press the Online button ÆP 7 20 Load Media Problem 1 The prin...

Page 118: ...on the operation panel and the print job stops Follow the procedure below to check each part for paper jams and remove the jammed sheets 1 While raising the manual feed lever remove the paper cassettes If you are using Cassette 2 be sure to remove all the paper cassettes 2 Remove the front upper cover ...

Page 119: ...Paper Jams 7 21 3 If you see paper jammed at the paper exit use both hands to pull the jammed paper out slowly 4 If you see paper jammed at any paper feed slot use both hands to pull the jammed paper out slowly ...

Page 120: ...over a and the back inner cover b then remove the jammed paper Grasp the knobs on both sides of the back inner covers b to open them After removing the jammed paper close the back cover and back inner cover z After you close the back inner cover push in gently the grips both sides If the back inner cover is loose the paper does not feed smoothly b a ...

Page 121: ...ilm a and try to avoid touching other parts of the device z Try to avoid bending the transparent film b z You must pull the jammed paper toward front of the printer Pulling it straight up could affect print quality or damage the printer z If any of the jammed paper has torn during removal make sure that you remove all pieces of torn paper inside the printer Torn paper remaining inside the printer ...

Page 122: ...Troubleshooting 7 24 7 Attach the front upper cover and the back upper cover 8 Load paper in the paper cassettes and insert the paper cassettes in the printer ...

Page 123: ...ded it may smear ink inside the printer and onto other media z You do not need to select the media size on the operation panel The media is force fed from Cassette 1 to print the pattern 1 Press the Power button to switch the printer on After a few seconds Ready is displayed in the operation panel and the Online lamp lights 2 Press the Online button to switch the Online lamp off The printer is set...

Page 124: ...s If there are no breaks in the vertical and horizontal lines for each color the nozzle check pattern is normal z Normal Print Pattern z Abnormal Print Pattern If any of the lines are broken follow the procedure below Execute printhead cleaning ÆP 7 28 Set Media Reset Enter Power Online Message Ink Replace Online Setup Cancel Job Utility U t i l i t y M e n u N o z z l e C h e c k ...

Page 125: ...g Print Test 7 27 5 When you are finished press the Online button to switch the Online lamp on The printer is ready to print Set Media Reset Enter Power Online Message Ink Replace Online Setup Cancel Job Utility ...

Page 126: ...inutes to complete THead Cleaning C Perform when the printer has not been used for a long period or when Head Cleaning B does not correct the problem This cleaning method consumes the most ink Head Cleaning C requires about 3 minutes When there is little ink remaining printhead cleaning B or C would not be performed properly Check the ink tanks to make sure that more than 40 of all inks remain bef...

Page 127: ...fter a few seconds Ready is displayed in the operation panel and the Online lamp lights 2 Press the Online button to switch the Online lamp off The printer is set offline 3 Press the Cancel Job Utility button The Utility Menu opens on the operation panel Set Media Reset Enter Power Online Message Ink Replace Online Setup Cancel Job Utility Set Media Reset Enter Power Online Message Ink Replace Onl...

Page 128: ...a nozzle check pattern to determine if normal operation has been restored Æ Performing Print Test P 7 25 6 After printing the pattern is finished press the Online button to switch the Online lamp on The printer is ready to print U t i l i t y M e n u H e a d C l e a n i n g A Set Media Reset Enter Power Online Message Ink Replace Online Setup Cancel Job Utility ...

Page 129: ...ller size is loaded it may smear ink inside the printer and onto other media z You do not need to select the media size on the operation panel The media is force fed from Cassette 1 to print the pattern 1 Press the Power button to switch the printer on After a few seconds Ready is displayed in the operation panel and the Online lamp lights 2 Press the Online button to switch the Online lamp off Th...

Page 130: ...n Adjust then press 7 Press or to select Print Pattern then press The printhead alignment pattern prints Set Media Reset Enter Power Online Message Ink Replace Online Setup Cancel Job Utility S e t u p M e n u A d j u s t P r i n t e r A d j u s t P r i n t e r A d j P r i n t h e a d A d j P r i n t h e a d P o s i t i o n A d j u s t P o s i t i o n A d j u s t P r i n t P a t t e r n ...

Page 131: ...ls sign to denote the current setting for A Vertical Lines Conspicuous Vertical Lines Inconspicuous 10 Repeat Step 8 to Step 9 to adjust the settings for B to F 11 After adjustment is finished press the Online button to switch the Online lamp on When Ready is displayed on the operation panel the printer is ready to print P o s i t i o n A d j u s t A d j S e t t i n g A A d j S e t t i n g A 2 Set...

Page 132: ... ink inside the printer and onto other media z You do not need to select the media size on the operation panel The media is force fed from Cassette 1 to print the pattern 1 Press the Power button to switch the printer on After a few seconds Ready is displayed in the operation panel and the Online lamp lights 2 Press the Online button to switch the Online lamp off The printer is set offline Set Med...

Page 133: ... to display Print Pattern then press The banding correction print pattern prints 7 Press or to display Adj Setting G then press Set Media Reset Enter Power Online Message Ink Replace Online Setup Cancel Job Utility S e t u p M e n u A d j u s t P r i n t e r A d j u s t P r i n t e r B a n d A d j u s t B a n d A d j u s t P r i n t P a t t e r n B a n d A d j u s t A d j S e t t i n g G ...

Page 134: ...etting is prefixed with an equals sign to denote the G value for banding adjustment Lines conspicuous Lines inconspicuous 9 After adjustment is finished press the Online button to switch the Online lamp on When Ready is displayed on the operation panel the printer is ready to print A d j S e t t i n g G 1 Set Media Reset Enter Power Online Message Ink Replace Online Setup Cancel Job Utility ...

Page 135: ...a smaller size is loaded it may smear ink inside the printer and onto other media z You do not need to select the media size on the operation panel The media is force fed from Cassette 1 to print the pattern 1 Press the Power button to switch the printer on After a few seconds Ready is displayed in the operation panel and the Online lamp lights 2 Press the Online button to switch the Online lamp o...

Page 136: ...or to display LF Adjust then press 7 Press or to display Print Pattern then press The LF setting pattern prints Set Media Reset Enter Power Online Message Ink Replace Online Setup Cancel Job Utility S e t u p M e n u A d j u s t P r i n t e r A d j u s t P r i n t e r A d j P r i n t h e a d A d j P r i n t h e a d L F A d j u s t L F A d j u s t P r i n t P a t t e r n ...

Page 137: ...ue for LF setting Horizontal Lines conspicuous Horizontal Lines inconspicuous 10 After adjustment of the LF settings is finished press the Online button to switch the Online lamp on When Ready is displayed on the operation panel the printer is ready to print z If you mistakenly alter the settings on the operation panel the printer may print white or dark streaks L F A d j u s t A d j S e t t i n g...

Page 138: ...er size is loaded it may smear ink inside the printer and onto other media z You do not need to select the media size on the operation panel The media is force fed from Cassette 1 to print the pattern 1 Press the Power button to switch the printer on After a few seconds Ready is displayed in the operation panel and the Online lamp lights 2 Press the Online button to switch the Online lamp off The ...

Page 139: ... sign sign to denote the current setting for the media type 7 Press or to display Print Pattern A then press The Paper Adjust pattern prints z If you perform Print Pattern B after performing Print Pattern A select Print Pattern B here Set Media Reset Enter Power Online Message Ink Replace Online Setup Cancel Job Utility S e t u p M e n u A d j u s t P r i n t e r A d j u s t P r i n t e r P a p e ...

Page 140: ...rom Step 3 to Step 9 to perform Print Pattern B In that case select Print Pattern in Step 7 After selecting Print Pattern B perform Adj Setting again 10 After adjustment of the LF setting is finished press the Online button to switch the Online lamp on When Ready is displayed on the operation panel the printer is ready to print z If you mistakenly alter the settings on the operation panel the prin...

Page 141: ...8 Other Important Information This chapter describes options specifications and provides other information ...

Page 142: ...rinter The printer can switch automatically between the paper cassettes as alternate paper sources Paper Feed Unit PFW 22 The paper feed unit for Cassette 2 Universal Cassettes These paper cassettes can be used interchangeably in the main body of the printer or with optional paper feed units Two universal paper cassettes can be used as Cassette 1 one as Cassette 2 and one as 13x22 in Cassette Univ...

Page 143: ...Options 8 3 Universal Cassette UCW 22 For Cassette 2 13x22 inch Cassette UCW 20 Exclusive for Proof Paper ...

Page 144: ...w the procedure below when you need to remove an old version of a USB or IEEE 1394 printer driver All of the printers presented in the list at Step 3 will be deleted z Before you uninstall an old version of a USB or IEEE 1394 driver be sure to disconnect the USB or IEEE 1394 cable 1 Mount the provided User Software CD ROM in the computer CD ROM drive z If the CD ROM auto start feature is switched ...

Page 145: ...he uninstallation is finished the printer names deleted from this list are displayed Confirm the printer names then click the OK button Follow the instructions on the screen to restart the computer z If a message warns you that the uninstallation failed restart the computer then repeat this procedure from Step 1 This completes the deletion of the old USB or IEEE 1394 drivers ...

Page 146: ...the printer in the list you wish to delete then click the Delete button Confirmation message appears 3 Click the Yes button 4 Make sure that the printer is deleted from the list then click the Exit button in the Delete Printer Window TMacintosh 1 Mount the User Software CD ROM in the CD ROM drive Open the OS folder on the User Software CD ROM 2 On the User Software CD ROM open the appropriate OS f...

Page 147: ...stalling the LPR Port Follow the procedure below to uninstall Canon LPR Port installed with Windows 1 Follow the messages indicated on the screen to uninstall the GARO Status Monitor On the Advanced sheet of the Printer Properties dialog box for Print to the following port select any setting other than the Canon LPR Port setting For the CANON LPR Port XXX XXX XXX XXX LP Canon LPR Port is displayed...

Page 148: ...tup Utility from the list of software applications then click the Change Remove button 4 Follow the messages indicated on the screen to uninstall the GARO Device Setup Utility Uninstalling NetBIOS NetBEUI Port Monitor 1 On the desktop click the Start button point to Settings then click Control Panel 2 Double click the Add Remove Programs icon 3 Select the software to be uninstalled from the list o...

Page 149: ... AWG28ormore Type Shieldedtwisted pair Length Max 2 0 m 6 6 ft Connector Amphenol 57 30360 USB Interface USBStandardSeries BReceptacle Recommendedcable Composition AWG28ormore Type Shieldedtwistedpair full speedcompatible Length Max 5 0 m 16 4ft Connector USBStandardSeries BPlug IEEE1394Interface IEEE 1394 6 pin without power supply Recommendedcable Composition AWG28 signals AWG powersupply ormore...

Page 150: ...H with no condensation Dimensions Standard Standard 587x 626 x 209 mm wx d xh 23 1x 24 6 x 8 2 in wx d xh Cassette2 587x 626 x 312 mm wx d xh 23 1x 24 6 x 12 3 in wx dx h Weight including paper cassettes printhead ink tanks Standard Approx 17 kg 37 5lb Cassette2 Approx 22 kg 48 6lb 1 Use an interface cable up to 2 m 6 6 ft long 2 The power consumption becomes maximum when using the bottom cassette...

Page 151: ...b 3 3 canceling printing Macintosh 4 7 Windows 3 3 carriage 1 4 Cassette 1 1 3 8 2 Cassette 2 1 6 8 2 cassette cover 1 3 1 6 2 9 Chooser 4 2 coated paper 2 2 connector cover 1 3 D display 5 2 E error messages 7 16 F foreground printing 4 12 front upper cover 1 2 2 18 7 20 function menu flow 5 8 summary 5 12 types 5 7 using 5 10 G GARO Device Setup Utility 8 8 GARO Printer Driver 4 3 GARO Status Mo...

Page 152: ... to replace 6 4 when to replace 6 2 J jams 7 20 L lamps 5 6 length guide 2 9 lift handles 1 3 1 6 load limit mark 2 10 LPR Port 8 7 M Mac OS 8 6 9 x 4 2 4 7 Mac OS X 4 4 4 9 Macintosh 4 2 manual feed 2 17 manual feed lever 1 2 2 18 7 20 Matte Photo Paper 2 3 media see print media media set menu 5 7 5 9 5 15 Message lamp 5 6 messages 7 16 N NetBIOS NetBEUI Port Monitor 8 8 network interface board 8...

Page 153: ...ff 1 8 power on 1 7 Print Center 4 4 print media 2 2 load capacity 2 6 loading 2 8 printing area 2 7 selecting size 2 13 selecting type 2 13 Print Queue Restarting 4 8 print side 2 10 2 19 printer cleaning 6 9 name 1 2 specifications 8 9 troubleshooting 7 3 printer driver 4 2 printer selection 4 2 printhead 1 4 6 16 aligning position 7 31 handling precautions 6 11 lock cover 1 4 lock lever 1 4 rep...

Page 154: ... Setup button 5 4 7 32 7 35 7 38 7 41 setup menu 5 7 5 8 5 12 slide lever 1 2 2 19 T transparencies 2 3 transparencies quick dry 2 4 tray 1 3 2 17 troubleshooting 7 2 U universal paper cassettes 8 2 USB port 1 3 utility menu 5 7 5 8 5 14 W width guide 2 9 Windows print procedure 3 2 ...

Reviews: