CHAPTER 2 STANDARDS AND ADJUSTMENTS
2-9
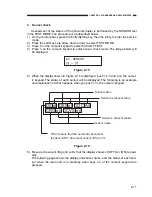
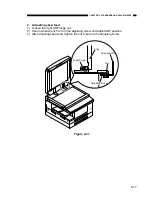
2) Select 9.BOOK from service mode #6 SCANNER. Set 1 in 018.
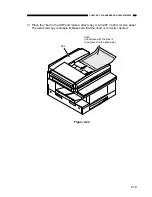
3) Set the test chart you made on the copyboard glass with the image facing down.
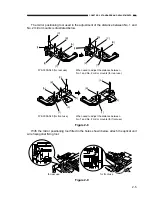
Figure 2-13
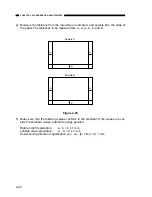
4) Copy the image enlarged to 400%.
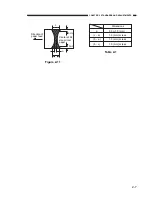
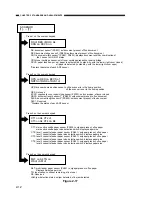
5) Measure the length of the leading and left edges of the copied image (see the figure
below).
Figure 2-14
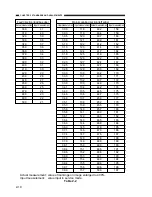
6) Refer to Table 2-2. Work out the input value that corresponds to the measurement
taken in step 5.
7) Select 8. CCD from service mode #6 SCANNER. Enter the value worked out from
the leading edge data, 007, and the left edge data, 010 in step 6).
8) Select 9.BOOK from service mode #6 SCANNER. Set 0 in 018.
9) Exit service mode. Copy the image at 100%. Check that the copied image and the
original document positioning matches.
CARD
A3
B4
A4
B5
A5
A3
B5
A5
CARD
A4
A4
B4
B5
A4
B5
A5
A5
Document
(Image facing down)
10mm
10mm
Left edge
Leading edge
Left edge
Leading edge
Output image (400% enlarged copy)
Summary of Contents for GP160DF
Page 6: ...COPYRIGHT 1999 CANON INC CANON GP160 REV 0 FEB 1999 PRINTED IN JAPAN IMPRIME AU JAPON iv...
Page 12: ......
Page 52: ......
Page 64: ......
Page 74: ......
Page 86: ......
Page 88: ......
Page 98: ......
Page 108: ......
Page 110: ......
Page 146: ......
Page 148: ......
Page 158: ......
Page 186: ......
Page 188: ......
Page 204: ......
Page 206: ......
Page 224: ......
Page 232: ......
Page 234: ......
Page 430: ......
Page 432: ......
Page 434: ...A 2 COPYRIGHT 1999 CANON INC CANON GP160 REV 0 FEB 1999 PRINTED IN JAPAN IMPRIME AU JAPON...
Page 436: ......
Page 482: ......
Page 622: ......
Page 623: ......
Page 625: ......
Page 627: ......
Page 635: ......


