Chapter 8
Maintenance
8-7
Maintenance
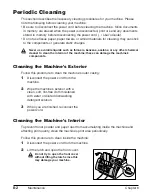
Replacing the FX-3 Cartridge
The only component of your machine you will need to replace is the FX-3 cartridge.
The FX-3 S Cartridge is a starter cartridge that comes with your machine, and yields
approximately 1,500 pages based on 5% coverage of an A4 size page. The
replacement FX-3 cartridge yields approximately 2,700 pages based on 5% coverage
of an A4 size page. To purchase this cartridge, contact the Canon Customer Care
Center, or your business machine retailer/dealer.
When
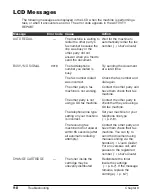
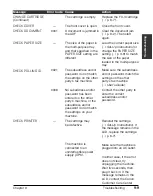
CHANGE CARTRIDGE
appears in the LCD, you may need to replace the
cartridge. However, it may also indicate that the toner inside the cartridge is simply
unevenly distributed. Before replacing the cartridge, follow this procedure to distribute
the toner evenly:
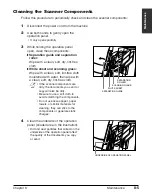
1
Remove the cartridge from the
machine (
1
steps 1 to 4, below).
2
Gently rock the cartridge from
side to side a few times to distribute
the toner evenly inside it.
• Poor print quality may result if the toner
is unequally distributed.
3
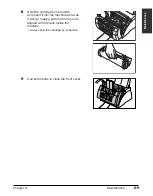
Reinsert the cartridge into the
machine (
1
steps 8 and 9, p. 8-9).
If after following the procedure above,
CHANGE CARTRIDGE
remains in the LCD or
print quality does not improve, follow this procedure to replace the cartridge:
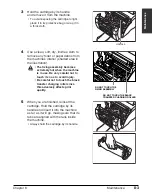
1
Remove any documents and printouts from the machine.
2
Make sure the machine is plugged in.
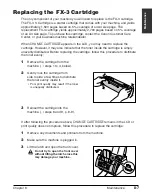
3
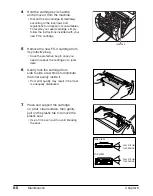
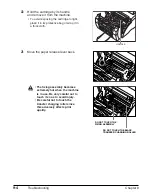
Lift the latch and open the front cover.
c
Do not try to open the front cover
without lifting the latch since this
may damage your machine.
Summary of Contents for FAXPHONE L80
Page 18: ...xviii Preface...
Page 19: ...Chapter 1 Introduction 1 1 Introduction Chapter 1 Introduction...
Page 41: ...Chapter 4 Sending Faxes 4 1 Sending Faxes Chapter 4 Sending Faxes...
Page 55: ...Chapter 5 Receiving Faxes 5 1 Receiving Faxes Chapter 5 Receiving Faxes...
Page 59: ...Chapter 6 Copying 6 1 Copying Chapter 6 Copying...
Page 62: ...6 4 Copying Chapter 6...
Page 69: ...Chapter 8 Maintenance 8 1 Maintenance Chapter 8 Maintenance...
Page 72: ...8 4 Maintenance Chapter 8 6 Use both hands to close the front cover 7 Reconnect the power cord...
Page 78: ...8 10 Maintenance Chapter 8...
Page 79: ...Chapter 9 Troubleshooting 9 1 Troubleshooting Chapter 9 Troubleshooting...
Page 104: ...9 26 Troubleshooting Chapter 9...
Page 105: ...Chapter 10 Summary of Settings 10 1 Summary of Settings Chapter 10 Summary of Settings...
Page 115: ...Appendix Specifications A 1 Specifications Appendix Specifications...

