


Scanning Film
13
10
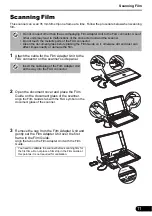
Place the film in the Film Guide.
Place the film face up in the Film Guide (images and
words should read correctly from above) with the
spaces between frames aligned with the guidelines on
the guide.
11
Remove the cap from the Film Adapter Unit
and gently set the unit over the frame you
wish to scan.
Align the tab on the Film Adapter Unit with the Film
Guide.
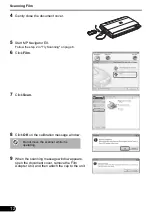
12
Gently close the document cover.
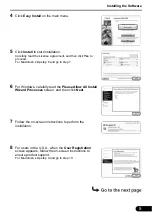
13
Click
OK
on the scanning message window.
The scanned image is displayed in the preview area.
14
Confirm the scanning image, and then click
Scan
to start scanning.
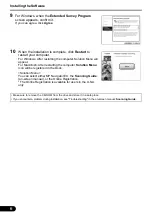
15
When prompted that the scanning completed,
click
Exit
.
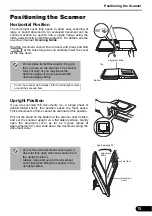
Do not move the Film Adapter Unit once it
has been placed on the Film Guide. Sliding it
may scratch the film.
The document cover does not touch the document glass. Be careful not to force the
document cover down.
Do not move the scanner while it is
operating.
Do not move the scanner while it is
operating.
Guidelines


