background image

EPSON SCANNING TIPS AND TROUBLESHOOTING GUIDE 

Epson Perfection 3170 Scanner 


SELECT A SUITABLE RESOLUTION  


The best scanning resolution depends on the purpose of the scan.  


When you specify a high resolution, the number of pixels increases and the scanned image 
becomes finer in texture. However, increasing the resolution causes the file size to increase. For 
example, an 8.5 x 11-inch original scanned at 300 dpi can produce a 24MB file. The same original 
scanned at 72 dpi creates only a 1.3MB file. Large files take longer to process and print, so select 
the lowest possible resolution that produces acceptable quality. 
 
Specify a suitable resolution according to your scanning purpose. Recommended resolutions for 
scanning print material:  
 

PURPOSE


RESOLUTION


Web pages 

96 dpi 

Sending E-mail  

96 to 150 dpi  

Printing  

300 dpi  

Saving as a PDF file  

300 dpi  

Sending Fax  

200 dpi  

OCR (Optical Character Recognition)  

300 dpi  

 
Use Target Size to specify the output size of the scanned image.  
 
If you are enlarging your image, you must increase the resolution (dpi) proportionally to maintain 
the resolution of your original.  Try scanning slides at 1200 dpi or higher.  
 
If you reduce the size of the image on a page, it does not decrease its file size.  
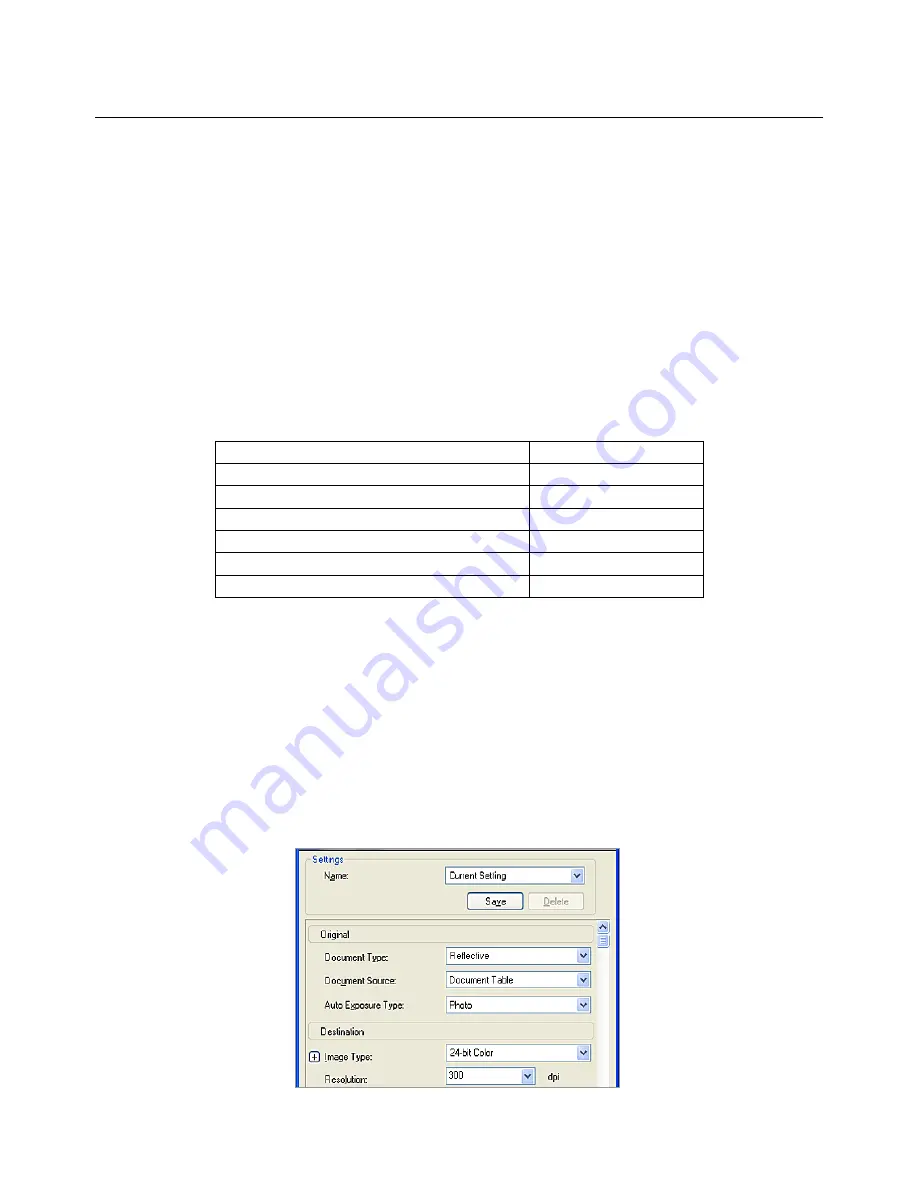


SCAN SETTINGS  


For photos: 


Summary of Contents for 3170 - Perfection Photo

Page 1: ...process and print so select the lowest possible resolution that produces acceptable quality Specify a suitable resolution according to your scanning purpose Recommended resolutions for scanning print material PURPOSE RESOLUTION Web pages 96 dpi Sending E mail 96 to 150 dpi Printing 300 dpi Saving as a PDF file 300 dpi Sending Fax 200 dpi OCR Optical Character Recognition 300 dpi Use Target Size to...

Page 2: ...For film For slides Specify Adjustment settings if necessary such as dust removal for slides and film ...

Page 3: ... to the section listed below that matches the type of transparency you want to scan SCAN 35 MM SLIDES 1 Place the film holder on the document table so that the triangle mark on its tab is aligned with the triangle on the document table The projection on the tab then goes into the hole on the document table 1 The first step is always to open the document cover and slide up the reflective document m...

Page 4: ... stripe pattern may appear in the scanned image To remove the newton ring place the film with the base side facing up and preview using the Thumbnail Preview then reverse the previewed image by using the Mirroring button SCAN 35 MM NEGATIVES AND FILM STRIPS 1 Slide the edge of the strip into the 35 mm film holder base side facing down Then place it so that the entire frame is positioned inside the...

Page 5: ...film holder opening 2 Set the cover on the film and press until you hear a click Press around the entire perimeter of the cover to make sure it is secured 3 Place the film holder on the document table so that the triangle mark on its tab is aligned with the triangle on the document table The projection on the tab then goes into the hole on the document table ...

Page 6: ... document cover 1 Open the document cover and remove the reflective document mat 2 Slide the film holder into the document cover 3 Insert the reflective document mat in the top and bottom fittings of the document cover See http files support epson com htmldocs per418 per418rf index htm for more information ...

Page 7: ...ssing from the scanned image If a line is missing on both your screen image and printout this indicates the scanner sensor is malfunctioning Contact your dealer A line of dots always appears in the scanned image If this happens on both your screen image and printout the document table may be dusty or scratched Clean the document table If you still have the problem contact your dealer Straight line...

Page 8: ...f the document with paper to block external light Make sure the document is flat against the document table Adjust your software s Gamma setting using the Histogram Adjustment dialog box in Professional Mode in EPSON Scan The image is dark Try one or more of the following solutions Check your software s Brightness setting using the Image Adjustment dialog box in Home Mode or the Histogram Adjustme...

Page 9: ...y smaller The image is larger or smaller than the original Try one or more of the following solutions The image size and resolution settings of your software determine the size of the printed image Do not use the size of the monitor image to judge the printed size Change the Target Size in the Home Mode or Professional Mode main window Scanned images cannot be printed or come out garbled when prin...

Page 10: ...ters typically use CMYK cyan magenta yellow and black Images cannot be located properly in the Thumbnail preview Try one or more of the following solutions In the Preview window create marquees on the area you want to scan and then scan In the Configuration dialog box adjust the thumbnail cropping area using the Thumbnail Cropping Area slider Poor character recognition during OCR scanning Try one ...

Page 11: ...iew In the Preview window create marquees on the area you want to scan and then scan The colors of negative film preview images look strange Try one or more of these solutions in the EPSON Scan Settings Make sure Document Type is set to the appropriate setting for your film type When previewing images with the Normal Preview the dark area around the film such as the frame of the film holder is per...

Reviews: