Setting Page
5
127
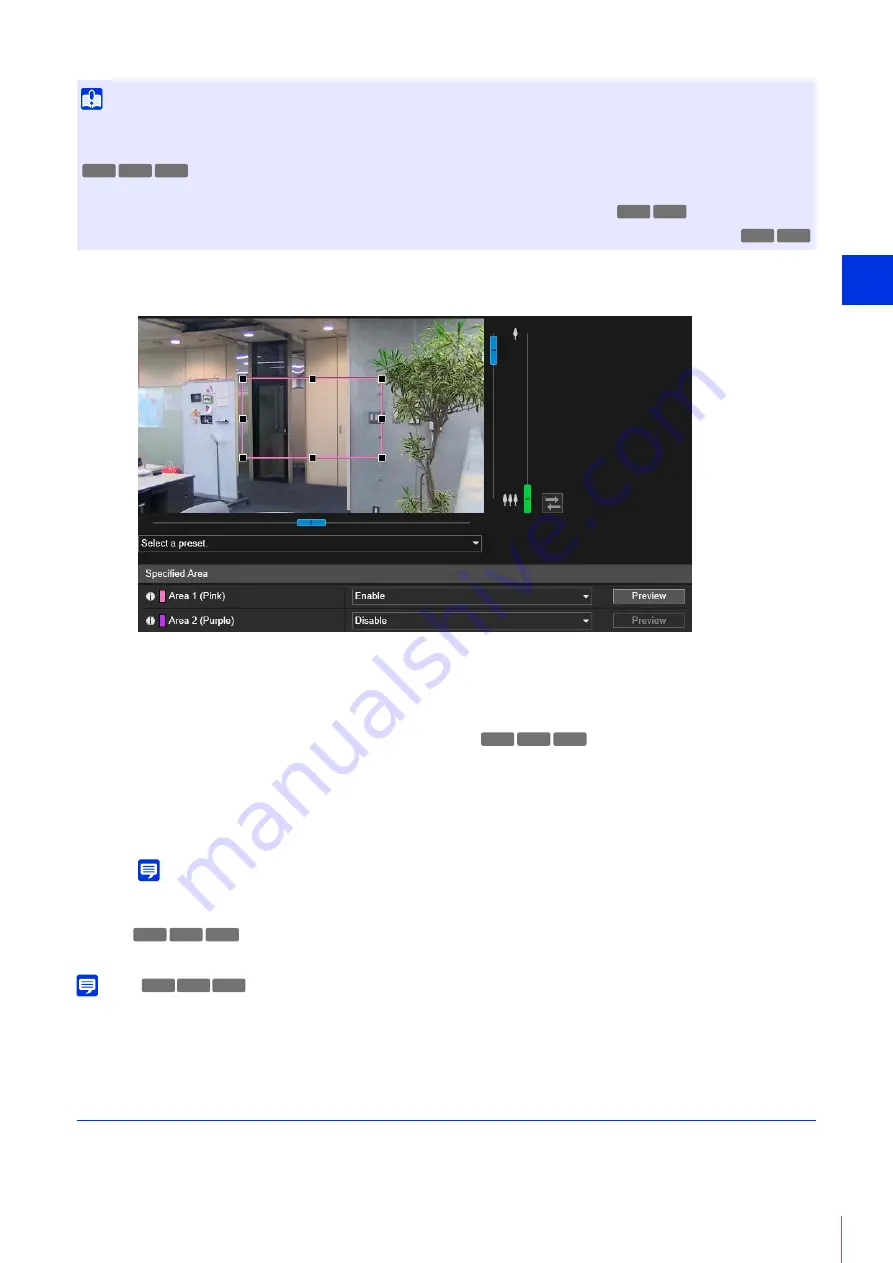
The frame for the specified area is displayed on the video display area.
Set the specified area as follows within the display area.
• Drag out a frame and move it to the area you want to specify.
• Change the size of the frame by dragging any of the eight handles (
■
).
• To change the camera angle, perform either of below
Control using the pan/tilt/zoom sliders
Select a preset in the preset selection box
The settings are saved to the camera.
Note
You can use the Camera Viewer to check video with ADSR settings applied. Video outside the specified area will deteriorate
according to the amount of applied data reduction.
[Preview]
The camera will move to a specified area if you click [Preview] for that area.
Note
If you change the camera angle before operating the area frame, the area frame may become hidden. To display the area frame again,
either click the [Preview] for the target specified area, or use the slider to move the camera angle to a position in which the entire area
frame is displayed.
ADSR
Set the data size reduction of outside areas set with [Specified Area].
Important
• If you change the [Video Flip] setting in [Camera] > [Installation Conditions], review the specified area settings.
• Reconfigure the specified area if you change the [Video] > [All Videos] > [Video Size Set] settings.
• Configure the specified area to a slightly larger size.
• Specified areas may deviate slightly from the specified position depending on the zoom position.
• The selected area can only be set within the optical zoom range, and cannot be set using the digital zoom range (P. 57).
HM4x S30 S31
HM4x S30
HM4x S30
1
Select [Enable] for the area with the frame color to use for the specified area.
2
Set the specified area.
3
Click [Apply].
HM4x S30 S31
HM4x S30 S31
HM4x S30 S31
Summary of Contents for 2541C001
Page 27: ...26 ...
Page 37: ...36 ...
Page 75: ...74 ...
Page 227: ...226 Reset Switch LED LED Reset Switch H730 S30 S31 S80x S90x Reset Switch LED ...
Page 243: ...BIE 7197 000 CANON INC 2017 ...


