Setting a Proxy
2357-037
A proxy (or HTTP proxy server) refers to a computer or software that carries out HTTP communication for other
devices, especially when communicating with resources outside the network, such as when browsing Web sites. The
client devices connect to the outside network through the proxy server, and do not communicate directly to the
resources outside. Setting a proxy not only facilitates management of traffic between in-house and outside networks
but also blocks unauthorized access and consolidates anti-virus protection for enhanced security. When you use
Google Cloud Print to print over the Internet, you can enhance security by setting a proxy. When setting a proxy, make
sure that you have the necessary proxy information, including the IP address, port number, and a user name and
password for authentication.
●
For more information about the basic operations to be performed when setting the machine from the
Remote UI, see Setting Up Menu Options from Remote UI(P. 166) .
1
Start the Remote UI and log in to System Manager Mode. Starting Remote
UI(P. 159)
2
Click [Settings/Registration] on the Portal page. Remote UI Screen(P. 160)
3
Select [Network Settings] [TCP/IP Settings].
4
Click [Edit] in [Proxy Settings].
5
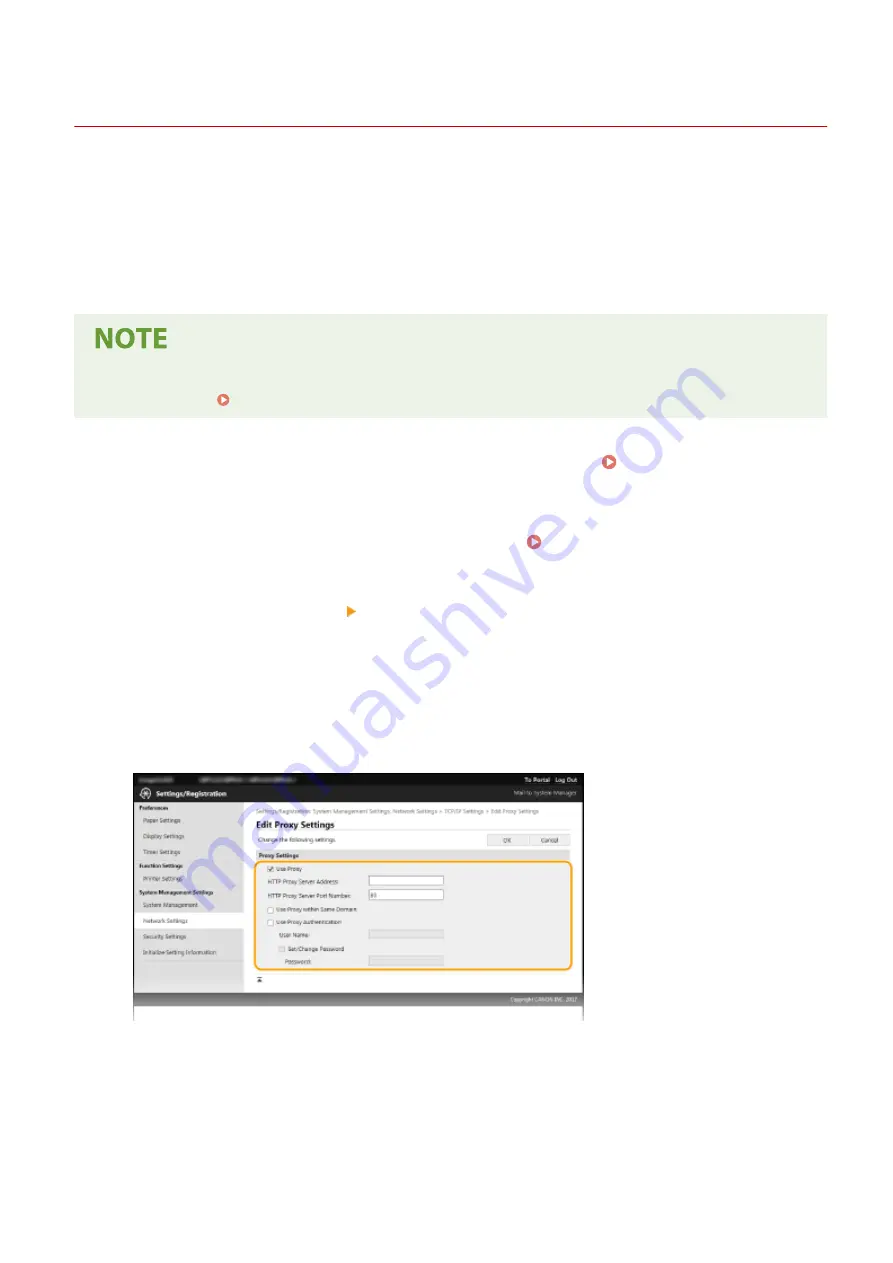
Select the [Use Proxy] check box and specify the required settings.
[Use Proxy]
Select the check box to use the specified proxy server when communicating with an HTTP server.
[HTTP Proxy Server Address]
Enter the address of the proxy server. Specify the IP address or host name depending on the environment.
[HTTP Proxy Server Port Number]
Change the port number as necessary.
[Use Proxy within Same Domain]
Managing the Machine
142
Summary of Contents for 2207C025
Page 1: ...LBP113w User s Guide USRMA 2446 00 2018 08 en Copyright CANON INC 2018 ...
Page 44: ...LINKS Setting IPv6 Addresses P 40 Viewing Network Settings P 43 Setting Up 39 ...
Page 59: ...Printing from a Computer P 102 Setting Up 54 ...
Page 87: ...Basic Operations 82 ...
Page 141: ...Managing the Machine 136 ...
Page 217: ...7 Close the toner cover 8 Replace the output cover LINKS Consumables P 223 Maintenance 212 ...
Page 221: ...8 Close the toner cover 9 Replace the output cover LINKS Consumables P 223 Maintenance 216 ...
Page 230: ... When replacing drum cartridges see Replacing the Drum Cartridge P 213 Maintenance 225 ...
Page 233: ...Troubleshooting 228 ...
Page 320: ... 12 JPEG this software is based in part on the work of the Independent JPEG Group ...


